Find the Beauty and Privacy of Cedar Fences
If you’re considering building a cedar fence, you’re already on the path to enhancing your property’s privacy and aesthetic appeal. Cedar is celebrated for its durability, natural beauty, and ability to withstand the elements. Whether you’re a DIY enthusiast or contemplating hiring a professional, constructing a cedar fence can be a rewarding project. Here’s what you need to know:
- Privacy: Cedar fences provide excellent privacy, shielding your yard from prying eyes while adding a touch of elegance.
- Natural Durability: Cedar is naturally resistant to rot and decay, making it a superb choice for outdoor structures.
- DIY Potential: With the right guide and tools, building a cedar fence on your own is achievable and cost-effective.
Before diving into your project, ensure that you check local building codes and discuss your plans with neighbors if your fence will run along property lines. Proper planning and preparation are key to a successful fence.
For those interested in long-term maintenance, sealing and staining your cedar fence can improve its longevity and keep it looking like new.
Quick building a cedar fence terms:
– pet fence installation
– reliable fence company
– pool safety fence installation
Planning Your Cedar Fence
Before you start building a cedar fence, it’s crucial to do some groundwork—literally and figuratively. Let’s break down the essentials:
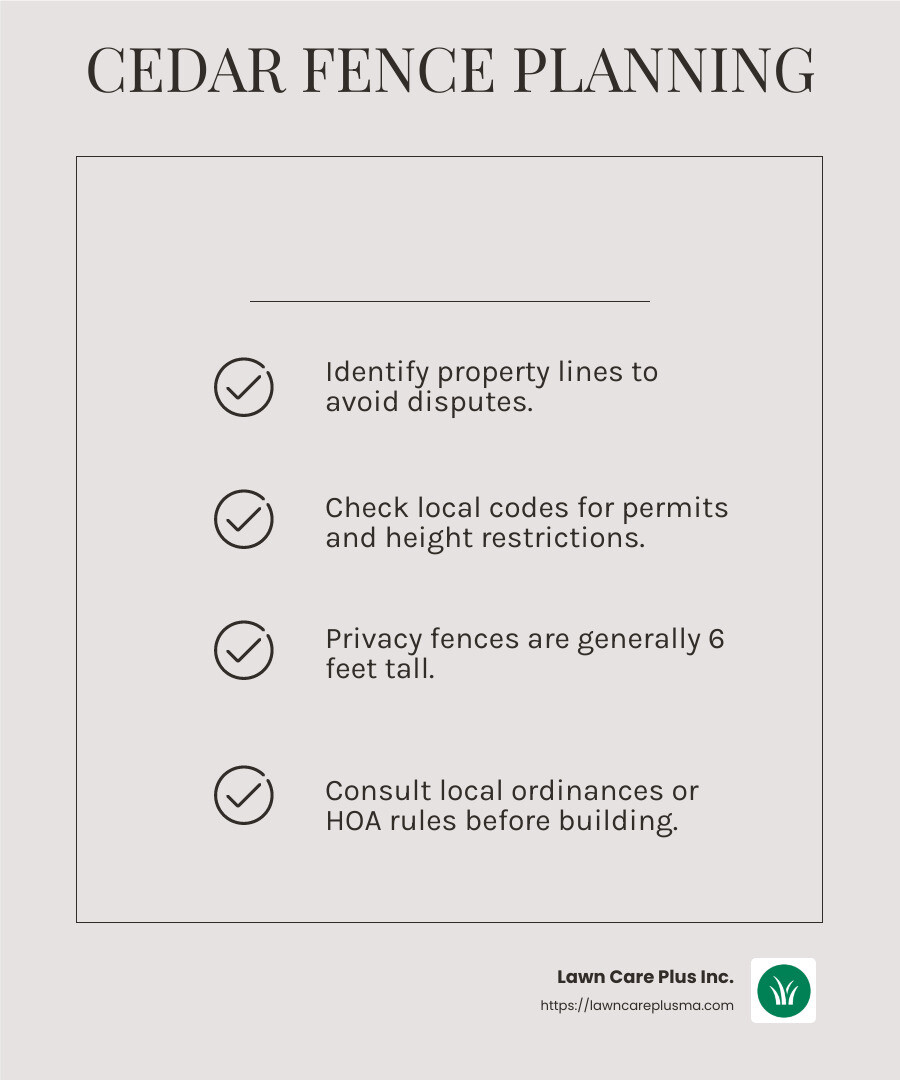
Property Lines
First things first, identify your property lines. This is vital to avoid any disputes with neighbors. If you’re unsure where your property ends, it’s wise to call in a surveyor. Building a fence over the line, even by a small margin, can lead to fines or the hassle of taking it down.
“Building your fence in the wrong place can have consequences—if you’re even slightly over your property line, you could be subjected to a fine, or even asked to take it down.”
Local Codes
Next, check with local authorities for any building codes or permits required for your fence. Each city or town might have different regulations. Some places have restrictions on fence height, materials, or even colors. Understanding these rules will save you from potential headaches later on.
Height Restrictions
Consider how tall your fence needs to be for privacy or aesthetic reasons. Generally, a privacy fence should be at least 6 feet tall to block the view from outside. However, always double-check local ordinances or homeowner’s association rules, as they might limit how tall your fence can legally be.
Final Thoughts Before Building
Proper planning ensures that your cedar fence will be both functional and compliant with local laws. By taking the time to understand property lines, local codes, and height restrictions, you set yourself up for a smooth building process.
Up next, we’ll dive into the step-by-step guide for building your cedar fence, covering everything from post spacing to attaching pickets.
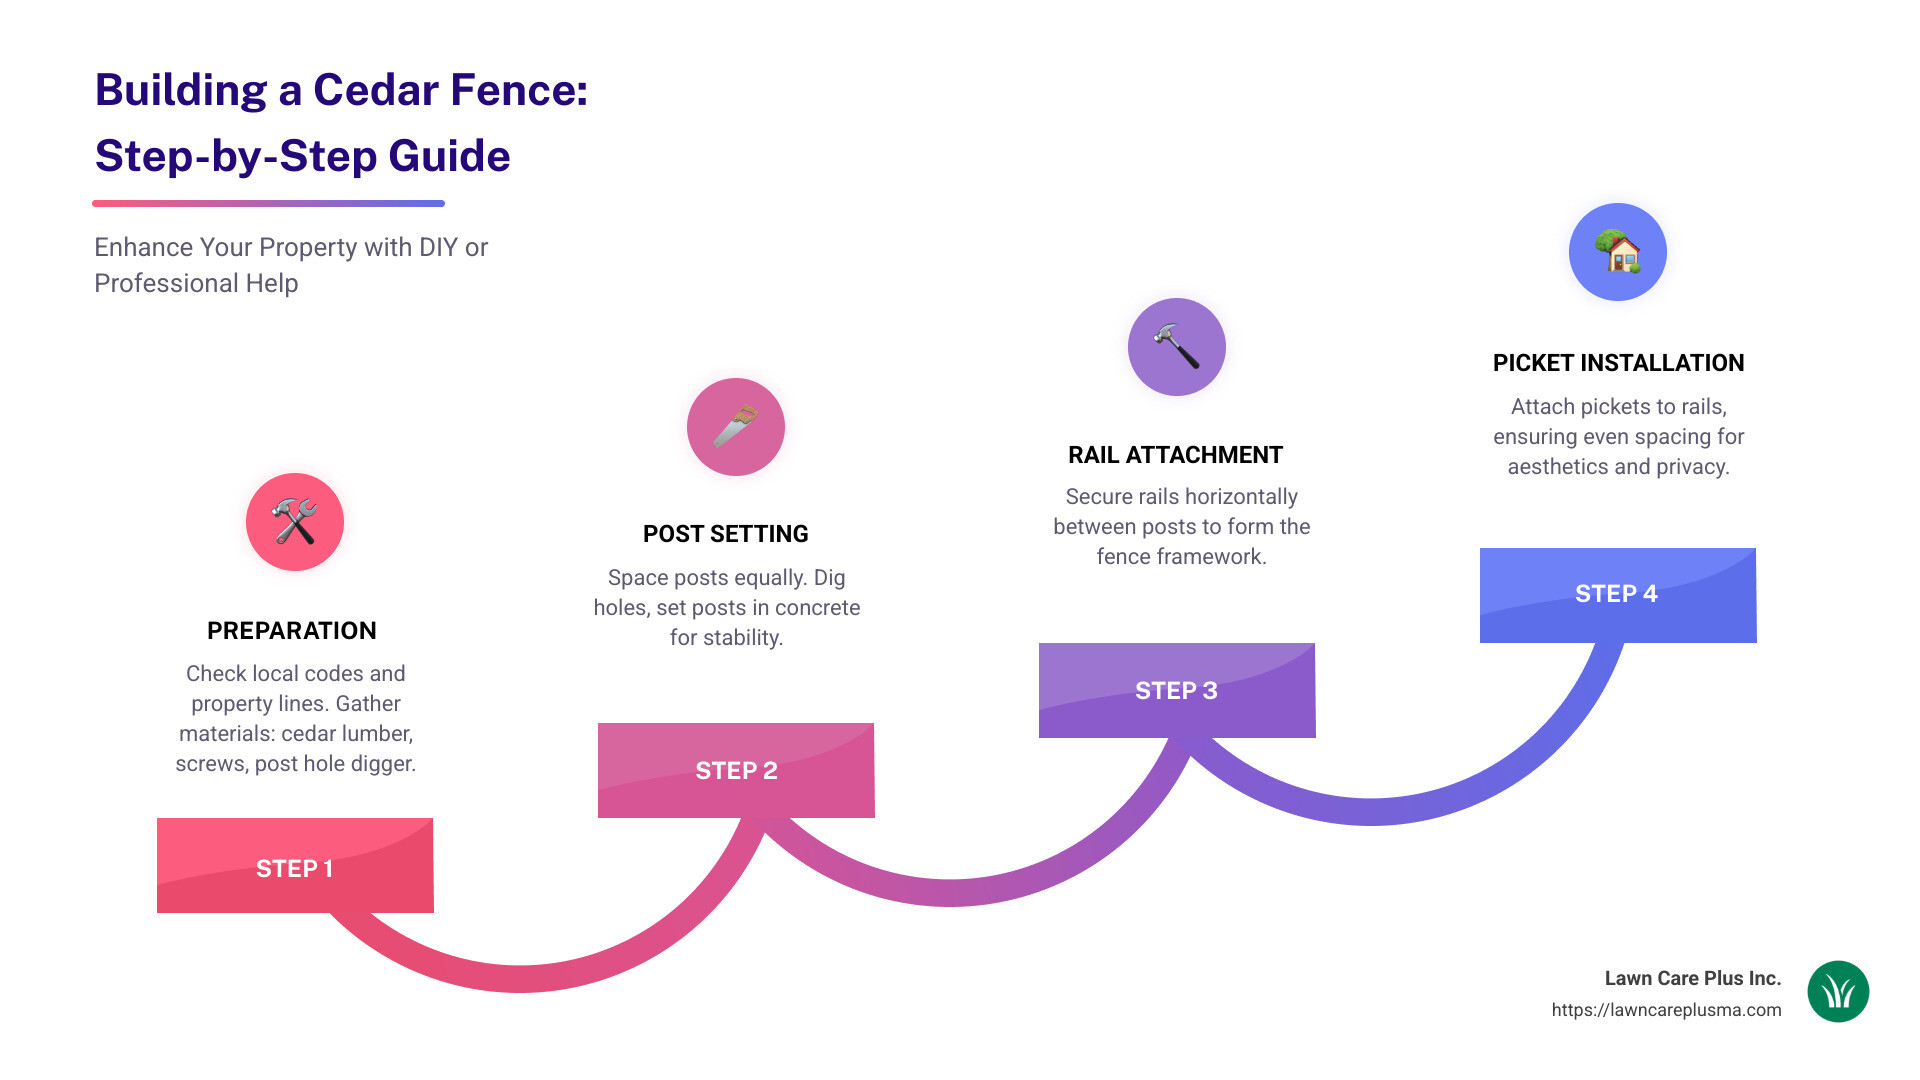
Building a Cedar Fence: Step-by-Step Guide
Now that you’ve planned your cedar fence, it’s time to get down to the nuts and bolts—or in this case, the posts and pickets. Follow this step-by-step guide to ensure a sturdy and beautiful cedar fence.
Post Spacing
Proper post spacing is crucial for the stability of your fence. Generally, fence posts should be spaced 6 to 8 feet apart. This distance provides optimal support for the fence panels and ensures durability against wind and other elements.
- Tip: Use a measuring wheel to accurately mark where each post will go. This tool is especially helpful for longer fence lines.
Setting Posts
Setting posts is the backbone of your fence construction. Here’s a quick rundown:
- Digging Holes: Use a post hole digger to create holes that are about one-third the height of your posts. For a 6-foot fence, dig at least 2 feet deep.
- Adding Concrete: Place the post in the hole and fill it with concrete mix. Make sure the post is level and straight. Let the concrete set for at least 24 hours.
- Bracing Posts: While the concrete sets, brace the posts with 2×4-inch lumber to keep them upright.
“It’s crucial to have a helper hold the posts upright as you fill the holes with concrete. This ensures they stay straight while the concrete cures.”
Attaching Rails
Once your posts are set, it’s time to attach the rails. Rails provide support for the pickets and add stability to the structure.
- Positioning Rails: Attach the top and bottom rails first. The top rail should be about 6 inches from the top of the posts, and the bottom rail about 6 inches from the ground.
- Securing Rails: Use nails or screws to secure the rails to the posts. Pre-drill holes to prevent the wood from splitting.
- Pro Tip: Use a level to ensure each rail is straight. This will help maintain an even look across the fence.
Attaching Pickets
Finally, it’s time to attach the pickets, which provide the visual appeal and privacy of your fence.
- Aligning Pickets: Start by attaching pickets on either end of a section. Run a string between them to ensure the rest are aligned perfectly.
- Spacing Pickets: Use a 1/4-inch piece of scrap plywood as a spacer to keep the pickets evenly spaced. This small gap allows for wood expansion.
- Securing Pickets: Fasten each picket with two nails or screws at each rail. This reinforces the attachment and ensures longevity.
- Reminder: Regularly check that each picket is plumb using a level. This will prevent a crooked appearance.
With these steps, your cedar fence will not only look great but also stand strong. Next, we’ll cover the materials and tools you’ll need to make this project a success.
Materials and Tools Needed
To successfully build a cedar fence, you’ll need the right materials and tools. Here’s a quick rundown of what you’ll need to get started:
Cedar Lumber
Cedar is a popular choice for fencing due to its natural beauty and durability. It’s not only visually appealing but also resistant to rot and insects. When selecting cedar lumber, consider the grade and quality, as these factors can affect both the appearance and longevity of your fence.
- Tip: Use high-quality cedar boards for the best results. They may cost more upfront, but they pay off in durability and reduced maintenance.
Screws
Screws are essential for securing the rails and pickets to the posts. Choose weather-resistant screws made from stainless steel or coated materials to prevent rusting and ensure the longevity of your fence.
- Pro Tip: Opt for screws over nails for a stronger hold, especially in areas prone to high winds or heavy use.
Post Hole Digger
A post hole digger is crucial for creating the holes needed to set your fence posts. This tool allows you to dig deep, narrow holes that provide the necessary support for your fence.
- Recommendation: A manual post hole digger works well for smaller projects, but consider renting a power auger for larger fences to save time and effort.
Concrete Mix
Concrete is used to anchor the fence posts securely in the ground. It provides stability and helps your fence withstand various weather conditions. When mixing concrete, follow the manufacturer’s instructions for the best results.
- Note: Allow the concrete to cure for at least 24 hours before attaching rails and pickets to ensure the posts are stable.
Additional Tools
While the materials listed above are essential, you’ll also need a few additional tools to complete your fence project:
- Tape Measure: For accurate measurements and post spacing.
- Level: To ensure your posts and rails are straight.
- Power Drill: For driving screws efficiently.
- Hammer: Useful for any necessary adjustments.
By preparing these materials and tools in advance, you’ll set yourself up for a smooth and successful building a cedar fence project. Next, we’ll explore how to maintain your cedar fence to keep it looking great for years to come.
Maintaining Your Cedar Fence
Once you’ve completed building a cedar fence, maintaining it is key to ensuring it lasts and looks great over time. Let’s break down the essential steps: sealing, staining, regular cleaning, and inspection.
Sealing
Sealing your cedar fence is an optional but highly recommended step. While cedar is naturally resistant to rot and insects, a sealant can offer an additional layer of protection against moisture and UV rays. This helps prevent warping and cracking.
- Tip: Apply a clear sealant every 3-5 years to maintain the wood’s natural beauty and durability.
Staining
Staining not only improves the color of your cedar fence but also adds another protective layer. Unlike paint, stains penetrate the wood, offering longer-lasting protection without peeling.
- Pro Tip: Choose a stain that offers UV protection to keep your fence looking vibrant. Reapply every few years as needed.
Regular Cleaning
Regular cleaning is crucial to prevent mold, mildew, and dirt buildup. Use a mixture of oxygen bleach and water to scrub your fence. This solution is safe for plants and effective in removing grime.
- Note: Avoid using household bleach, as it can harm vegetation and doesn’t offer the same cleaning benefits as oxygen bleach.
Inspection
Frequent inspections help catch minor issues before they become major problems. Check for loose nails, disconnected boards, or any signs of damage. Address these promptly to maintain the structural integrity of your fence.
- Recommendation: Perform inspections at least twice a year, ideally in spring and fall, to prepare for seasonal changes.
By following these maintenance steps, your cedar fence will stay sturdy and visually appealing for years. Next, let’s dive into some frequently asked questions about cedar fences to clear up any lingering doubts.
Frequently Asked Questions about Cedar Fences
How far apart should posts be for a cedar fence?
When building a cedar fence, post spacing is crucial for stability. Ideally, posts should be spaced about 6 to 8 feet apart. This distance ensures the fence remains sturdy and can withstand various weather conditions. If posts are too far apart, the fence may sag or become unstable over time.
- Quick Tip: Use a tape measure to ensure consistent spacing between posts. Consistent spacing not only improves stability but also improves the overall appearance of your fence.
What are the disadvantages of a cedar fence?
While cedar fences are popular for their natural beauty and resistance to rot, they do have some drawbacks. One significant disadvantage is the cost. Cedar is a premium wood, making it more expensive than other fencing materials. Maintenance is another consideration. Cedar fences require regular sealing and staining to maintain their appearance and durability.
- Weathering: Over time, cedar can weather to a grayish color if not treated, which some homeowners may not prefer. Regular maintenance can help preserve its rich, natural hue.
- Average Cost Insight: According to various sources, the cost of cedar fencing can range widely, with high-end prices being at least three times the average. Keep this in mind when budgeting for your project.
Do you need to seal both sides of a cedar fence?
Sealing both sides of a cedar fence is recommended for maximum protection and longevity. While cedar is naturally resistant to decay and insects, sealing helps protect against moisture and UV damage, which can cause warping and cracking over time.
- Protection Strategy: Applying a sealant to both sides ensures even protection, reducing the risk of uneven weathering and extending the life of your fence.
- Longevity Tip: Reapply sealant every 3-5 years, focusing on both sides to maintain consistent protection and appearance.
By addressing these common questions, you can make informed decisions about your cedar fence project. Whether you’re considering post spacing for stability or the ongoing maintenance required, understanding these aspects will help you enjoy a beautiful and durable fence for years to come.
Conclusion
Building a cedar fence can transform your outdoor space into a private oasis. While the process may seem daunting, the right guidance can make it manageable and rewarding. At Lawn Care Plus Inc., we understand the intricacies of constructing a cedar fence that not only improves privacy but also stands the test of time.
Expert Advice and Professional Installation
Choosing to work with a professional team like ours ensures that your fence is built to last. Our experts have the experience and knowledge to handle every aspect of the project, from planning to execution. We take into account local codes, property lines, and optimal post spacing to ensure your fence meets all requirements and performs well in the Massachusetts climate.
By opting for professional installation, you benefit from:
- Precision and Efficiency: Our team uses precise methods and high-quality materials to build a fence that is both functional and aesthetically pleasing.
- Time Savings: Leave the hard work to us and spend your time enjoying your beautiful new fence.
- Longevity: With expert construction and maintenance advice, your cedar fence will remain sturdy and attractive for years.
Lawn Care Plus Inc. offers a wide range of services beyond fence installation. Whether you need help with lawn maintenance, hardscaping, or seasonal yard cleanups, we’re here to assist. Our comprehensive approach ensures your entire outdoor space is well-maintained and visually appealing.
For more details on our services, visit our services page. If you’re ready to improve your property with a stunning cedar fence, contact us today for expert advice and professional installation. Let us help you create the perfect outdoor sanctuary.
