Pet fence installation is an essential task for homeowners with pets who wish to provide a safe and contained environment for their furry friends. Whether you’re dealing with a curious dog who loves to explore or simply want peace of mind knowing your pet is secure, installing a pet fence is a great solution.
- Pet-Friendly Options: Ensure your solutions are custom to pets, with fences that blend into your environment and don’t compromise your property’s aesthetics.
- Containment: Achieve complete containment, preventing your pet from wandering off while allowing them the freedom to enjoy your outdoor spaces.
- Safety Considerations: Prioritize your pet’s safety by opting for a fur-friendly system like an in-ground electronic fence, designed to keep pets in while being gentle on them.
Pet fence installation doesn’t have to be daunting. With the right tools and a clear plan, you can swiftly and easily create a secure outdoor space for your beloved pets.
Quick pet fence installation terms:
– pool safety fence installation
– reliable fence company
– reliable fence company near me
Understanding Pet Fence Options
When it comes to pet fence installation, the choices can be overwhelming. Let’s break down the most popular options to help you decide which is best for your furry friend.
Electronic Fences
Electronic pet fences, also known as invisible fences, offer a modern solution for pet containment. These systems use a transmitter connected to underground wires to create an invisible boundary. A receiver on your pet’s collar emits a warning tone as they approach the boundary. If they continue, a mild static correction is applied, encouraging them to stay within the safe zone.
Pros:
– Invisible Boundaries: Keeps your yard open and unobstructed.
– Customizable: Easily adjust the boundary size to fit your yard.
– Minimal Maintenance: Once installed, requires little upkeep.
Cons:
– Installation Effort: Requires some groundwork to bury wires.
– Training Required: Pets need time to learn the boundaries.
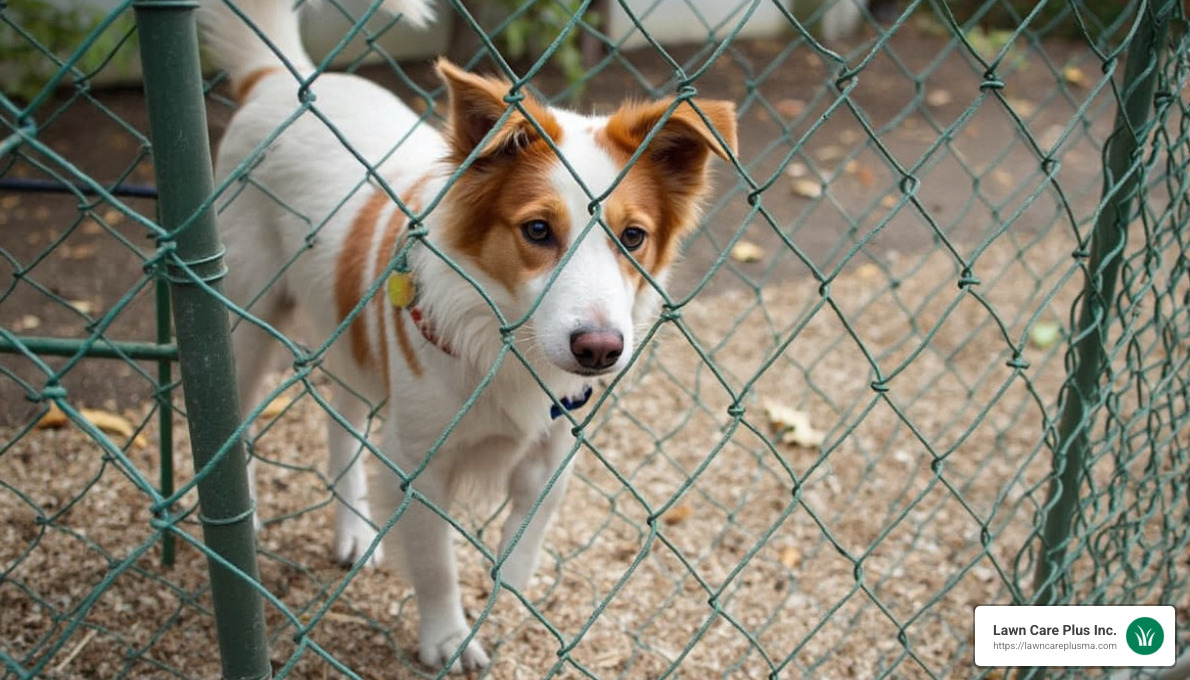
Chain Link Fences
Chain link fences are a classic choice for pet owners. They are durable, cost-effective, and provide a physical barrier that pets can see.
Pros:
– Durability: Withstands weather and wear.
– Affordability: Generally less expensive than other physical fences.
– Visibility: Pets can see the boundary, which may help with training.
Cons:
– Aesthetic Appeal: May not suit all landscape designs.
– Climbing Hazard: Some pets may try to climb over.
Wood Fences
Wood fences offer a traditional and attractive option for pet containment. They can be built to various heights, providing both privacy and security.
Pros:
– Aesthetic Versatility: Complements many home styles.
– Height Options: Can be built tall to prevent jumping.
Cons:
– Maintenance: Requires regular staining or painting to prevent rot.
– Cost: Can be more expensive than chain link.
Vinyl Fences
Vinyl fences are a modern alternative that combines aesthetics with low maintenance. They are available in various styles and colors.
Pros:
– Low Maintenance: No need for painting or staining.
– Durability: Resistant to weather and pests.
– Aesthetic Appeal: Available in many styles to match your home.
Cons:
– Initial Cost: Higher upfront investment compared to chain link.
– Flexibility: Less customizable in terms of design than wood.
Choosing the right pet fence depends on your specific needs, budget, and aesthetic preferences. Whether you opt for an electronic system or a traditional physical barrier, each type of fence has its unique advantages.
Next, we’ll walk you through the Step-by-Step Guide to pet fence installation, ensuring a smooth setup process.
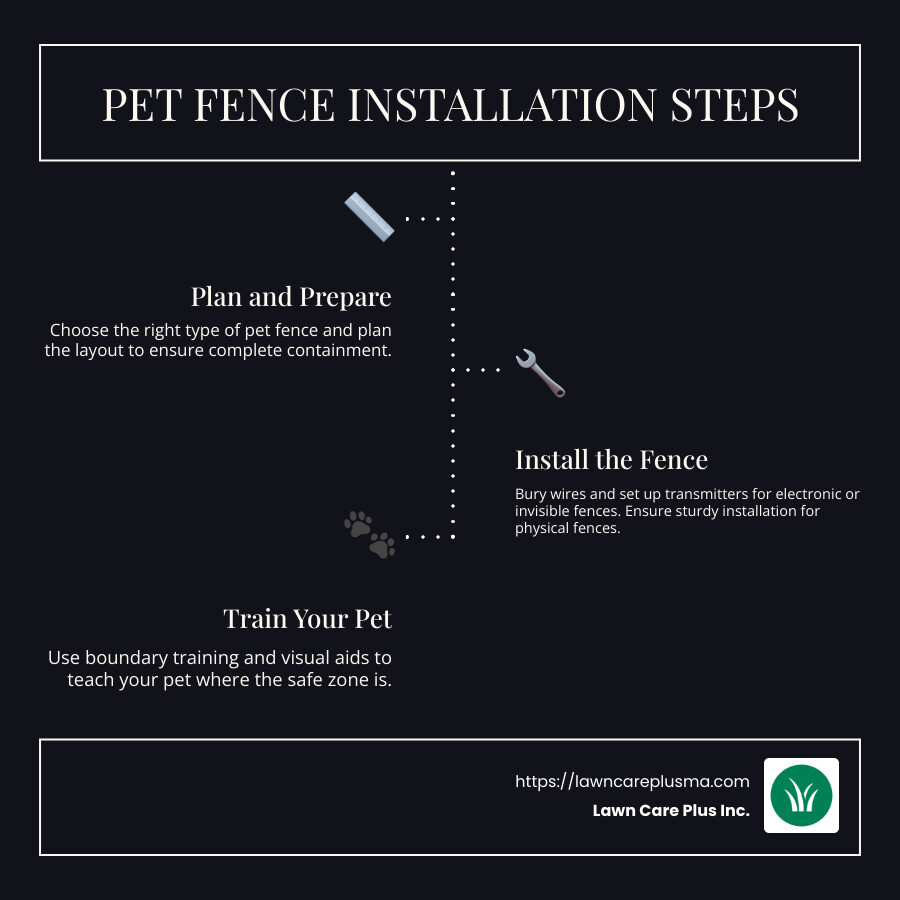
Pet Fence Installation: Step-by-Step Guide
Installing a pet fence might seem daunting, but with a clear plan, you can ensure a smooth process. Let’s break it down step-by-step.
Planning Your Layout
Before you start digging, take some time to plan your fence layout. This is crucial for avoiding obstacles and ensuring efficiency.
Key Points to Consider:
- Complete Loop: The boundary wire must form a complete loop starting and ending at the base unit.
- Rounded Corners: Avoid sharp angles; round off corners with a 3-foot radius to prevent signal interference.
- Proximity to Neighbors: Keep your boundary wire 5-10 feet away from any neighboring systems to avoid interference.
For example, if you’re setting up a single loop layout, it covers your whole property, allowing your pet to roam freely. If you need to restrict access to just a part of your yard, consider a double loop layout, which uses more wire but can be custom for specific areas.
Burying the Wires
Once your layout is planned, it’s time to bury the wires.
Steps to Follow:
- Mark Your Path: Use flags or spray paint to mark where the wire will go. This helps avoid mistakes.
- Dig a Trench: Use a shovel or lawn edger to dig a shallow trench, about 1 to 3 inches deep. This depth protects the wire but keeps it accessible for future adjustments.
- Lay the Wire: Place the boundary wire in the trench, ensuring it’s secure but not stretched tight.
- Test Before Burying: Connect the wire to the transmitter and test the system above ground to ensure it works before covering the wire.
Transmitter Setup
The transmitter is the heart of your pet fence system. It sends signals through the boundary wire.
Setting Up the Transmitter:
- Choose a Location: Install the transmitter indoors, in a dry, protected area with access to a power outlet. A garage is ideal.
- Avoid Interference: Keep it away from breaker boxes and appliances to prevent signal disruption.
- Connect the Wire: Attach the boundary wire to the transmitter following the manufacturer’s instructions.
Collar Setup
Finally, prepare the receiver collar that your pet will wear.
Steps to Prepare the Collar:
- Charge the Collar: Before installation, ensure the collar is fully charged. This takes about 3 hours.
- Adjust the Fit: The collar should be snug but comfortable. You should be able to fit one finger between the collar and your pet’s neck.
- Set Correction Levels: Start with the lowest correction level and adjust as needed based on your pet’s response.
- Test the System: Walk the collar along the boundary to ensure it beeps before reaching the wire and administers a correction if your pet continues.
Installing a pet fence requires planning and precision, but with these steps, you can create a safe and secure environment for your furry friend. Next, we’ll explore how to train your pet to understand and respect their new boundaries.
Training Your Pet for the Fence
Now that your pet fence is installed, it’s time to train your pet to understand and respect their new boundaries. Proper training is key to ensuring the fence works effectively and keeps your pet safe.
Boundary Training
Boundary training is essential for helping your pet understand where they can and cannot go. The goal is to teach your pet to recognize the boundary and respond to the warning signals.
Steps for Effective Boundary Training:
- Introduce the Boundary: Begin by walking your pet on a leash around the boundary. Allow them to hear the warning tone from the collar as they approach the boundary.
- Use Visual Aids: Place flags along the boundary line to give your pet a visual cue. The flags help your pet associate the boundary with the warning tone.
- Reinforce with Positive Feedback: Reward your pet with treats or praise when they respond correctly to the warning tone and stay within the boundary.
- Practice Consistently: Repeat these sessions multiple times a day for about 10-15 minutes. Consistency helps reinforce the behavior.
Visual Aids
Visual aids, like boundary flags, are crucial during the initial training phase. They provide a clear visual marker for your pet, helping them understand the limits of their roaming area.
How to Use Visual Aids:
- Placement: Position the flags along the boundary every few feet.
- Removal: Gradually remove the flags as your pet becomes more familiar with the boundary, usually after a couple of weeks.
Correction Levels
Understanding and setting the correct correction levels on your pet’s collar is vital. The correction should be enough to get your pet’s attention without causing distress.
Tips for Setting Correction Levels:
- Start Low: Begin with the lowest correction level and observe your pet’s reaction.
- Adjust as Needed: If your pet ignores the warning signals, gradually increase the level. Always prioritize your pet’s comfort and safety.
- Monitor Reaction: Watch for signs of stress or fear and adjust accordingly.
Training your pet to respect their new boundaries takes time and patience. With consistent practice and the use of visual aids and appropriate correction levels, your pet will learn to steer their space safely. Next, we’ll address some common questions about pet fence installation.
Frequently Asked Questions about Pet Fence Installation
How much does it cost to build a dog fence?
Building a dog fence can vary in cost depending on several factors. The size of your yard is a significant factor. A larger area requires more materials, which increases costs. The type of fence also matters. Electronic fences, like the PetSafe® Classic In-Ground Fence™, often involve costs for the base unit, receiver collar, and boundary wire. Other materials, such as chain link or wood, have their own cost considerations.
Labor costs can also add up if you hire professionals for installation. However, doing it yourself can reduce expenses. While initial costs might seem high, investing in a quality fence ensures your pet’s safety and can save money in the long run.
What is the cheapest fence to install for dogs?
For those looking for a budget-friendly option, chain link fences are often the most cost-effective. They offer durability and require less maintenance compared to other materials. Chain link fences provide a physical barrier that is straightforward to install and can be a great option for smaller budgets.
However, if you prefer an invisible fence, the initial investment might be higher, but it offers flexibility in creating customized boundaries without altering the landscape.
How deep to bury pet fence wire?
When installing an electronic fence, it’s crucial to bury the boundary wire at the right depth to protect it from damage. The recommended depth is 1 to 3 inches underground. This depth ensures the wire is safely out of reach from lawnmowers and trimmers while still effectively transmitting the signal.
Protection Tips:
- Test Aboveground First: Before burying, test the wire aboveground to ensure the system functions correctly.
- Avoid Utility Lines: Use the Call 811 service to mark utility lines and avoid interference.
- Mark Obstacles: Identify and mark any obstacles like sprinkler systems to prevent damage during installation.
By following these guidelines, you can ensure a successful installation that keeps your pet safe and your system working efficiently.
Conclusion
At Lawn Care Plus Inc., we pride ourselves on offering comprehensive services custom to meet your specific needs. Whether it’s pet fence installation or another landscaping project, our experienced team is ready to help you create a safe and beautiful environment for your pets and family.
Our expertise extends beyond fences. We offer a wide range of services, including lawn maintenance, landscape installations, and hardscaping. Our team is skilled in installing patios, walls, walkways, driveways, and more. We also provide seasonal services like yard cleanups and snow removal, ensuring your property looks its best year-round.
Our experienced team understands the unique challenges of the Massachusetts climate and terrain. We use this knowledge to deliver top-notch service, ensuring your outdoor spaces are both functional and attractive. By choosing us, you’re not just getting a service provider; you’re gaining a partner committed to enhancing your outdoor living experience.
If you’re ready to transform your yard into a pet-friendly oasis or need assistance with any of our other services, don’t hesitate to reach out. Explore our comprehensive services today and see how we can make your outdoor dreams a reality!
