Transform Your Outdoor Space with a Paver Patio
Building a paver patio can instantly improve your outdoor living area, providing both beauty and function to your backyard. Whether you’re looking to create a cozy family nook or a grand entertaining space, this versatile DIY project is perfect for revamping your outdoor environment.
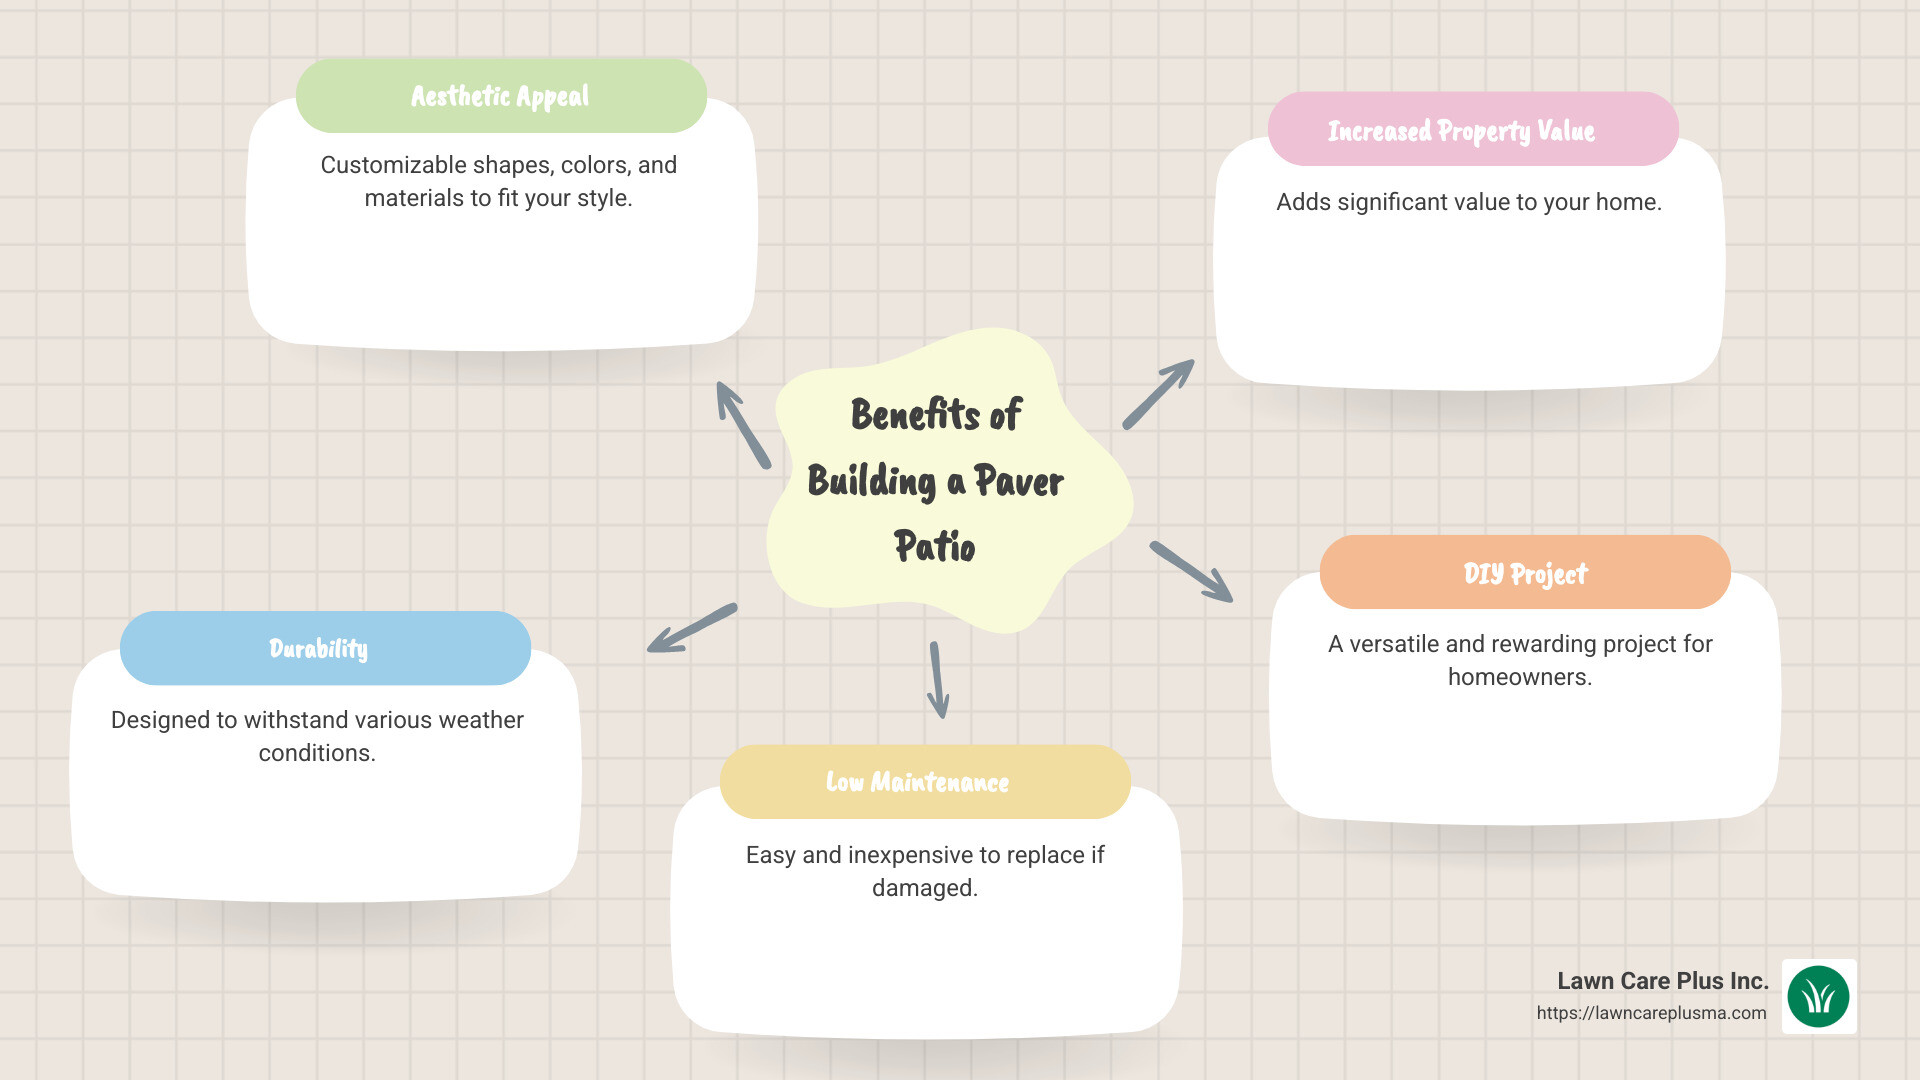
Here’s why you should consider building a paver patio:
- Aesthetic Appeal: Pavers come in various shapes, colors, and materials, allowing you to customize your patio to perfectly fit your style and landscape.
- Durability and Low Maintenance: Unlike concrete, pavers are easy and inexpensive to replace if damaged. Plus, they’re designed to withstand the elements.
- Increased Property Value: A well-designed patio can add significant value to your home, making it an investment in both enjoyment and equity.
- Lawn Care Plus Inc. Advantage: Based in the Boston Metro-West area, we offer expert guidance and services to ensure that your paver patio project is not only successful but stress-free.
With Lawn Care Plus Inc., you don’t have to tackle this project alone. Our team provides the expertise and support you need to bring your patio dreams to life.
Know your building a paver patio terms:
– how to install patio pavers
– patio installation cost
– outdoor patios
Planning Your Paver Patio
Planning your paver patio is an exciting step in changing your outdoor space. Let’s explore the essentials of choosing the right pavers and designing your patio layout.
Choosing the Right Pavers
Selecting the right pavers is crucial for both the look and longevity of your patio. Here’s how to make the best choice:
- Materials: You have several options, including brick, concrete, and natural stone. Each has its own charm:
- Brick pavers offer a classic look and are known for their durability.
- Concrete pavers are versatile and come in a variety of finishes and colors, making them a popular choice for many homeowners.
- Natural stone pavers, like bluestone or granite, bring a touch of elegance and can withstand harsh weather conditions.
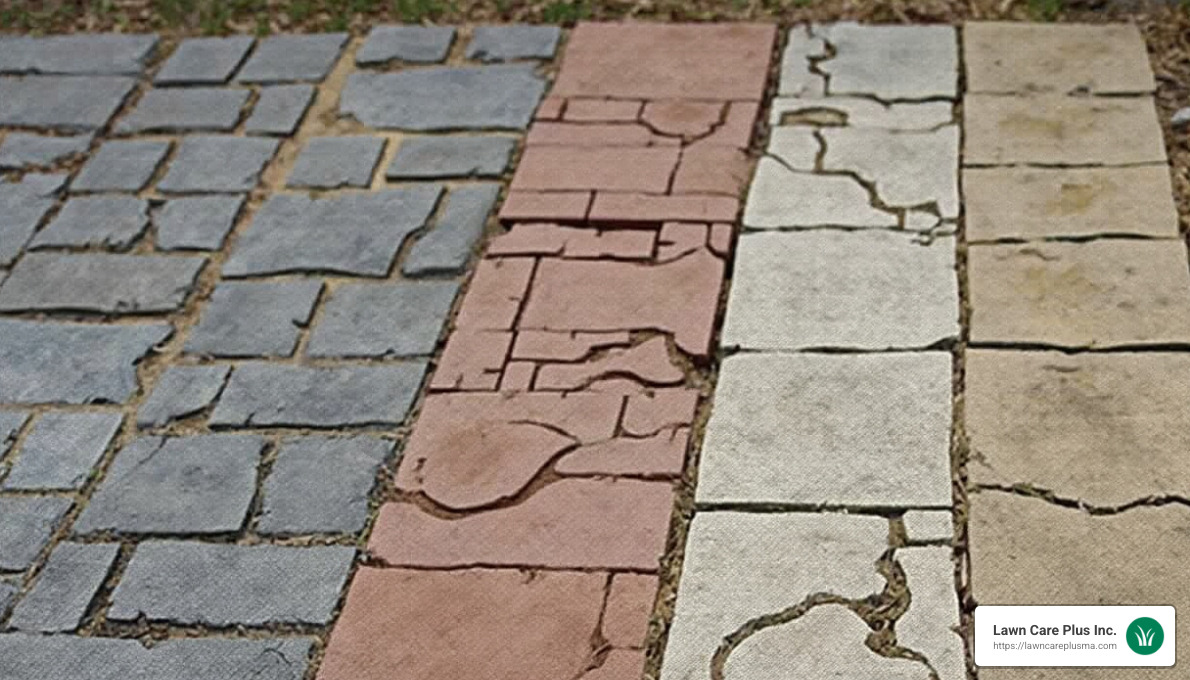
- Colors and Shapes: Pavers come in a range of colors from earthy reds to cool grays. Choose a color that complements your home and garden. Shapes vary as well, from simple squares and rectangles to more intricate designs.
- Budget: Consider your budget when selecting materials. While natural stone may be pricier, it offers best beauty. Concrete is often more affordable and can mimic the look of stone.
Designing Your Patio Layout
Once you’ve chosen your pavers, it’s time to focus on the design and layout of your patio.
- Size and Layout: Determine the size of your patio based on how you plan to use it. A smaller area might suffice for a cozy seating nook, while a larger space is ideal for entertaining.
- Patterns: The pattern you choose can dramatically impact the overall appearance of your patio. Here are a few popular options:
- Running Bond: Simple yet effective, this pattern is easy to install and works well with rectangular pavers.
- Herringbone: A bit more complex, this pattern adds a dynamic look and is great for high-traffic areas.
- Jack-on-Jack: This grid-like pattern is straightforward and gives a neat, orderly appearance.
- Pinwheel: For a unique touch, the pinwheel pattern combines square and rectangular pavers in a playful design.
- Tools: Ensure you have the right tools for the job. Basic tools like a rubber mallet, tape measure, and level are essential. For cutting pavers, a wet saw may be necessary.
By carefully considering your paver choices and patio layout, you’ll set the foundation for a stunning outdoor space. Next, we’ll dig into preparing the ground to ensure your patio is built to last.
Preparing the Ground
Building a paver patio begins with preparing the ground properly. This step is crucial for ensuring a stable and durable patio. Let’s explore the key components: excavation, leveling, compacting, and drainage.
Excavating the Area
Excavation is the first and most challenging step in preparing the ground. You’ll need to remove about 8-10 inches of soil beneath the desired height of your patio. This depth accounts for a 4-6 inch gravel base, a 1-inch sand layer, and the thickness of your pavers.
Soil Removal: Start by marking the perimeter of your patio. Use a shovel for small areas or a mini skid steer for larger spaces. Renting a mini skid steer can save time and effort, making quick work of the excavation process.
Tip: Before you start digging, remember to call 811 to check for any underground utilities.
Creating a Solid Base
A solid base is essential for the longevity of your paver patio. It prevents shifting and ensures proper drainage.
Gravel Base: Lay down a 4-6 inch layer of 3/4 inch clean gravel. This gravel doesn’t contain fines or dust, allowing water to drain efficiently. Spread the gravel evenly across the excavated area.
Compacting: Use a plate compactor to compact the gravel into a firm base. This step is crucial to minimize settling over time.
Landscape Fabric: After compacting the initial gravel layer, lay down commercial-grade landscape fabric. This fabric helps lock the layers in place and reduces settling.
Sand Layer: Add a 1-inch layer of coarse sand over the compacted gravel. Use 1-inch diameter PVC pipes as guides to screed the sand evenly. This sand layer provides a smooth surface for laying the pavers.
Drainage Considerations: Ensure your base is pitched correctly—1/8 inch per foot—to allow water to flow away from your home.
By carefully excavating and creating a solid base, you’re setting the stage for a paver patio that will stand the test of time. Next, let’s move on to the exciting part—laying the pavers!
Building a Paver Patio: Step-by-Step Guide
Creating a beautiful and durable paver patio involves a few key steps. Let’s break it down into simple, manageable parts: laying the foundation, installing the pavers, and adding polymeric sand.
Laying the Foundation
The foundation is the backbone of your paver patio. Here’s how to set it up:
- Gravel Base: Start by spreading a 4-6 inch layer of 3/4 inch clean gravel over the prepared area. This gravel helps with drainage and provides a stable base.
- Compacting: Use a plate compactor to press down the gravel. This step ensures the base is firm and reduces the risk of future settling.
- Leveling Sand: Add a 1-inch layer of coarse sand on top of the compacted gravel. Use 1-inch diameter PVC pipes as guides to screed the sand evenly. This creates a smooth surface for the pavers.
- Screeding: Drag a straight edge across the pipes to level the sand. Remove the pipes carefully and fill the gaps with sand. Make sure the sand is level and smooth before moving on to the next step.
Installing the Pavers
Now comes the fun part—placing the pavers to create your patio design.
- Placing Pavers: Start laying pavers at one corner, working your way outwards. Align each paver carefully and maintain a consistent gap between them.
- Using a Rubber Mallet: Tap each paver gently with a rubber mallet to set it into the sand. This step ensures each paver is level with its neighbors.
- Cutting Pavers: For edges or curves, you might need to cut some pavers. Use a wet saw with a diamond blade for precise cuts. Always wear safety gear when cutting.
- Checking Alignment: Regularly check that your pavers are aligned and level. Adjust as needed to keep the pattern consistent.
Adding Polymeric Sand
To finish your paver patio, you’ll need to lock the pavers in place with polymeric sand.
- Jointing Sand: Spread polymeric sand over the entire patio. Use a broom to sweep it into the joints between the pavers.
- Sweeping and Compacting: Sweep away excess sand from the surface. Then, use a compactor to settle the sand into the joints, ensuring a tight fit.
- Watering: Lightly mist the patio with water to activate the polymeric sand. This helps it harden and lock the pavers in place. Avoid over-watering, as it can wash away the sand.
By following these steps, you’re well on your way to mastering the art of building a paver patio. With the foundation set, pavers installed, and joints filled, your patio is ready for the finishing touches that will make it truly shine.
Finishing Touches
Once your paver patio is set, you’re just a few steps away from creating a stunning outdoor space. Let’s explore the final touches that will make your patio both functional and beautiful.
Edging and Backfilling
Creating strong edges and backfilling properly is crucial for a long-lasting patio.
Paver Restraints: To keep your pavers in place, install paver restraints along the edges. These can be plastic or metal and should be secured with long spikes. They help maintain the shape and prevent shifting.
Plastic vs. Concrete Edging: You have two main choices for edging—plastic or concrete. Plastic edging is flexible and easy to install, making it a popular choice. However, some prefer concrete edging for its durability and strength. Concrete edging provides a more permanent solution but requires more effort to install.
Soil Backfill: After setting your edges, backfill around the patio with soil. This step helps blend the patio into your yard seamlessly. Use leftover topsoil to fill gaps and ensure the edges are stable.
Decorating Your Patio
Now that the structural work is done, it’s time to personalize your patio with furniture and decor.
Outdoor Furniture: Choose furniture that suits your style and space. Compact sets work well for smaller patios, while larger spaces can accommodate more seating. Opt for weather-resistant materials to ensure longevity.
Garden Beds: Incorporate garden beds or potted plants around your patio to add greenery and color. Vertical gardens are a great option for small spaces, providing a lush look without taking up too much room.
Lighting: Install outdoor lighting to extend your patio’s usability into the evening. Options like string lights, lanterns, or built-in LED fixtures create a warm and inviting atmosphere.
Heating: Consider adding a fire pit or outdoor heater to keep your patio cozy during cooler months. A small tabletop fire pit can add warmth and ambiance without taking up much space.
With these finishing touches, your paver patio will not only be functional but also a beautiful addition to your home. Now, let’s move on to addressing some common questions you might have about building a paver patio.
Frequently Asked Questions about Building a Paver Patio
Is it cheaper to lay concrete or pavers?
When deciding between concrete and pavers for your patio, cost is a key factor. Generally, laying concrete might have a lower initial cost compared to pavers. However, consider the long-term expenses. Pavers offer durability and are easier to replace if damaged. Concrete, while initially cheaper, can crack and require more costly repairs.
Pavers also provide flexibility in design. You can easily change patterns or replace individual units if you want a fresh look. In the long run, the value and durability of pavers often outweigh the initial savings of concrete.
Can you lay pavers directly on dirt?
Laying pavers directly on dirt is not recommended. Proper ground preparation is crucial for a stable and long-lasting patio. Without a solid base, the pavers can shift, sink, or become uneven over time.
Start by excavating the area to the right depth. Then, level and compact the soil to create a firm foundation. This prevents settling and ensures your patio remains even and attractive.
How deep should a paver base be for a patio?
For a sturdy paver patio, the base is everything. A well-prepared base typically includes a layer of gravel and a layer of sand. Here’s a simple breakdown:
- Gravel Depth: Aim for about 4 to 6 inches of compacted gravel. This provides a solid and drainable foundation.
- Sand Layer: On top of the gravel, add a 1-inch layer of sand. This helps create a smooth, even surface for the pavers.
Compacting each layer is essential. Use a plate compactor to ensure the base is firm and well-settled. This will prevent future shifts and maintain the integrity of your patio.
With these common questions addressed, you’re now better equipped to make informed decisions for your paver patio project.
Conclusion
Building a paver patio is a rewarding project that can transform your outdoor space into a beautiful and functional area. By following the steps outlined in this guide, you can create a durable and attractive patio that will last for years. Pavers offer flexibility in design, durability, and ease of maintenance, making them a great choice for any patio project.
The benefits of installing a paver patio are numerous. Not only does it improve the aesthetic appeal of your home, but it also increases your property value. A well-built patio can serve as an extension of your living space, providing a perfect spot for relaxation, entertaining guests, or enjoying a meal outdoors.
At Lawn Care Plus Inc., we specialize in creating stunning outdoor spaces with our expert landscaping and hardscaping services. Our team is dedicated to helping you achieve your dream patio with precision and care. Whether you need help with planning, design, or installation, we are here to assist you every step of the way.
Ready to start your paver patio project? Contact Lawn Care Plus Inc. today to learn more about our services and how we can help bring your vision to life. Let’s transform your outdoor space into a beautiful oasis you’ll love for years to come.
