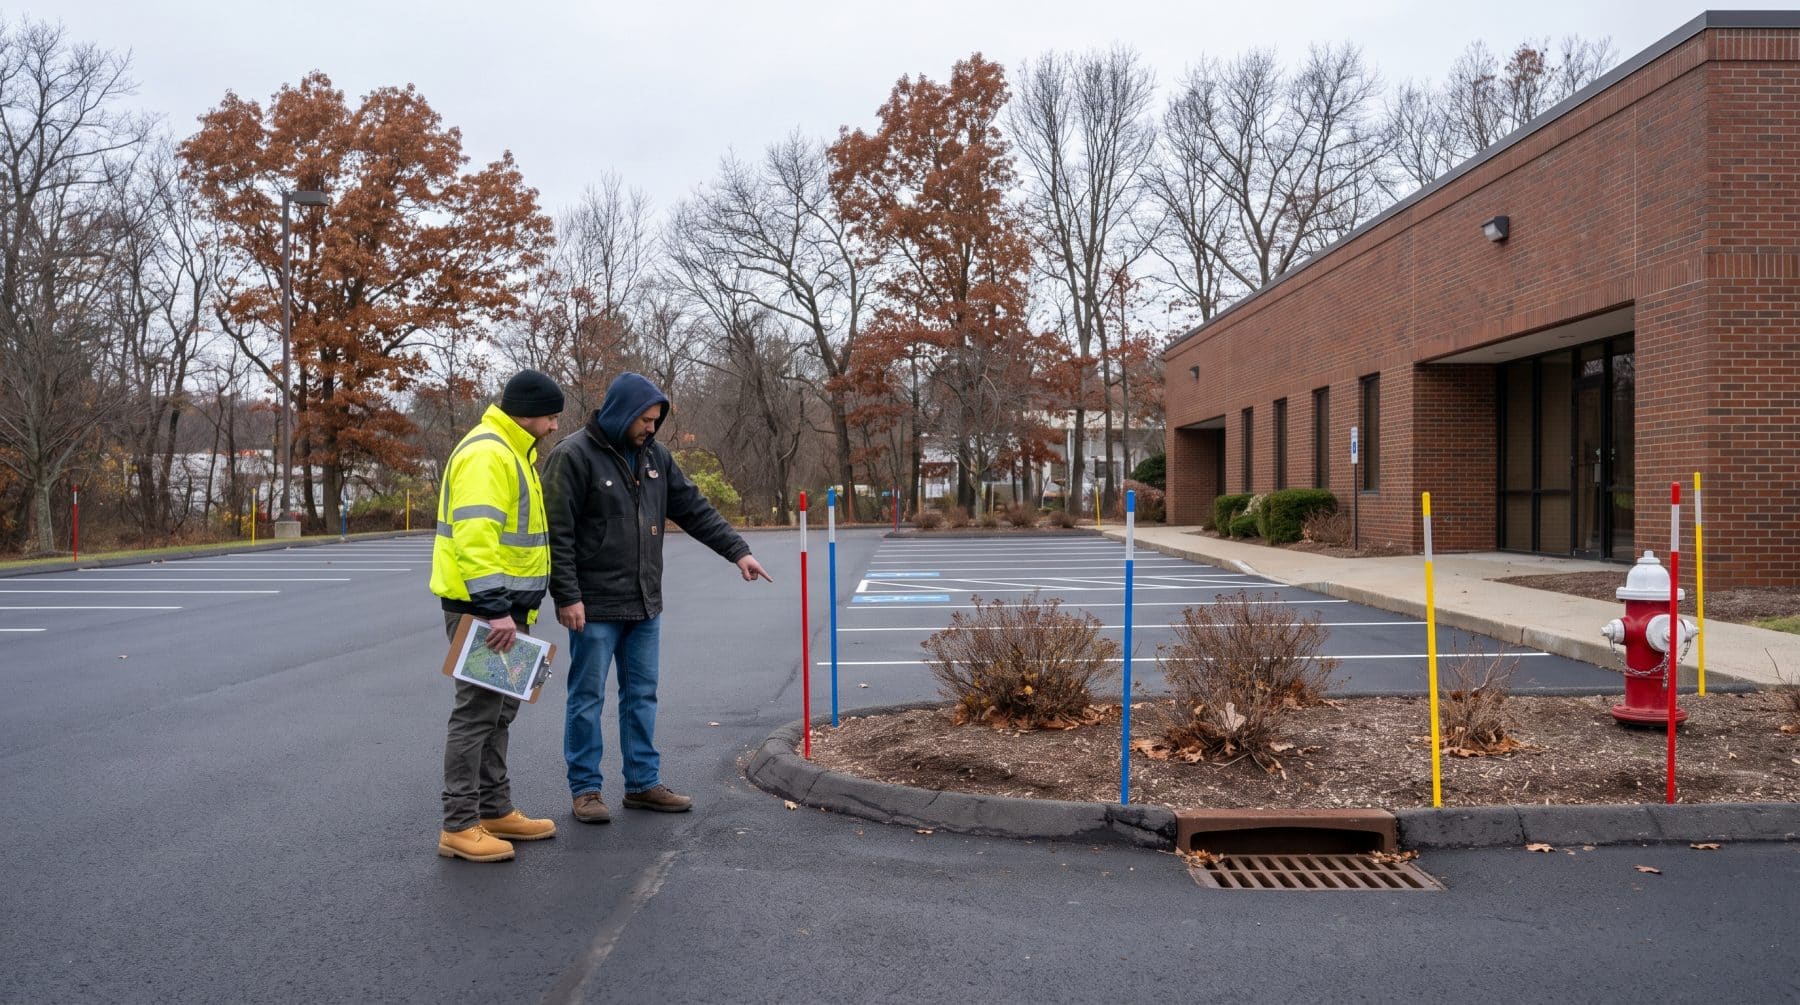
A commercial snow site-marking plan should show operators what will disappear once pavement edges, drains, islands, low obstacles, and access routes are covered. The most useful system combines a current site map, a simple field-marker legend, and preseason photos. Each element answers a different question: where the feature is, what the marker means, and what condition existed before winter.
For a Greater Boston property, this work belongs in the preseason—not during the first overnight storm. Marking the site early gives the property manager and snow team time to resolve unclear boundaries, temporary obstructions, and conflicting routes while the pavement is still visible.
Separate site marking from snow pile planning
Site marking identifies fixed features and operating boundaries that may be hidden by snow. A snow pile plan determines where accumulated snow can be stored without compromising access, drainage, visibility, or capacity. The two documents should agree, but they are not interchangeable.
If pile locations still need to be chosen, use the separate commercial snow pile placement planning guide. This checklist starts after the site’s required routes and pile zones have been decided.
Build one legend before placing any markers
A marker is useful only when every operator reads it the same way. Choose a small set of colors or labels and define each meaning on the site map. Do not assume a substitute driver will recognize a local habit or remember a verbal instruction from months earlier.
SnowEx and the Snow & Ice Management Association describe preseason staking as a map legend in the field. Their property-staking guidance recommends a consistent system for pavement boundaries, drainage structures, fire equipment, walks, utility features, and hidden obstacles, plus inspections throughout the season.
A practical legend might distinguish boundary markers, raised hazards, drainage features, protected access, and no-push areas. The exact colors matter less than consistency. Record the legend on the map, in the route packet, and in the crew briefing.
Mark the site in a fixed order
Walking the property in the same sequence makes omissions easier to spot. Start with the perimeter and work inward:
- Pavement boundaries: curbs, islands, medians, lawn edges, walk edges, and changes in elevation.
- Low or raised hazards: wheel stops, speed humps, heaved pavement, sign bases, light bases, and fixed seasonal equipment.
- Drainage: catch basins, trench drains, low points, swales, and areas that must remain open for meltwater.
- Protected access: hydrants, fire department connections, utility boxes, meters, loading areas, waste enclosures, and emergency routes.
- Pedestrian and accessible routes: curb ramps, access aisles, crosswalks, primary walks, stairs, and entrances.
- Operating boundaries: no-push lines, equipment turn limits, tenant-specific exclusions, and the edges of approved pile zones.
Place markers where they can be seen from the operator’s approach, not only from a person standing beside the feature. Confirm that a marker will remain visible after expected accumulation and will not itself obstruct a required path.
Use the checklist to test the field plan
| Layer | Field check | Record to keep |
|---|---|---|
| Boundary | Can an operator follow the pavement edge when curb lines disappear? | Map line plus approach photo |
| Hazard | Are low objects marked on both relevant approaches rather than hidden behind one stake? | Feature label and close photo |
| Drainage | Can crews identify drains and avoid covering the inlet or its meltwater path? | Drain symbol, flow arrow, and photo |
| Access | Are hydrants, fire connections, utilities, doors, ramps, and required walks obvious? | Protected-zone shading and site contact |
| Operations | Do marker meanings match the route map, pile plan, and crew briefing? | Dated legend and revision number |
Quick rule: Every marker should correspond to a mapped feature, every mapped hazard should be visible from the operator’s approach, and every exception should name the person who can resolve it.
Photograph the site before winter changes it
Take an overview from each vehicle entrance, then capture the direction of travel for each route. Add close photos of cracked curbs, damaged pavement, loose wheel stops, leaning signs, or any other pre-existing condition near a plow path. Label the photos to match the map rather than leaving a folder of unnamed images.
The photo log is not just a damage record. It helps a new or substitute operator understand how a marker relates to the physical site. Include the date, viewpoint, feature number, and a short note. Retake a photo when construction, restriping, tenant use, or temporary storage changes the route.
Confirm local obligations and protected routes
A site plan should reflect the municipality and the property’s operating requirements. In Boston, adjoining sidewalks and curb ramps have clearing requirements, including a specified accessible path, and private snow cannot be pushed into the street. Review the current City of Boston snow-clearing rules when the property is within the city. Requirements may differ elsewhere in Greater Boston.
Show public-facing walks and curb ramps as protected routes on the map. Mark their boundaries, but keep the markers out of the path. Likewise, identify hydrants, fire department connections, and utility access points so snow operations do not turn a visible dry-weather feature into a buried winter obstruction.
Catch basins deserve their own symbol and approach-side markers. Keep the inlet and its meltwater path visible in the route plan instead of treating the grate as spare snow-storage space. If the drainage plan is unclear, resolve it during the preseason walk rather than leaving the operator to improvise in accumulating snow.
Run a preseason walk with the people who use the plan
The property manager, snow contractor, and site representative should walk the finished marking system together. Test it from a truck or equipment approach where practical. Ask a person who did not place the markers to identify the route, hazards, drains, protected access, and no-push boundaries using only the map and legend.
Resolve any marker that needs a verbal explanation. Add a fixed revision date and distribute the same version to everyone responsible for storm decisions. If a tenant, construction project, dumpster, storage container, or traffic pattern changes after the walk, update both the field and map versions.
Inspect markers throughout the season
Markers can lean, disappear, break, or become buried. Assign responsibility for checking them before a forecast event and after substantial accumulation, cleanup, or thaw. Replace missing markers using the map and reference photos rather than guessing at the original location.
After winter, compare the site with the preseason photo log. Note any location where operators lacked visibility, a marker was repeatedly damaged, or the legend caused confusion. Those observations become the next season’s revision list.
Lawn Care Plus provides commercial snow management in Greater Boston. A shared site map, marker legend, and photo record can make the preseason walkthrough more specific and give crews clearer field guidance once snow covers the pavement.