Why Block Walls Are Essential For Your Landscape
A block wall offers a versatile solution for homeowners looking to improve their outdoor spaces. Whether it’s for structural support, aesthetic appeal, or both, these walls are indispensable in landscape design. Here’s why a block wall might just be the perfect addition to your property:
- Strength and Durability: Block walls are robust structures that can withstand the test of time and elements.
- Aesthetic Appeal: They add a professional and neat appearance to your property, boosting curb appeal.
- Functional Benefits: Perfect for preventing soil erosion and creating levelled, usable spaces in your garden.
Learning to install a block wall yourself not only saves money but also gives you the satisfaction of a hands-on project. DIY installation lets you customize the design to fit your personal taste and landscape needs. Plus, it can be a fulfilling experience that provides both mental and physical exercise.
If you have some spare time and are looking to improve your outdoor space efficiently, building a block wall yourself is a great option. A solid plan and understanding of the process can turn this project into a smooth and rewarding addition to your home’s landscape.
Block wall terminology:
– block retaining wall
– concrete block retaining wall
– concrete retaining wall block
Understanding Block Walls
When it comes to enhancing your landscape with a block wall, understanding the different types and materials is crucial. Let’s break down the basics to help you make informed decisions for your DIY project.
Types of Block Walls
1. Gravity Retaining Walls:
These walls rely on their weight to hold back soil. They are perfect for shorter walls and can be built without mortar, making them ideal for DIY enthusiasts.
2. Cantilevered Retaining Walls:
Cantilevered walls use a slab foundation to provide additional support. They’re more complex but offer greater height and strength for larger projects.
3. Piled Retaining Walls:
These are constructed by driving rods or piles into the ground. They are suitable for areas with soft soil where other wall types might not be as stable.
4. Anchored Retaining Walls:
These walls use cables or other supports anchored into the soil behind them. They provide extra reinforcement, making them suitable for walls that need to withstand significant pressure.
Materials for Block Walls
Choosing the right material for your block wall is essential for both aesthetics and functionality.
Cinder Blocks:
Cinder blocks are a popular choice due to their affordability and ease of use. They are lighter than concrete blocks, making them easier to handle during installation. However, they may require additional reinforcement for taller walls.
Concrete Blocks:
Concrete blocks are known for their strength and durability. They are heavier and provide more stability, especially for larger walls. These blocks can be customized with different finishes to match your landscape design.
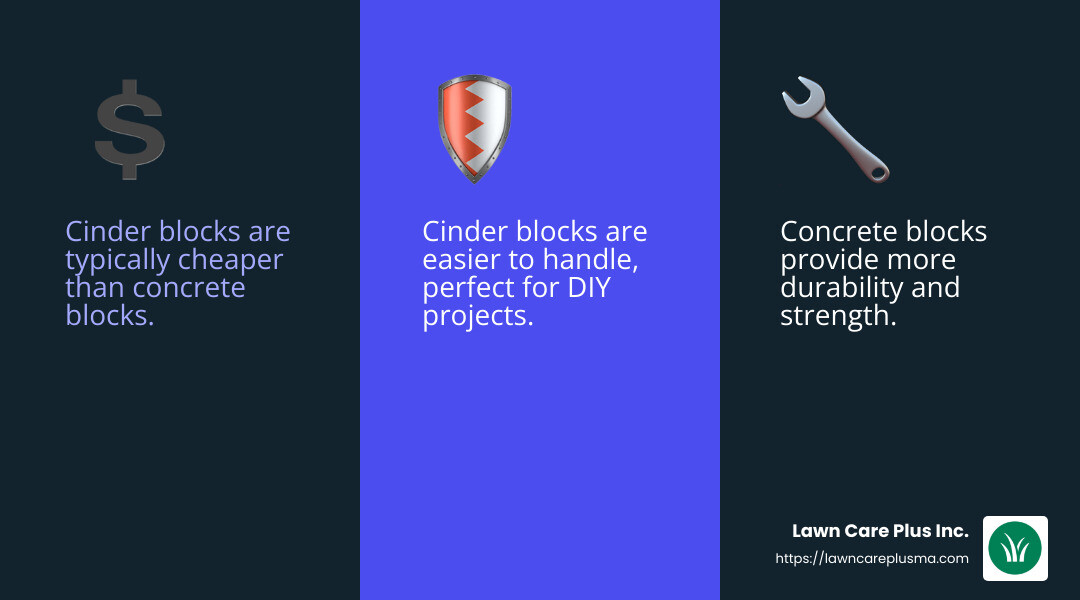
Cinder Blocks vs. Concrete Blocks
- Cost: Cinder blocks are generally cheaper, making them a budget-friendly option.
- Durability: Concrete blocks offer superior strength and longevity, suitable for more demanding applications.
- Ease of Installation: Cinder blocks are easier to maneuver, ideal for DIY projects.
Choosing the Right Material for Your Project
When selecting the material for your block wall, consider the following:
- Project Scale: Larger projects may benefit from the strength of concrete blocks.
- Budget: If cost is a concern, cinder blocks are a viable option.
- Aesthetic Preferences: Concrete blocks offer more design options, including various textures and colors.
Understanding these elements will help you choose the right type and material for your block wall, ensuring a successful and visually appealing addition to your landscape. As you plan your project, the right choice of materials can significantly affect the outcome and longevity of your wall.
Planning Your Block Wall Installation
Before diving into your block wall project, careful planning is key. This section will guide you through selecting the right site, measuring accurately, and determining the layout. We’ll also cover the tools and materials you’ll need, and how to use a block retaining wall calculator to ensure everything fits perfectly.
Site Selection
Choosing the right location for your block wall is crucial. Consider the following factors:
- Purpose: Is the wall for decorative purposes, or does it need to retain soil?
- Drainage: Ensure the site allows for proper drainage to prevent water accumulation.
- Proximity to Structures: Avoid placing the wall too close to buildings or trees, which could affect stability.
Measuring and Layout
Accurate measurements are essential for a successful installation. Here’s how to get started:
- Measure the Length and Height: Use a tape measure to determine the total length and desired height of your wall. The first row of blocks should be half-buried for stability.
- Mark the Layout: For straight walls, use stakes and string to outline the area. For curved designs, a rope or hose can help mark the shape. Use marking paint to finalize the outline.
- Calculate the Number of Blocks: Divide the total length of the wall by the length of a block to find out how many you’ll need per row. For the number of rows, divide the total wall height by the height of a block.
Tools and Materials
Having the right tools and materials on hand will make your project smoother. Here’s a checklist:
- Tools:
- Shovel
- Level
- Tape measure
- String and stakes
- Marking paint
- Materials:
- Blocks (purchase 10% more than calculated to account for breakage)
- Gravel or sand for foundation
- Backfill material
- Drainage pipe (if needed)
Using a Block Retaining Wall Calculator
A block retaining wall calculator can simplify the planning process. This tool helps estimate the number of blocks needed, considering the wall’s dimensions and block size. It also accounts for the first row being half-buried, ensuring your calculations are accurate.
Before purchasing materials or starting work, check local building codes and homeowners association regulations. Some areas may require permits for retaining walls. Compliance with these rules ensures your project is safe and legal.
By carefully planning your block wall installation, you’ll set the stage for a successful build. With the right site, measurements, and materials, you’re well on your way to creating a sturdy and attractive addition to your landscape.
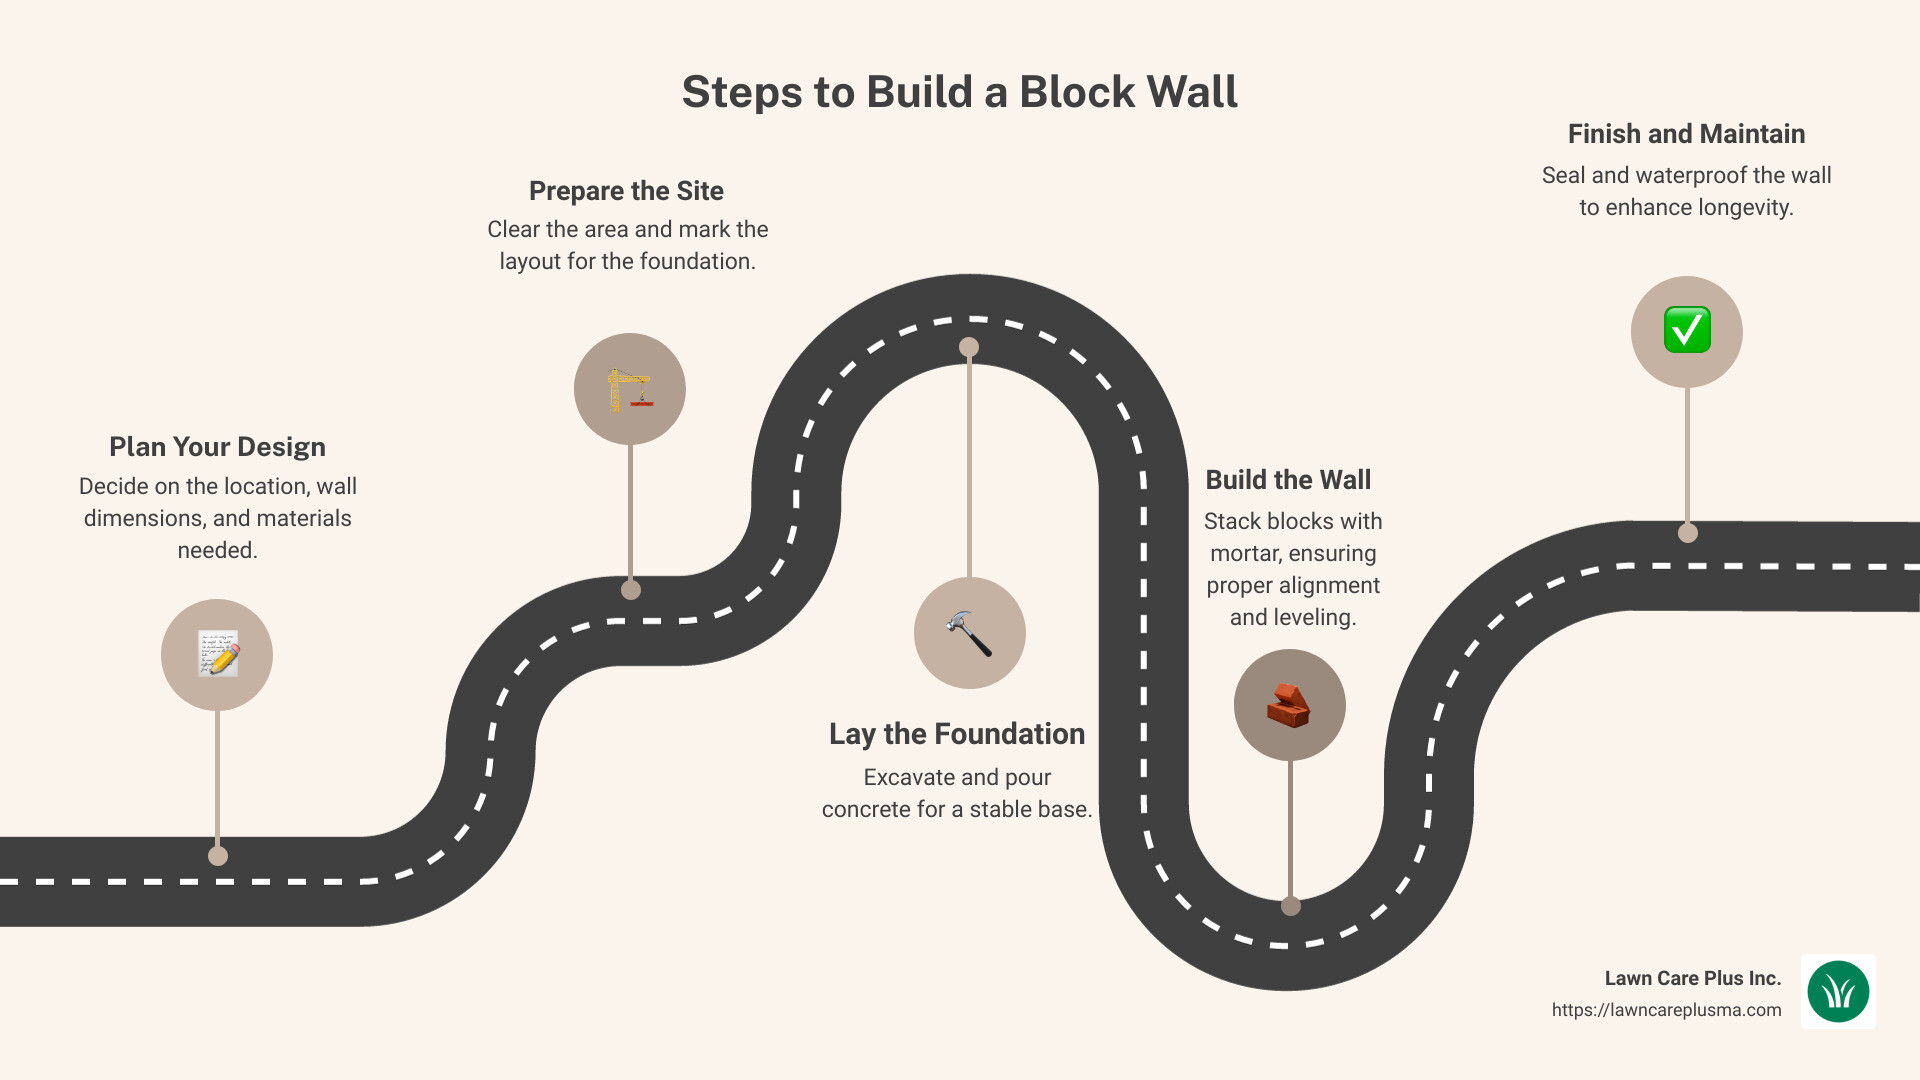
Step-by-Step Guide to Building a Block Wall
Now that you have your plan in place, it’s time to get hands-on. This guide will walk you through each step of building your block wall, from preparing the foundation to the final touches.
Preparing the Foundation
Excavation
Start by digging a trench where your block wall will sit. This trench should be about twice as wide as your blocks and deep enough to hold the first row halfway. This ensures stability.
Framing
Next, set up a frame using wooden stakes and string to mark the trench’s boundaries. This will guide you in keeping the trench straight and level.
Pouring Concrete
Once the trench is ready, pour a layer of gravel or sand at the bottom for drainage. Then, pour concrete to form a solid base. This base must cure for at least 24 hours before you start laying blocks.
Laying the Blocks
Alignment
Begin placing blocks at one end of the wall, ensuring they are aligned with your string guide. Use a level to check each block’s position as you go.
Mortar Application
Apply a consistent layer of mortar between each block. The mortar should be thick enough to hold the blocks together but not so thick that it oozes out excessively. Consistency is key!
Leveling
As you lay each row, check for levelness. Adjust by tapping blocks gently into the mortar with a rubber mallet. This ensures a straight and even wall.
Finishing Touches
Curing
Allow the mortar to cure properly. This usually takes about 48 hours, but it can vary depending on weather conditions. Avoid disturbing the wall during this period.
Sealing
Once the wall is cured, apply a sealant to protect it from moisture. This helps prevent water from seeping into the mortar and causing damage.
Waterproofing
For added protection, especially in areas prone to heavy rain, consider applying a waterproof coating. This extra step improves the wall’s durability and longevity.
By following these steps, you’ll build a sturdy and visually appealing block wall. Patience and attention to detail are your best tools in this project. Next, we’ll dive into some tips for ensuring your block wall installation is a complete success.
Tips for a Successful Block Wall Installation
Building a block wall requires careful attention to detail. Here are some key tips to help ensure your project is a success:
Alignment
Straight lines make strong walls. Use a string line as your guide to keep blocks aligned. This ensures that each block is placed correctly, preventing a wavy or uneven wall. Regularly check alignment as you work, especially after laying several blocks.
Mortar Consistency
Consistency is crucial. The mortar should be thick enough to adhere to the blocks but not so thick that it bulges out. Think of it like peanut butter. If it’s too runny, it won’t hold the blocks securely. Too thick, and it becomes difficult to work with. Mix small batches to maintain the right consistency throughout your project.
Curing Time
Patience is key. Allow the mortar to cure properly, which typically takes about 48 hours. This curing time is essential for the strength and durability of your wall. Avoid any disturbances during this period to prevent weakening the mortar bond.
Weather Considerations
Weather can be a friend or foe. Avoid starting your project in extreme weather conditions. Hot, dry weather can cause mortar to dry too quickly, leading to weak joints. In contrast, cold or wet weather can delay curing and affect the mortar’s strength. Plan your work during mild, dry conditions for the best results.
By keeping these tips in mind, you’ll be well on your way to a successful block wall installation. Up next, we’ll explore common mistakes to avoid, ensuring your hard work doesn’t go to waste.
Common Mistakes to Avoid in Block Wall Installation
Building a block wall can be a rewarding DIY project, but there are common pitfalls that can undermine your hard work. Here’s how to avoid them:
Poor Foundation
A solid foundation is crucial for a stable block wall. Without it, your wall is at risk of shifting or collapsing. The foundation should be level and properly compacted. This means digging down to a stable, frost-free depth and using gravel or crushed stone to create a firm base. The foundation should be wider than the wall itself to provide adequate support.
Incorrect Mortar Mix
Mortar is the glue that holds your blocks together. An incorrect mix can lead to weak joints and a flimsy wall. The right mortar mix should have the consistency of peanut butter—not too runny and not too thick. Follow the manufacturer’s instructions for the correct ratio of sand, cement, and water. Mixing small batches ensures consistency throughout the project, which is key to a strong bond.
Inadequate Drainage
Water is a block wall’s worst enemy. Without proper drainage, water can build up and cause pressure against the wall, leading to cracks and failure. Ensure that your design includes drainage solutions, like gravel backfill and drainage pipes, to direct water away from the wall. This is especially important for retaining walls, which hold back soil and moisture.
Avoiding these mistakes will help ensure that your block wall stands the test of time. Next, we’ll tackle some frequently asked questions to clarify any lingering doubts you might have.
Frequently Asked Questions about Block Walls
What is the difference between a block wall and a concrete wall?
When it comes to building walls, block walls and concrete walls are two popular options, but they have distinct differences. A block wall is constructed using individual blocks, such as cinder or concrete blocks, stacked and joined with mortar. These blocks are typically hollow, making them lighter and easier to handle. Concrete walls, on the other hand, are made by pouring concrete into a formwork to create a solid, continuous structure. This makes them highly durable and strong, often used in foundations and larger structures.
Key Differences:
- Construction: Block walls are built by stacking blocks, while concrete walls are formed by pouring concrete.
- Materials: Block walls use pre-made blocks; concrete walls require forms and poured concrete.
- Strength: Concrete walls are generally stronger and more durable due to their solid nature.
Are cinder block walls cheaper?
Yes, cinder block walls are often a more cost-effective option compared to other wall types. Cinder blocks are made from a mix of concrete and coal cinders, making them lighter and less expensive to produce. This translates to lower material costs and easier handling during construction, which can reduce labor expenses. However, keep in mind that the total cost will also depend on factors like wall height, length, and additional features such as waterproofing or insulation.
- Material Costs: Cinder blocks are typically cheaper than solid concrete blocks or poured concrete.
- Labor Costs: Easier handling can lead to reduced labor time and costs.
What is the cheapest block for a retaining wall?
When considering materials for a retaining wall, Pavestone blocks are a popular choice for those looking to save on costs. Pavestone offers a range of blocks that are not only affordable but also designed for easy installation. The Pavestone RockWall Large block is currently a top-seller, known for its cost-effectiveness and ease of use. These blocks often feature interlocking designs, which provide stability without the need for mortar.
- Affordable Options: Pavestone blocks provide a budget-friendly solution for retaining walls.
- Easy Installation: Many Pavestone blocks have interlocking features, reducing the need for additional materials.
Understanding these differences and options can help you make informed decisions about your next block wall project. Now, let’s dive into some maintenance tips and ways to improve the longevity of your wall.
Conclusion
Building a block wall is an investment in your property’s landscape. To ensure it stands the test of time, proper maintenance is key. Here are some tips to help you maintain your block wall and improve its longevity.
Maintenance Tips
- Regular Inspections: Check your block wall periodically for any signs of wear, such as cracks or bulging. Early detection can prevent minor issues from becoming major problems.
- Cleaning: Keep your wall clean by removing dirt, algae, and moss. Use a gentle pressure wash or a soft brush with water and mild detergent.
- Sealing: Apply a waterproof sealant to protect your wall from moisture. This is especially important in areas prone to heavy rain or freeze-thaw cycles.
- Weed Control: Prevent weeds from growing between the blocks by applying a herbicide or laying landscape fabric during installation.
- Drainage Maintenance: Ensure that the drainage system behind the wall is functioning correctly. Clear any blockages to prevent water buildup, which can weaken the structure.
Enhancing Longevity
- Proper Construction: A well-built foundation and correctly laid blocks are crucial. Ensure the footing is deep enough and the blocks are aligned and level.
- Quality Materials: Use high-quality blocks and mortar to withstand environmental pressures.
- Professional Help: Consider hiring professionals for complex projects to ensure the wall is built to last. Lawn Care Plus Inc. offers expert services to assist you with installation and maintenance.
Lawn Care Plus Inc. Services
At Lawn Care Plus Inc., we are committed to helping you create a durable and beautiful landscape. Our team of experienced professionals offers a range of services, including:
- Landscape Installations: Transform your outdoor space with our comprehensive landscape design and installation services.
- Hardscaping Solutions: From patios to walkways and driveways, our hardscaping services improve the functionality and aesthetics of your property.
- Retaining Walls: We specialize in designing and building retaining walls that complement your home’s style and add value to your property.
For more information on how we can assist with your block wall project, visit our landscape retaining walls page. Let us help you bring your vision to life with quality craftsmanship and attention to detail.
By following these maintenance tips and utilizing our services, you can ensure your block wall remains a sturdy and attractive feature of your landscape for years to come.
