
Why Lawn Installations Are the Foundation of Beautiful Outdoor Spaces
Lawn installations are the process of establishing a new lawn via sodding, seeding, or hydroseeding. The process involves careful soil preparation, selecting the right grass, proper installation, and consistent aftercare to create a healthy, vibrant outdoor space.
Quick Overview: The Lawn Installation Process
- Choose Your Method – Sod (instant), seed (cost-effective), hydroseeding (large areas), or artificial turf (low maintenance).
- Prepare the Soil – Test pH, remove old turf, till and grade, add topsoil.
- Install the Lawn – Lay sod, spread seed, or apply hydroseed.
- Provide Proper Aftercare – Follow strict watering schedules and proper mowing/fertilizing practices.
Achieving a picture-perfect lawn doesn’t happen by accident. Proper lawn installation is critical. Skipping steps in soil preparation or choosing the wrong grass for Massachusetts weather can lead to years of fighting weeds, bare spots, and drainage problems.
When you understand the complete process, you set yourself up for decades of success. This guide walks you through every step of professional lawn installations. Whether renovating an existing lawn or starting from bare dirt, you’ll learn what it takes to create a healthy foundation that transforms your property’s curb appeal.
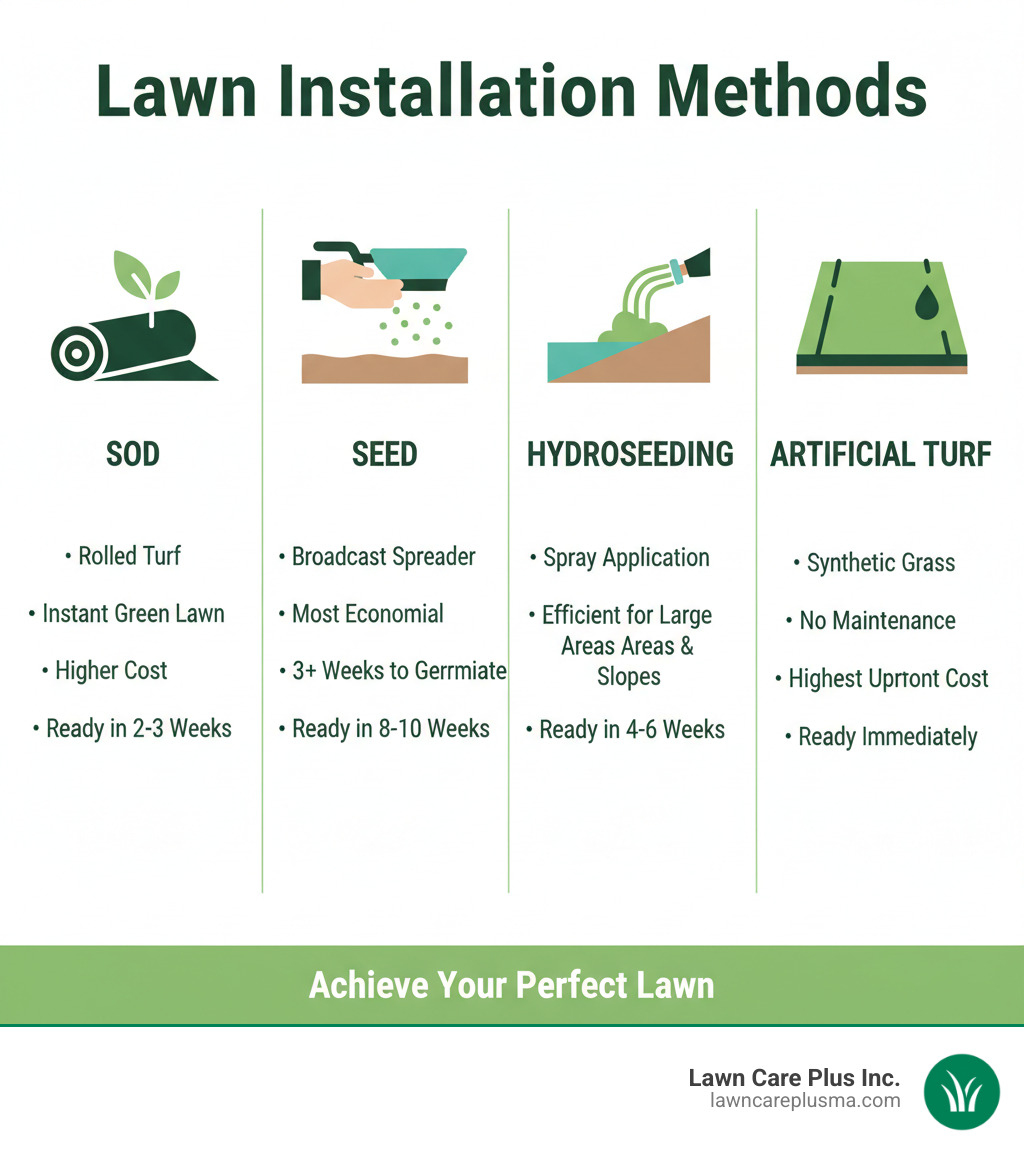
Lawn installations terms to know:
Choosing Your Installation Method: Sod, Seed, Hydroseeding, or Turf?
Your first big decision in any lawn installation project is choosing the right method. Each approach has its own timeline, budget, and level of involvement. Let’s review your four main options.
Sod: The Instant Lawn Solution
Sod is pre-grown grass that arrives in rolled strips, providing a lush, green lawn in a single afternoon. The biggest advantage is instant results. It’s also excellent for slopes where erosion is a concern and naturally crowds out weeds. Within two to three weeks, you can enjoy light foot traffic. The trade-offs are a higher upfront cost and the need for a strict watering schedule immediately after installation. For homeowners who want immediate curb appeal, sod is often worth the investment.
Seed: The Economical & Customizable Choice
Seeding is the budget-friendly approach, involving broadcasting grass seeds across prepared soil. The cost savings are significant, especially on large properties. You also get access to a wider variety of custom seed blends. However, patience is essential. Germination takes weeks, and a mature lawn takes several months. During this time, the new grass is vulnerable to weeds, erosion, and foot traffic.
Hydroseeding: The Efficient Sprayed-On Lawn
Hydroseeding is the middle ground between sod and seed. A machine sprays a slurry of grass seed, mulch, fertilizer, and a tacking agent onto your soil. This method is ideal for large areas or slopes where traditional seeding is impractical. The mulch promotes faster germination than dry seed, and the tacking agent provides good erosion control. It requires professional equipment but is faster than seeding and more affordable than sodding large areas.
Artificial Turf: The Low-Maintenance Alternative
Artificial turf is a synthetic grass that requires virtually no maintenance—no mowing, watering, or fertilizing. It’s durable and stays green year-round. The downsides are a substantially higher upfront cost, and it can get hot in direct sun. It also lacks the environmental benefits of real grass, like oxygen production and natural cooling.
Making Your Decision
Here’s how the three main natural lawn installation methods compare:
| Feature | Sod | Seed | Hydroseeding |
|---|---|---|---|
| Cost | Higher upfront | Lowest | Moderate |
| Time to Usable | 2-3 weeks for light use | 8-10 weeks (after germination) | 4-6 weeks (after germination) |
| Initial Care | Moderate (heavy watering) | High (diligent watering, protection) | Moderate (consistent watering) |
| Erosion Control | Excellent (instant) | Poor (vulnerable) | Good (tacking agent helps) |
| Weed Resistance | High (mature turf) | Low (vulnerable seedlings) | Moderate (mulch provides some protection) |
| DIY Feasibility | Possible, but labor-intensive | High | Low (requires specialized equipment) |
Your choice depends on your timeline, budget, and property. Need instant results? Sod is your answer. On a tight budget with time to wait? Seed is a great option. Have a large, sloped property? Hydroseeding is the ideal solution.
The Foundation: A Step-by-Step Guide to Soil Preparation
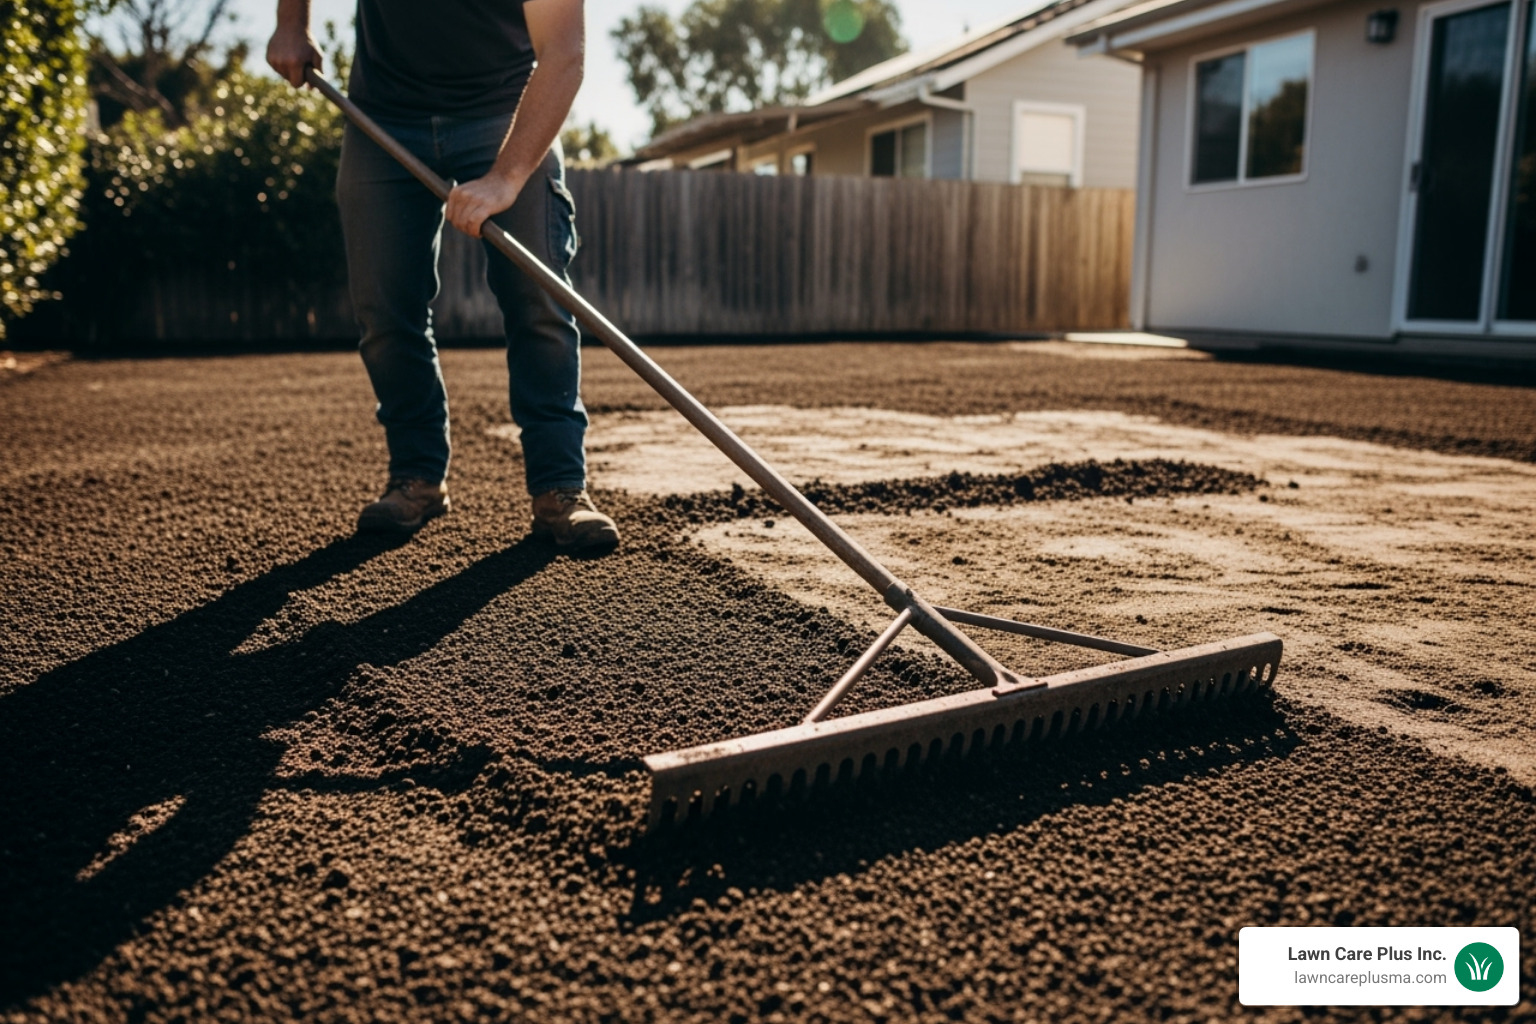
If your soil isn’t properly prepared, even the most expensive sod or seed will fail. Proper soil preparation is the foundation for a healthy lawn that will thrive for years, preventing issues with compaction, drainage, and nutrient deficiencies.
1. Soil Testing and pH Adjustment
Soil testing is essential for understanding your soil’s nutrient levels and pH balance. Most grasses thrive in a pH between 6.0 and 7.0. Outside this range, grass can’t absorb nutrients properly. We collect samples and send them to a lab, such as the UMass Soil and Plant Nutrient Testing Laboratory, to get a detailed report. Based on the results, we add lime to raise the pH (if acidic) or sulfur to lower it (if alkaline).
2. Removing Old Turf and Weeds
Starting with a clean slate is non-negotiable. Old grass and weeds compete with your new lawn for water and nutrients. We typically apply a non-selective herbicide and wait 2-4 weeks for it to work. Alternatively, a sod cutter can physically remove the old turf layer, eliminating pests and weed seeds.
3. Tilling and Aeration
Tilling the soil to a depth of 6-8 inches breaks up compacted layers, improves drainage, and creates a loose environment for new roots. For heavily compacted clay soils, core aeration removes small plugs of soil, improving air circulation and water penetration.
4. Grading for Proper Drainage
Proper grading ensures water flows away from your home’s foundation. We carefully contour the terrain, removing rocks and debris to create an even surface that prevents pooling water, which can drown grass roots and cause disease.
5. Adding High-Quality Topsoil and Amendments
We add 2-5 inches of high-quality topsoil to provide a nutrient-rich base. We also blend in organic compost, which improves soil structure, boosts fertility, and increases water retention. This step is crucial for changing heavy clay soil into a healthy growing medium.
6. Applying Starter Fertilizer
Just before installation, we apply a starter fertilizer formulated to promote strong root development. This specialized blend gives new grass the nutrients it needs to establish quickly without being overwhelmed.
These six steps are the most important investment you can make for a healthy, vibrant lawn. For more details, check out How to Install a New Lawn.
The Complete Guide to Professional Lawn Installations
While DIY lawn installation is possible, the difference between a good result and an exceptional one often comes down to professional expertise. At Lawn Care Plus Inc., we’ve seen how a slim margin for error can lead to years of frustration with uneven growth, drainage problems, or bare patches.
A professional brings years of hands-on experience with Massachusetts soil, weather patterns, and the grass varieties that thrive here. We use specialized equipment like power rakes and primary seeders to ensure a precise, efficient operation that’s nearly impossible to achieve by hand. Our systematic approach means your lawn installation is completed at the right time and in the right sequence, minimizing common problems and resulting in a beautiful, healthy lawn that establishes quickly.
Key Steps in Laying Sod for a New Lawn
When we install sod, we start by laying the first row along a long, straight edge like a driveway. We then lay subsequent rows in a staggered brick pattern to create structural integrity and prevent seams from separating. We butt each piece tightly against the next to eliminate gaps where weeds could grow.
For curved areas, we cut the sod to fit with a sharp knife for a clean appearance. On slopes, sod is laid horizontally and sometimes secured with staples to prevent slippage. The final, critical step is rolling the sod with a weighted lawn roller. This eliminates air pockets and ensures excellent root-to-soil contact, which is essential for fast, strong establishment.
Best Practices for Seeding a New Lawn
After preparing the soil, we use a calibrated broadcast spreader to distribute grass seed evenly. We then lightly rake the area to ensure good seed-to-soil contact without burying the seeds too deep. For added protection, a thin layer of weed-free grass straw mulch can be applied to keep seeds moist and stable. Germination typically takes around three weeks, during which the soil must stay consistently moist.
An Overview of the Hydroseeding Process for Lawn Installations
Hydroseeding uses specialized equipment to spray a slurry mixture of grass seed, fertilizer, fiber mulch, and a tacking agent over prepared soil. The mulch creates a protective, moisture-retaining blanket, while the tacking agent helps it adhere to the soil. This process is highly efficient and shines on large areas or slopes, providing excellent erosion control and promoting rapid, even germination. For more on this technique, visit our Hydroseeding guide.
Planning for Success: Timing, Grass Selection, and Costs
A beautiful lawn requires smart planning. Understanding the best time to install, selecting the right grass, and budgeting accurately are all critical for a successful lawn installation.
How to Choose the Best Type of Grass for Your New Lawn
Choosing the right grass is paramount in Massachusetts, where cool-season grasses thrive. These varieties prefer temperatures between 60°F and 75°F.
- Kentucky Bluegrass: Known for its lush, dark green color and dense growth. It recovers well from damage, making it great for high-traffic areas.
- Tall Fescue: Celebrated for its drought resistance and strong root system. It also offers good defense against pests like the Chafer Beetle.
- Perennial Ryegrass: Establishes quickly and is often used in seed mixes to improve lawn density.
Consider your lawn’s sunlight, foot traffic, and your desire for drought tolerance when making a selection. We can help you find the perfect grass for your property. Find more guidance on How to Choose the Best Type of Grass for Your New Lawn.
The Best Time of Year for Lawn Installations in Massachusetts
Timing is everything. For seeding cool-season grasses in Massachusetts, the ideal window is late August to mid-September. The warm soil and cool air reduce stress on seedlings, and there’s less weed competition. Spring seeding (mid-April to mid-May) is also possible but can be more challenging due to rising temperatures and aggressive weed growth.
Sodding is more flexible and can be done from spring through fall, as long as the ground isn’t frozen. However, we recommend avoiding installation during the peak heat of summer (July and August), which requires intensive watering. For optimal results, both seed and sod benefit from soil temperatures between 50°F and 65°F.
Estimating the Cost for New Grass Installation
Understanding potential costs is key for planning. Please note these figures are averages based on internet data and are not actual costs for Lawn Care Plus Inc. Prices vary based on location, project size, materials, and complexity.
- Sod Material: Internet data suggests costs between $0.30 and $2.55 per square foot.
- Professional Sod Installation: Including materials and labor, the range broadens to $1 to $6 per square foot. Slopes and intricate cuts can increase costs.
- Topsoil: Adding fresh topsoil can add $0.50 to $2.00 per square foot.
Seeding is more affordable, though professional service costs more than DIY. Hydroseeding typically falls between seeding and sodding in price, offering a good balance for larger areas. For an accurate quote, contact us directly. Our guide on the Cost of New Lawn Installation provides more detail.
Aftercare, Benefits, and Common Pitfalls
Your new lawn is installed, but the work isn’t over. The first few weeks after lawn installations are critical for long-term health and require attentive care.
Maintenance for a Newly Installed Sod Lawn
Watering is everything for new sod. The goal is to keep the sod and the soil beneath it consistently moist.
- Week 1: Water 3-4 times daily for 5-10 minutes each session. Avoid evening watering to prevent fungus.
- Week 2: Reduce watering to once daily for about 30 minutes, encouraging roots to grow deeper.
- Week 3 & Beyond: Water every other day, aiming for about one inch of water per week (including rain). By week four, the roots should be firmly established.
Hold off on mowing for at least 10 days. When you do mow, use the highest setting and never remove more than one-third of the blade length. Your lawn won’t need fertilizer for 4-6 weeks if a starter fertilizer was applied. Finally, keep all foot traffic off the grass for at least 3-4 weeks to allow the delicate roots to anchor without disturbance.
Avoiding Common Lawn Installation Problems
Even with professional lawn installations, some issues can arise. Here’s how to prevent them:
- Gaps Between Sod: We lay sod tightly to prevent gaps that invite weeds and cause edges to dry out.
- Poor Root Establishment: This is usually caused by insufficient watering or poor soil prep. Rolling the sod and following a strict watering schedule are key.
- Weed Competition: Thoroughly removing old turf and weeds before installation is the best defense.
- Pests and Disease: Proper watering (not at night) and choosing pest-resistant grass varieties help prevent these issues.
- Drainage Issues: Correct grading during soil preparation is essential to prevent standing water that drowns grass.
The Lasting Value of a Healthy Lawn
Professional lawn installations dramatically improve curb appeal and increase property value. Healthy lawns also provide environmental benefits by cooling the air, producing oxygen, and filtering pollutants. The dense root system prevents soil erosion and reduces stormwater runoff. While DIY can save money upfront, a professional ensures the job is done right, saving you hassle and leading to a more successful, long-lasting result.
Frequently Asked Questions about Lawn Installation
Here are answers to the questions we hear most about lawn installations.
Can I just lay new sod over my existing grass?
No, this is a shortcut that always backfires. New sod roots need direct root-to-soil contact to establish. A layer of old grass prevents this, causing the new sod to fail. The decomposing old grass also creates an uneven, spongy surface and can harbor diseases and pests. For a successful lawn installation, we always remove the existing turf completely.
What are the main advantages of choosing sod over grass seed?
Sod offers several key advantages over seed:
- Instant Lawn Appearance: You get a green lawn the same day it’s installed.
- Superior Weed Suppression: Mature sod is dense, giving weeds little opportunity to grow.
- Immediate Erosion Control: Sod holds soil in place from day one, which is critical on slopes.
- Usable Sooner: A sodded lawn can handle light foot traffic in 2-3 weeks, while a seeded lawn needs several months.
How long does the new lawn installation process take?
The timeline depends on several factors:
- Area Size: A small yard may take a day or two, while a large property could take a week or more.
- Prep Work: Sites with poor soil, drainage issues, or significant grading needs require more time for preparation.
- Installation Method: Sod installation is fast, often completed in a day. You can use the lawn lightly in 2-3 weeks. Seeding is also fast to apply, but you must wait about three weeks for germination and 8-10 weeks before the lawn is ready for regular use.
From start to finish, a straightforward sod project can be ready in a few weeks, while a seeded lawn can take three to four months to fully establish. For more details, see our guide on How Long Does the New Lawn Installation Process Take?.
Conclusion

Stepping onto a lush, healthy lawn built right from the ground up is deeply satisfying. The path to a beautiful lawn involves four key phases: thorough soil preparation, selecting the right method and grass, precise installation, and consistent aftercare. Skipping any of these steps can lead to years of preventable problems.
Think of your new lawn as a long-term investment. It boosts your home’s curb appeal, increases property value, and creates a beautiful outdoor space for your family to enjoy. Environmentally, your lawn works to cool the air, produce oxygen, and prevent soil erosion.
At Lawn Care Plus Inc., we’ve been creating thriving lawns across the Boston Metro-West area for years. Our experienced team knows the local soil, climate, and best practices for Massachusetts. We handle all the heavy lifting and technical details of lawn installations so you can skip straight to enjoying your beautiful new lawn.
Ready to transform your outdoor space? Get a quote for your professional lawn installation today, and let’s create the lawn you’ve been dreaming about.
