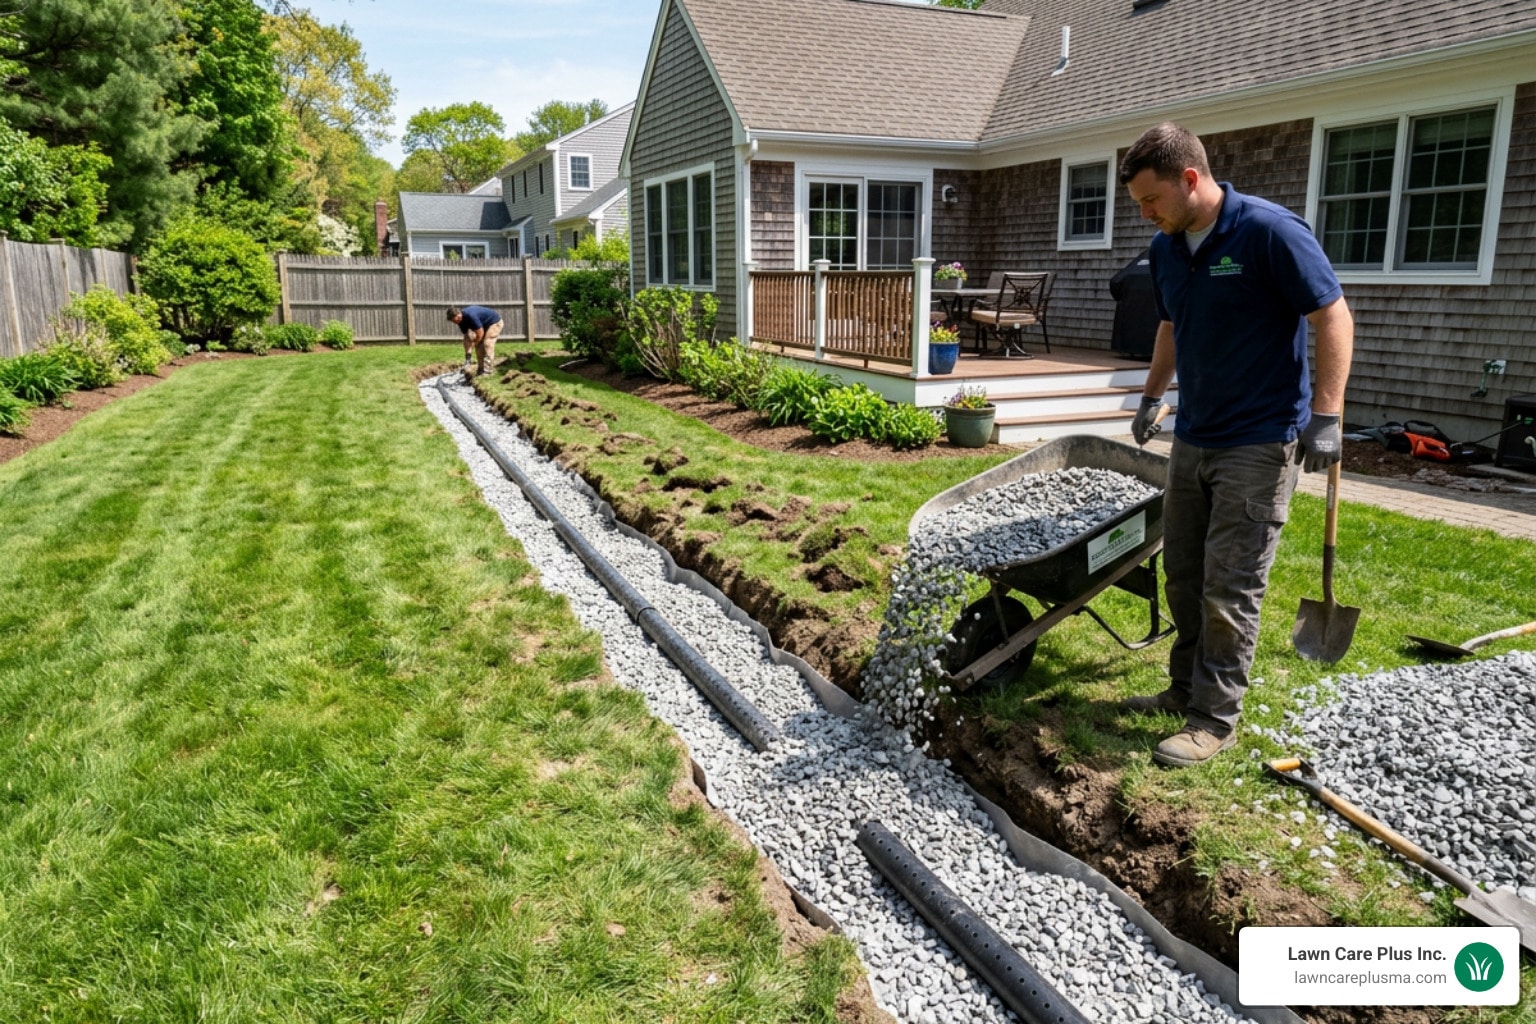
Is Your Backyard Flooding? Here’s What a French Drain Can Do
Backyard French drain installation is one of the most effective ways to stop standing water from damaging your yard, foundation, and home.
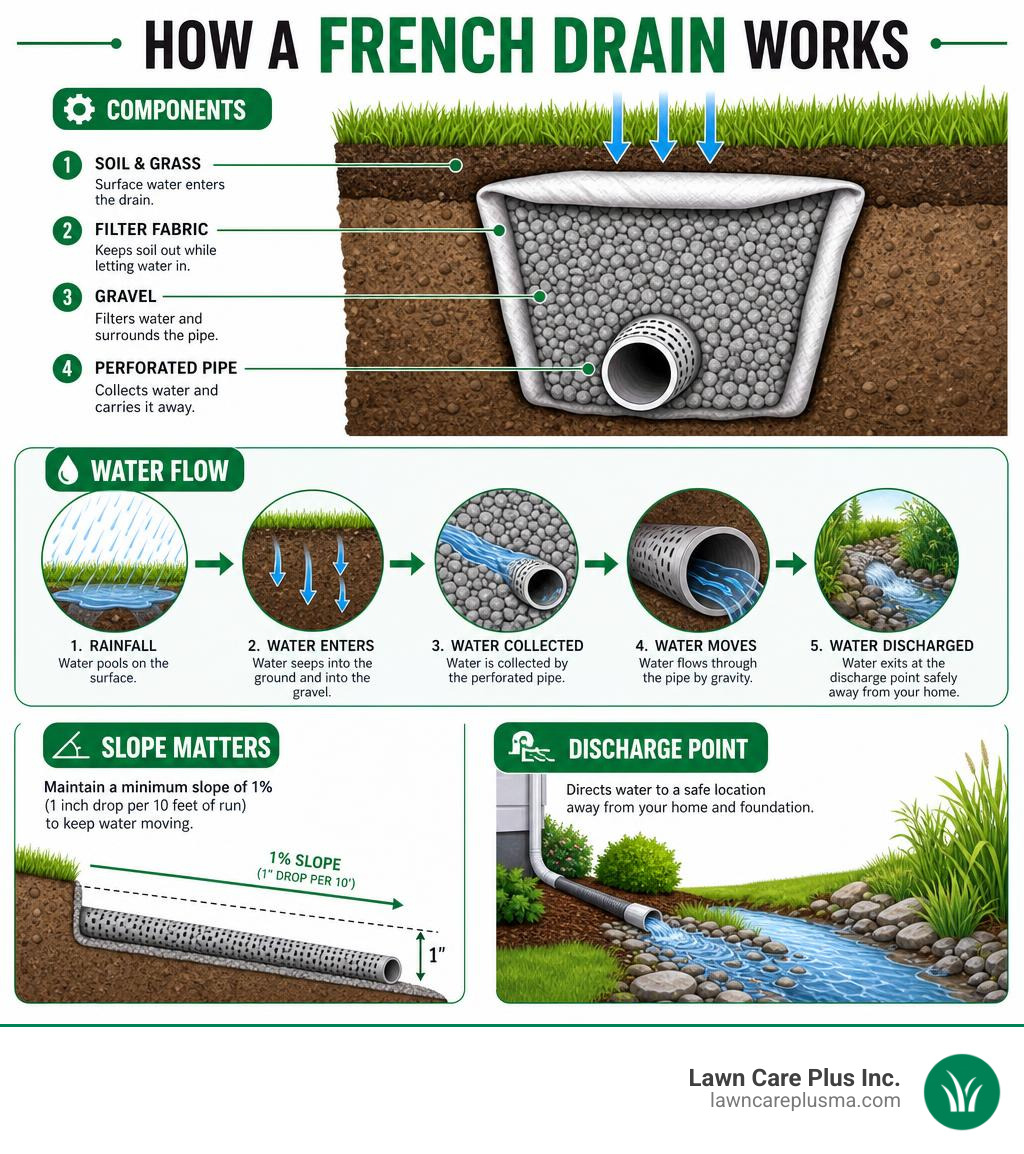
Here’s a quick overview of how it works:
- Dig a trench from the problem area toward a safe discharge point, sloped at least 1% (1 inch drop per 10 feet)
- Line the trench with non-woven geotextile fabric
- Add gravel as a base layer (2-3 inches)
- Lay perforated pipe with holes facing down
- Backfill with gravel, wrap the fabric over the top, and cover with soil
That’s the core process. The sections below walk through each step in detail — including materials, common mistakes, and cost.
Pooling water isn’t just an eyesore. Up to 70% of wet basement and foundation problems trace back to poor surface and subsurface drainage. Left unchecked, standing water can cause mold, wood rot, pest problems, and costly structural damage. The good news: a properly built French drain can solve most backyard water problems and last 20 to 30 years or more.
I’m Tim DiAngelis, owner of Lawn Care Plus, Inc., a full-service landscaping company serving Greater Boston and Metro-West — and our team has handled backyard French drain installation across dozens of New England properties with the heavy clay soils and wet springs that make drainage a real challenge here. In the sections below, I’ll walk you through everything you need to know to plan, install, and maintain a French drain that actually works.
Backyard french drain installation further reading:
Planning Your Backyard French Drain Installation
Before picking up a shovel or renting a trencher, you need a solid plan. A French drain relies entirely on gravity to carry water away, which means the design must work with the natural contours of your property.
We always begin by evaluating the overall site grading. If you don’t map out your route and secure the correct slope, water will simply pool inside the pipe, turning your new drain into an expensive underground puddle.
Additionally, safety and legal requirements must come first. Excavating without knowing what lies beneath is incredibly dangerous. In Massachusetts, you are legally required to notify utility companies before you dig. Always call Dig Safe (811) at least 72 hours before starting your project to have underground gas, electric, water, and fiber-optic lines clearly marked.
For more details on how these systems integrate with your home’s infrastructure, check out our guide on domestic drainage systems.
Choosing the Best Route and Discharge Point
Your French drain route should start in the wettest part of your yard (the low spots where water naturally pools) and travel downhill to a safe discharge zone.
Common discharge points include:
- A daylight outlet: This is where the pipe simply exits the side of a slope, letting water flow naturally onto the surface.
- A dry well: An underground plastic basin surrounded by gravel that collects runoff and allows it to slowly percolate back into the soil.
- A municipal storm drain: This requires explicit permission and permits from your local town hall (such as in Belmont, Newton, or Brookline).
Crucial Rule: Never direct your drainage water toward a neighbor’s property or close to your own foundation. Your drain must discharge at least 10 feet away from any residential structure. For additional strategy tips, review these step-by-step planning tips.
Calculating Trench Depth, Width, and Slope
To keep water moving smoothly, your trench must follow the “1% slope rule.” This means the trench must drop at least 1 inch for every 10 feet of length (some contractors prefer a slightly steeper 2% slope for shorter runs to ensure sediment doesn’t settle).
For standard residential yard drainage, we recommend a trench that is:
- Width: 12 to 18 inches wide.
- Depth: 18 to 24 inches deep.
If you are trying to intercept water to protect a basement or crawlspace, the trench may need to go deeper—down to the level of your foundation footings. To learn more about compact or shallow drainage designs, read our article on small French drains.
Essential Tools and Materials for DIY Drainage
Having the correct equipment on hand makes a massive difference in how quickly and successfully your project goes.
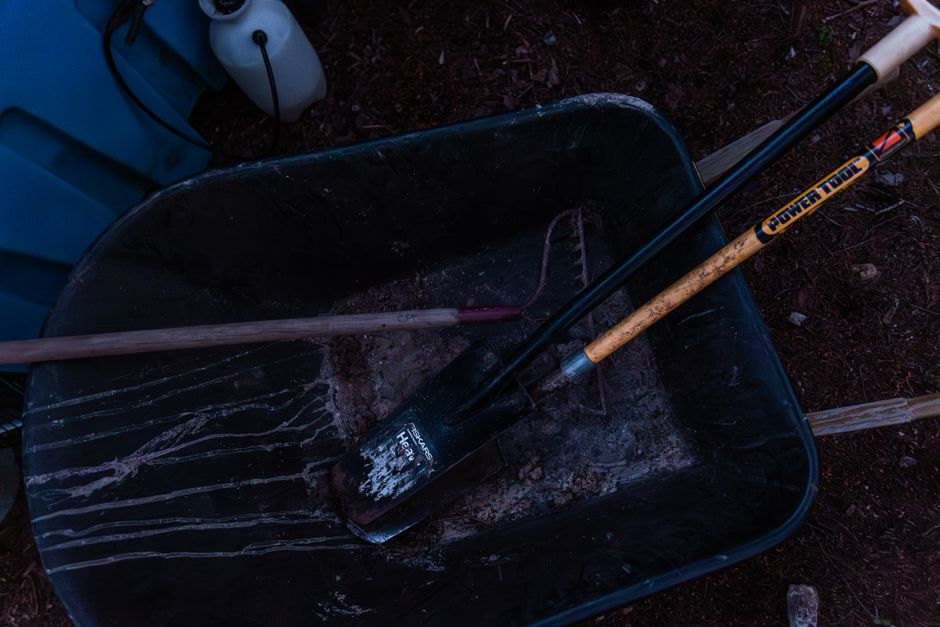
For a successful DIY installation, you will need:
- Hand tools: Trenched shovels, a wheelbarrow, a hand tamper, and a pickaxe (highly useful for rocky New England soils).
- Layout tools: Stake pegs, high-visibility string, a line level, or a rented laser level to verify your slope.
- Heavy machinery (Optional but recommended): A walk-behind trencher and a plate compactor.
Selecting the Right Pipe and Gravel
Do not cut corners on your materials. The pipe and stone you choose will dictate whether your drain lasts 3 years or 30 years.
- The Pipe: We strongly advise using rigid PVC Schedule 40 perforated pipe instead of thin, flexible corrugated HDPE pipe. Rigid PVC is smooth on the inside, which prevents sediment buildup, resists crushing from heavy loads, and is significantly easier to clean out with a plumbing snake.
- The Gravel: You must use washed round gravel (3/4-inch to 1.5-inch in size). Washed stone has had all the fine dust and “fines” rinsed off. Avoid crushed stone or road base gravel; crushed aggregate compacts tightly over time, reducing the void space between the rocks by 30% to 40% and choking off your water flow.
For a deeper dive into material sourcing, check out this gravel selection guide.
Why Geotextile Fabric is Critical for Backyard French Drain Installation
If you skip landscape fabric—or use the wrong type—your French drain is virtually guaranteed to fail within 3 to 5 years.
You must use non-woven geotextile fabric (ideally rated at 4 to 6 ounces per square yard).
Unlike woven weed-barrier fabric, non-woven geotextile acts like a high-performance filter. It allows water to pass through effortlessly while holding back microscopic silt and clay particles. Without it, the surrounding soil will slowly wash into your gravel bed, filling the void spaces and completely clogging the system.
To learn more about selecting the right fabric weight, read our guide on geotextile for French drains.
Step-by-Step Guide to Installing a French Drain
Once you have your permits, marked your utilities, and gathered your materials, it is time to begin the physical installation.

Excavation and Trenching
Digging is the most labor-intensive part of the process. If you are digging a 50-foot trench by hand, expect a full weekend of intense physical labor.
If you want to save your back, we highly recommend renting a walk-behind trencher from a local tool supplier. A job that takes 12 hours with a shovel can easily be completed in 2 to 3 hours with a trencher.
As you dig, keep these regional soil factors in mind:
- Clay Soils: Many areas around Boston, Milton, and Canton feature heavy clay soils. Clay packs tightly and drains slowly, meaning you should dig your trench slightly wider (up to 18 inches) to allow for a larger gravel envelope.
- Rocky Glacial Till: Be prepared to encounter large stones and roots. If you run into massive obstacles, you may need a pickaxe or a mini-excavator.
For operating tips, consult this trenching equipment guide.
Laying the Pipe and Backfilling
Once your trench is excavated and you have verified a consistent downhill slope, follow these steps to assemble the drain:
- Line the Trench: Lay your non-woven geotextile fabric inside the trench. Ensure the fabric is wide enough to line the bottom, climb up both vertical walls, and leave at least 12 inches of excess fabric flapped over the sides.
- Add Bedding Gravel: Pour 2 to 3 inches of washed round gravel along the bottom of the fabric-lined trench. This acts as a smooth, stable bed for your pipe.
- Orient the Pipe (CRITICAL): Lay your perforated PVC pipe on top of the gravel bed. The holes must face down (specifically at the 4 o’clock and 8 o’clock positions).
- Why? Water rises from the bottom of the trench as the groundwater level swells. Facing the holes downward allows the water to enter the pipe immediately and flow away.
- Cover with Gravel: Pour more washed gravel into the trench, covering the top of the pipe by at least 10 to 12 inches.
- The Burrito Fold: Fold the excess flaps of geotextile fabric over the top of the gravel. This completely seals the gravel and pipe inside a clean, dirt-free fabric envelope.
- Backfill and Compact: Cover the fabric wrap with a few inches of sand or coarse soil, then top with your native soil or turf. Lightly compact the surface using a hand tamper or plate compactor to prevent future settling.
For visual demonstrations of this process, refer to the HGTV French drain guide.
Common Mistakes to Avoid
Roughly 40% of DIY French drains fail prematurely due to simple, preventable installation errors.
To ensure your hard work pays off, keep an eye out for these critical mistakes:
- Creating a “Dead End”: A drain must have a physical, open outlet. If you run your pipe into the ground without a daylight exit, dry well, or sump connection, the water will simply back up and saturate your yard.
- Using Cheap Weed Fabric: Standard woven landscape fabric will clog with fine silt within 24 months, rendering your drain useless.
- Connecting Downspouts Directly: Never tie your roof downspouts directly into your perforated French drain pipe. The leaves, twigs, and massive water volume from your roof will quickly overwhelm the trench and fill it with debris. Keep downspouts on a separate, solid PVC line.
How to Avoid Failure in Your Backyard French Drain Installation
Beyond the basics, you must plan for long-term environmental factors. Clay soils require extra care because fine clay particles can easily bypass thin filters.
Additionally, tree roots pose a serious threat. Roots naturally seek out the moisture inside drainage lines. If you must route your drain near large maples or oaks, consider installing a solid pipe section through the root zone, or use root barriers to protect your trench.
For more strategies on managing root intrusion, read our article on roots in French drains.
Cost Analysis: DIY vs. Professional Installation
Note: The following cost estimates are average market ranges compiled from nationwide internet data. They do not represent exact pricing for Lawn Care Plus, Inc. Every property presents unique grading, soil, and access challenges that require an on-site evaluation.
Installing a French drain yourself is highly cost-effective if you have the time and physical stamina. However, hiring a professional saves you days of grueling labor and guarantees the system is engineered correctly.
| Expense Category | DIY Cost (Per 100 Linear Feet) | Professional Cost (Per 100 Linear Feet) |
|---|---|---|
| Permits & Utility Locates | $0 (DIY Call to 811) | Included |
| Equipment Rental (Trencher, etc.) | $150 – $350 | Included |
| Rigid PVC Perforated Pipe (4″) | $150 – $300 | Included |
| Washed Round Gravel (approx. 10 tons) | $400 – $700 | Included |
| Non-Woven Geotextile Fabric | $100 – $200 | Included |
| Professional Labor & Grading | $0 | $2,500 – $12,000+ |
| Total Estimated Project Cost | $800 – $1,750 | $2,500 – $12,000+ |
When looking at average market pricing, costs typically range from $8 to $15 per linear foot for DIY materials, compared to $25 to $120+ per linear foot for professional installation. The wide variation on the professional end depends heavily on factors like trench depth, soil composition (such as dense New England clay), tree root removal, and hardscape restoration (such as rebuilding walkways or patios that the drain must pass under).
To compare these averages with national database benchmarks, you can view the Angi French drain cost guide.
Frequently Asked Questions about French Drains
Should perforated pipe holes face up or down?
The holes must face down. Water enters the French drain from below as the groundwater table rises. If the holes face up, the water level in the trench has to rise all the way to the top of the pipe before it can drain away, leaving the bottom half of your trench permanently muddy and flooded.
How long does a French drain last?
A high-quality French drain built with rigid PVC pipe, washed round gravel, and heavy non-woven geotextile fabric will easily last 20 to 30 years or more. Systems built with cheap corrugated pipe and no filter fabric often fail within 3 to 5 years.
What maintenance is required for a French drain?
We recommend an annual inspection. Every autumn, check your discharge point to clear away leaves and debris.
Pro Tip: Install a clean-out port (a vertical PVC pipe extending to the surface with a screw-on cap) at the beginning of your drain run. This allows you to insert a garden hose and flush the system with water once a year to clear out any trace silt.
Conclusion
A backyard French drain is a highly reliable, time-tested solution to get rid of standing water and protect your home’s foundation from costly moisture damage. While a DIY installation is entirely possible for handy homeowners with a free weekend, it is physically demanding work that requires absolute precision when calculating slopes and handling heavy materials.
If you live in the Boston Metro-West area—including Belmont, Newton, Brookline, Dedham, Milton, or surrounding towns—and would prefer to leave the heavy lifting to the experts, we are here to help. At Lawn Care Plus, Inc., our experienced team handles everything from site grading and excavation to seamless hardscape restoration.
Contact Lawn Care Plus Inc. for professional drainage solutions today to schedule your on-site evaluation and keep your property dry year-round!