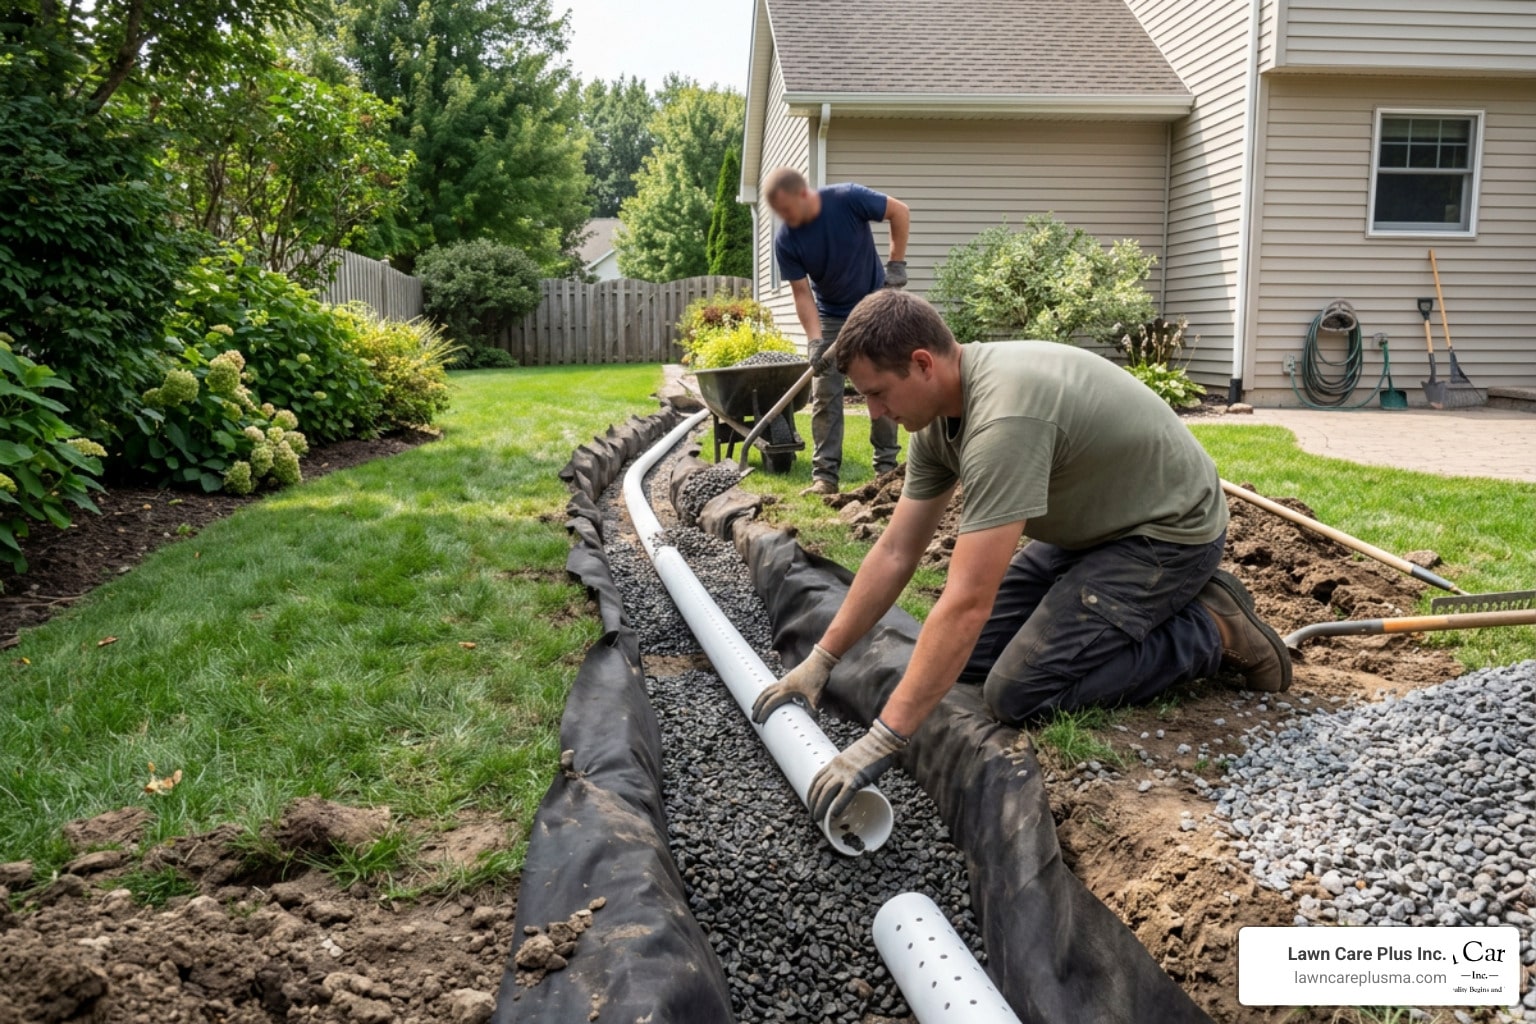
Is Your Yard Holding Water After Every Rain?
Building a French drain in your yard is one of the most effective ways to stop standing water, protect your foundation, and keep your lawn healthy year-round.
Here’s how to build a French drain in your yard — quick overview:
- Dig a trench 18 inches deep and 12 inches wide, sloping at least 1 inch per 10 feet toward your outlet point
- Line the trench with non-woven geotextile fabric to prevent soil from clogging the system
- Add a gravel bed (3 inches) and lay 4-inch perforated pipe with holes facing down
- Backfill with gravel and fold the fabric over the top like a burrito
- Cover with topsoil and restore your lawn surface
That’s the core of it. The details — slope, materials, soil type — are what make or break the system.
Standing water isn’t just an eyesore. It can:
- Harbor mosquito larvae and other pests
- Cause wood rot in decks, fences, and siding
- Seep into your foundation and flood your basement
- Kill grass and damage landscape plantings
In fact, 70% of wet basement and foundation problems trace back to inadequate surface and subsurface drainage — problems that a properly designed French drain can often solve.
If you’re dealing with soggy spots that linger for days after a rainstorm, you’re not alone. It’s one of the most common issues we see on Greater Boston and Metro-West properties, especially on lots with clay-heavy soils and older grading.
I’m Tim DiAngelis, owner of Lawn Care Plus, Inc., a full-service landscaping company based in Roslindale, Massachusetts — and building a French drain in your yard is something our team handles regularly across Greater Boston. In this guide, I’ll walk you through exactly how to do it right, what materials to use, and when it makes sense to call a pro.
Building a french drain in your yard terms explained:
What is a French Drain and How Does It Work?
Despite its elegant-sounding name, the French drain is a remarkably simple, gravity-powered system. Fun fact: It wasn’t invented in France at all! It was popularized in the 1850s by Henry French, a Massachusetts farmer and judge, who wrote a groundbreaking book on farm drainage.
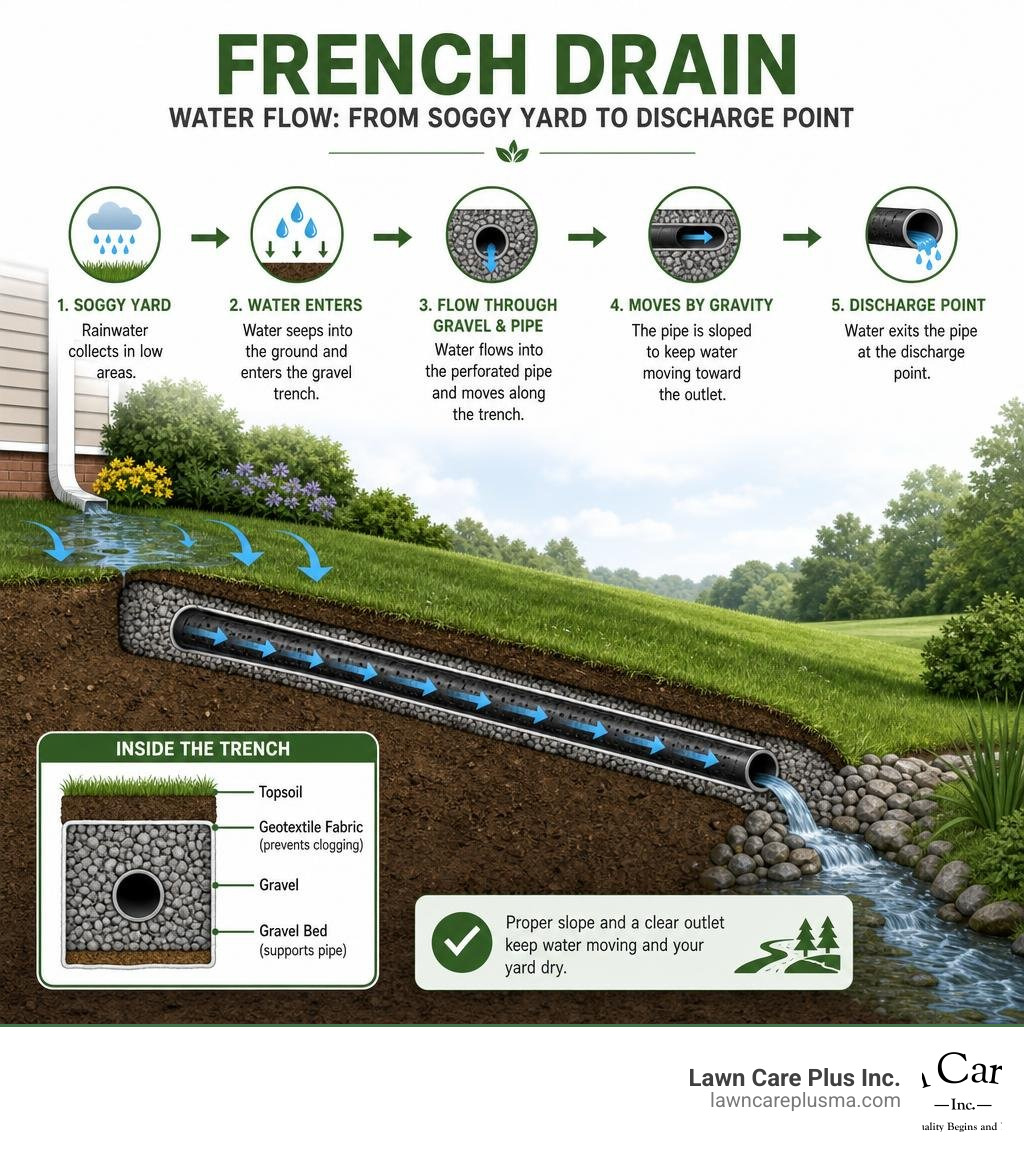
At its core, a French drain is a gravel-filled trench containing a perforated pipe. It works on a simple principle of physics: water always seeks the path of least resistance.
When heavy rain falls or snow melts on your property, water saturates the soil. Without a clear escape route, this groundwater creates hydrostatic pressure against your home’s foundation, eventually seeping through microscopic cracks in the concrete.
By building a french drain in your yard, you create an easy, open pathway. Water percolates through the soil, enters the highly permeable gravel trench, falls into the perforated pipe, and flows safely away via gravity to a designated discharge point.
For more details on how these systems integrate with other drainage components, check out our Drainage Solutions Complete Guide or read the classic How to Install French Drains | HGTV guide.
When to Choose a French Drain vs. Swales or Dry Wells
We often get asked by homeowners in Newton, Brookline, and Wellesley whether they actually need a French drain, or if a swale or dry well would do the trick. The answer depends entirely on whether you are dealing with surface runoff or subsurface groundwater.
- Swales: These are wide, shallow, vegetated channels designed to direct surface water during a storm. They are excellent for handling rapid storm runoff but won’t do much for a high water table or water-logged soil that stays spongy for days.
- Dry Wells: These are large underground plastic basins (or stone pits) designed to collect a high volume of water quickly and let it slowly dissipate into the surrounding soil. They are fantastic destination points for downspouts but require soils with good percolation rates.
- French Drains: These are the ultimate solution for intercepting subsurface groundwater, relieving hydrostatic pressure against foundations, and drying out chronically soggy turf areas.
| Solution | Best Used For | Visual Impact | Key Limitation |
|---|---|---|---|
| Swale | Rapid surface runoff, sloping properties | Visible grassy depression | Requires significant yard space |
| Dry Well | Storing and dispersing concentrated roof runoff | Completely hidden underground | Fails in heavy, impermeable clay |
| French Drain | High groundwater, soggy soil, foundation protection | Hidden (covered by grass or decorative stone) | Requires a downhill outlet point |
Planning, Designing, and Sourcing Materials for Building a French Drain in Your Yard
Before you grab a shovel or head to the local home improvement store, successful planning is critical. Skipping these steps is why 40% of DIY French drains fail within 3 to 5 years.
First, call 811 to mark your underground utilities. It is free, it is the law, and it prevents you from accidentally slicing through a gas, water, or fiber-optic line in your front yard.
Second, understand local regulations. Here in Massachusetts, the Massachusetts Wetlands Protection Act strictly regulates any grading or drainage modifications near protected wetlands, streams, or riverfront areas. If your property in Belmont, Milton, or Medfield is near a wetland, you must consult your local Conservation Commission before starting.
When sourcing materials, do not cut corners. Here is what you need:
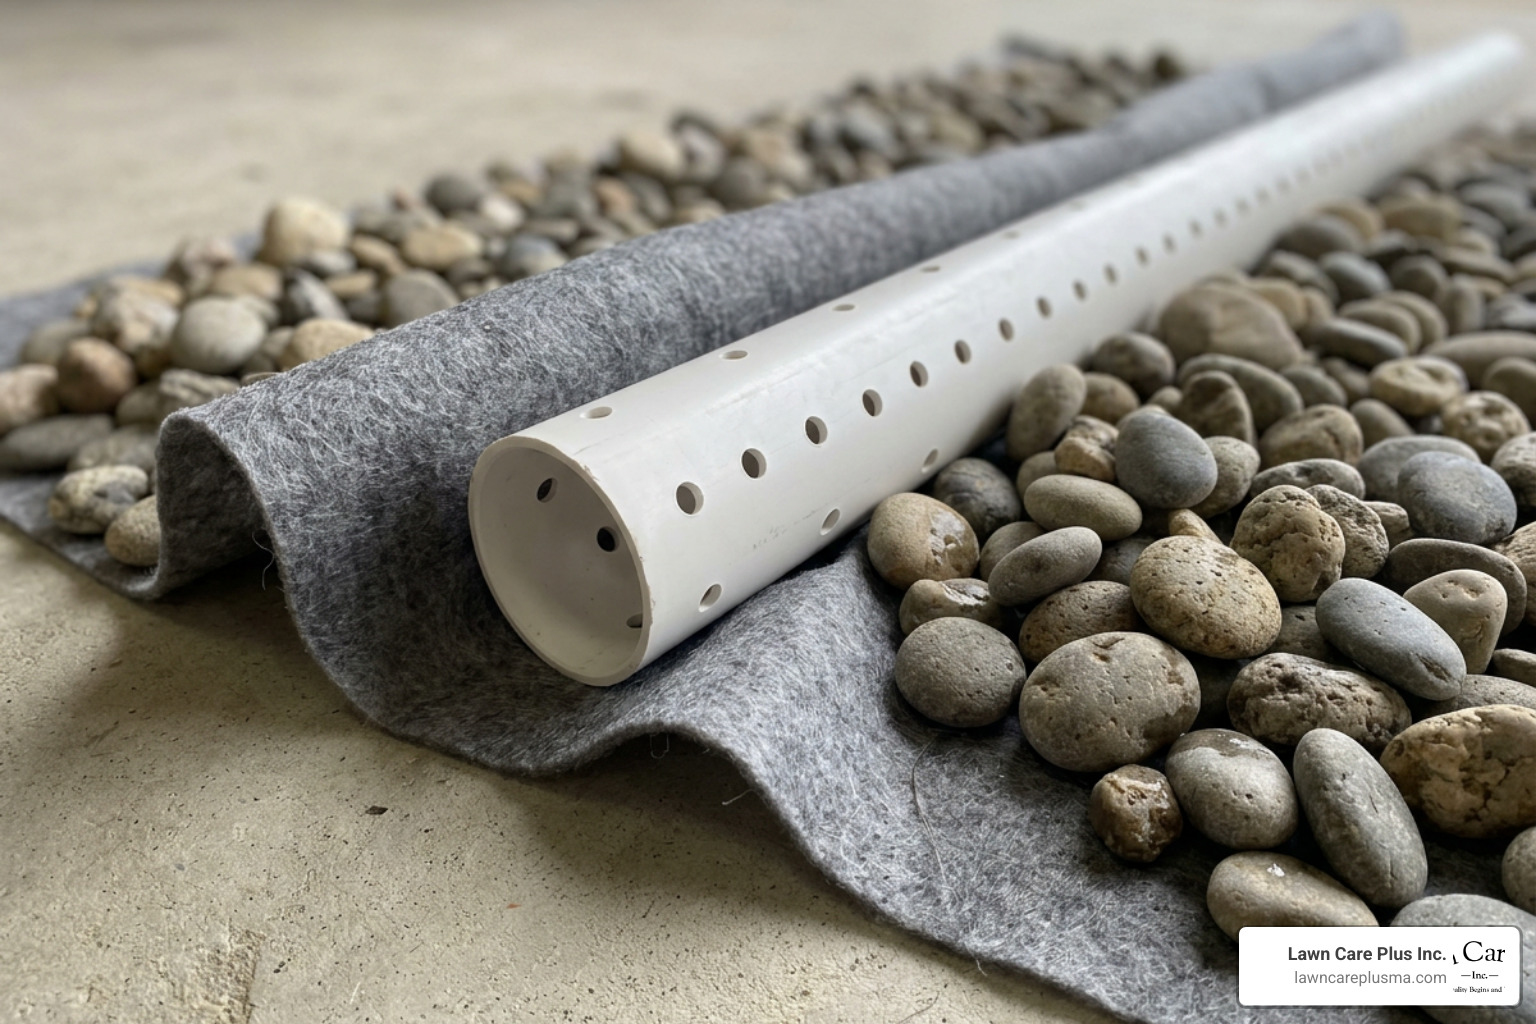
- The Pipe: You have two main choices: rigid PVC (SDR35 or Schedule 40) or corrugated HDPE. While corrugated pipe is flexible and easier to lay, we strongly recommend rigid PVC. It has a smooth interior that resists clogs, is much easier to clear with a sewer snake, and lasts 50 to 100 years.
- The Stone: Use clean, washed round gravel (3/4-inch to 1.5-inch). Never use “crushed stone with fines” or road base gravel. These contain small dust particles that will quickly pack together and clog your system. Washed round stone maintains a 40% to 45% void space, allowing water to flow freely.
- The Fabric: This is the single most important material. You must use a professional-grade, non-woven geotextile fabric (typically 4oz weight). Never use standard woven landscape fabric. Woven fabric is designed to block weeds, not filter water, and it will clog with fine silt in a year or two. For more on this, read our guide on Geotextile for French Drain.
Calculating Slope and Outlet Locations for Building a French Drain in Your Yard
Water does not run uphill. To keep water moving, your trench must follow the 1% slope rule (a minimum of 1 inch of drop for every 10 feet of horizontal run). If you have a flat yard, you will have to dig progressively deeper as you go to artificially create this slope.
You also need a legal, safe discharge point. You cannot simply dump your yard water onto your neighbor’s property, nor can you discharge it directly onto a public street or sidewalk where it can freeze and create a winter skating rink.
Great options for outlets include:
- Daylighting the pipe on a downward slope far away from the house.
- Directing the flow into a buried dry well.
- Connecting to a municipal storm sewer (with proper local permits).
For more detailed strategies on managing elevation challenges, check out our guide on Drainage Solutions for Sloping Land.
How Clay Soil Affects Building a French Drain in Your Yard
If you live in the Metro-West area — in places like Needham, Dedham, or Norwood — you are probably familiar with heavy, compacted clay soil. Clay holds onto water like a sponge and drains incredibly slowly.
When building a french drain in your yard in clay-heavy soil, you must adjust your design:
- Widen the trench: Instead of a standard 12-inch trench, dig it 18 to 24 inches wide. This creates a larger gravel envelope to capture water.
- Upsize the pipe: Consider upgrading from a 4-inch pipe to a 6-inch pipe to handle larger volumes of slow-moving water.
- Avoid soil compaction: Digging when clay is wet can “smear” the trench walls, sealing off the natural pores in the soil. Always wait for a dry spell to dig.
How to Build a French Drain in Your Yard in 5 Steps
Now that you have planned your route, called 811, and gathered your materials, it is time to start digging. If you want to compare these steps with other DIY approaches, you can review How to Install a French Drain – The Home Depot or check our quick guide on How to Install a Backyard French Drain in 5 Easy Steps.
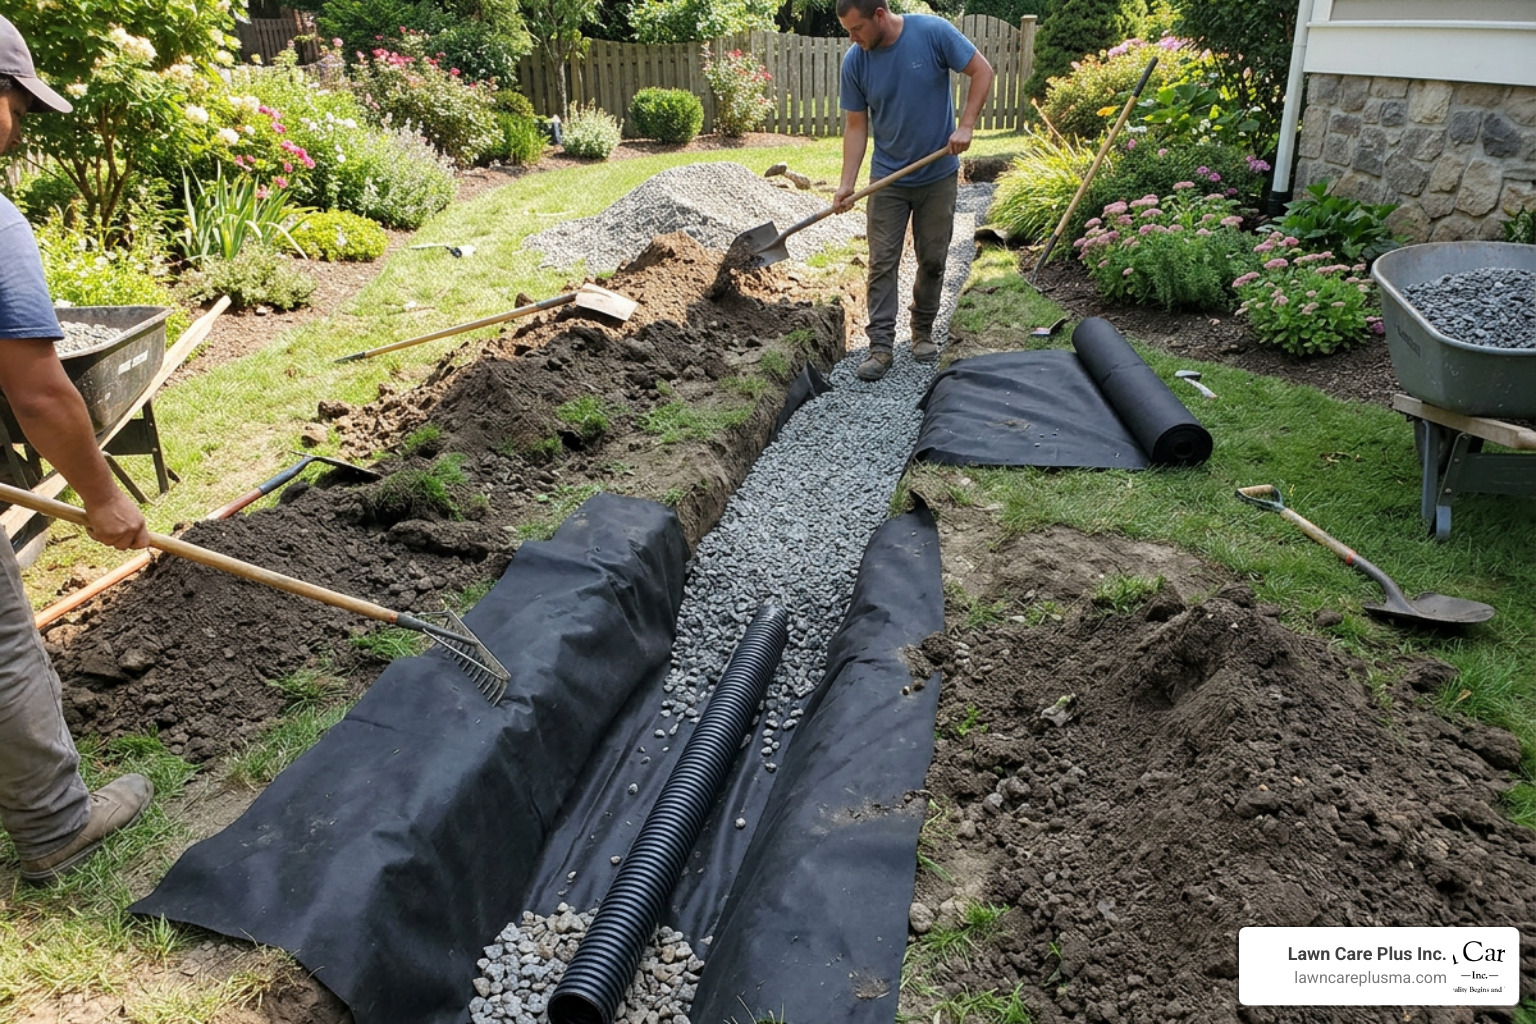
Step 1: Excavate the Trench with the Proper Slope
Mark your route using landscape spray paint. For a standard residential yard drain, aim for a trench that is 18 inches deep and 12 inches wide.
To verify your slope, do not rely on your eyes — optical illusions in yards are incredibly common. Instead, use a laser level or a simple string line with a line level. Drive stakes at the beginning and end of your run, tie a tight string between them, and measure down to the bottom of the trench every 10 feet to ensure a consistent, downward slope.
Step 2: Line the Trench with Geotextile Fabric
Once your trench is clean and properly sloped, line it with your non-woven geotextile fabric. Lay the fabric flat against the bottom and sides of the trench, leaving at least 12 to 18 inches of excess fabric spilling out over the sides.
This excess fabric is crucial; you will eventually fold it over the top of the gravel like a burrito. This “burrito wrap” method creates a complete barrier, keeping fine silt and soil out of your clean gravel while letting water pass through effortlessly.
Step 3: Pour the Gravel Bed and Lay the Perforated Pipe
Pour a 3-inch base layer of washed round gravel along the bottom of the fabric-lined trench. Smooth it out and verify that your slope is still correct.
Next, place your perforated pipe on top of this gravel bed.
CRITICAL STEP: The holes (or slots) in your perforated pipe must face DOWN, not up. We often see DIYers place the holes facing up, thinking water falls into the pipe from above. In reality, groundwater rises from the bottom of the trench. Placing the holes down (specifically at the 4 o’clock and 8 o’clock positions) allows water to enter the pipe immediately and drain away before the trench can fill up.
Step 4: Backfill with Gravel and Fold the Fabric
With the pipe in place, backfill the trench with more washed round gravel. Fill it until the gravel is about 2 to 3 inches below the surface of the yard.
Once the gravel is poured, take the excess geotextile fabric from the sides of the trench and fold it over the top of the gravel, overlapping the layers by at least 6 inches. This completes the protective envelope.
Step 5: Cover with Topsoil and Restore Your Lawn
To finish the installation, place a thin layer of coarse sand over the folded fabric to assist with water transition, then fill the remaining 2 to 3 inches of the trench with quality topsoil.
Lightly tamp the soil to prevent future settling, and then restore your lawn. You can either plant grass seed or roll out fresh sod over the trench. Once the grass grows in, your highly effective French drain will be completely invisible!
Cost Analysis and Common Mistakes to Avoid
Why do so many DIY drainage projects fail? Usually, it comes down to a few easily avoidable mistakes.
The Most Common French Drain Mistakes:
- Skipping the filter fabric: Systems without non-woven geotextile fabric can clog with soil migration in clay soils within 5 to 10 years, rendering the drain useless.
- Placing holes facing up: This forces the water table to rise much higher before it can enter the pipe, keeping your yard soggy.
- Routing downspouts directly into the perforated pipe: Roof water carries shingle grit and leaves that will quickly clog your French drain. Downspouts should always be routed through a separate, solid pipe.
- No cleanout access: If you do not install a cleanout riser, you will have no way to flush the system if a clog does occur.
DIY vs. Professional Installation Costs
Note: The following cost estimates are average costs based on internet data and do not represent the actual pricing of Lawn Care Plus, Inc.
When deciding whether to tackle this as a weekend project or hire a professional landscaping team, it helps to understand the financial breakdown.
- DIY Costs: If you choose to build the drain yourself, materials (including pipe, geotextile fabric, and washed stone) typically run about $8 to $25 per linear foot. If you choose to rent a walk-behind trencher to save your back, expect to add $150 to $350 per day for equipment rental.
- Professional Costs: Professional French drain installation costs generally range from $30 to $75 per linear foot for straightforward yard drainage. However, deeper foundation drains or highly complex systems requiring specialized grading and excavation can reach $80 to $250+ per linear foot.
While DIY saves on labor, professional installation ensures the grading is mathematically perfect, local conservation laws are followed, and the excavation is done safely around existing utilities. For a professional evaluation of your property, you can explore our land drainage system services.
Frequently Asked Questions About Yard Drainage
How long does a properly installed French drain last?
A properly installed French drain using high-quality materials, rigid PVC pipe, and professional-grade non-woven geotextile fabric typically lasts 30 to 40 years. Without fabric, the system will likely clog and fail within 5 to 10 years, especially in clay-heavy soils.
Can I connect my roof downspouts directly into a French drain?
No. This is a very common mistake. Roof runoff contains debris and shingle silt that will clog your French drain from the inside out. Furthermore, heavy downpours can overload the French drain, forcing water out of the perforations and saturating the soil right next to your foundation. Always run downspouts through a separate, solid pipe system.
What type of maintenance does a French drain require?
We recommend an annual inspection. During a heavy rainstorm, check your discharge point to ensure water is flowing freely. If you installed cleanout ports, you can flush the system once a year with a garden hose to clear out any small sediment that may have bypassed the fabric.
Conclusion
Building a French drain in your yard is an excellent investment in your property’s long-term health. It keeps your basement dry, protects your foundation from structural shifting, and turns a soggy, unusable lawn back into a beautiful outdoor space.
While a small, shallow yard drain can be a manageable weekend project for an ambitious DIYer, larger systems — especially those near foundations, retaining walls, or on properties with heavy clay and complex slopes — are best left to the professionals.
At Lawn Care Plus, Inc., we have years of experience designing and installing custom drainage systems across Greater Boston, including Belmont, Brookline, Newton, Wellesley, and Walpole. We understand local soils, New England’s challenging freeze-thaw cycles, and how to protect your landscape beautifully.
If you would rather leave the heavy digging to us, we are here to help. Schedule a consultation with Lawn Care Plus Inc. today, and let’s get your yard draining properly!