The Best Time to Install a New Lawn: Quick Answers for Homeowners
Wondering when is the best time to install new lawn in the Boston area? Here’s the no-nonsense answer, upfront:
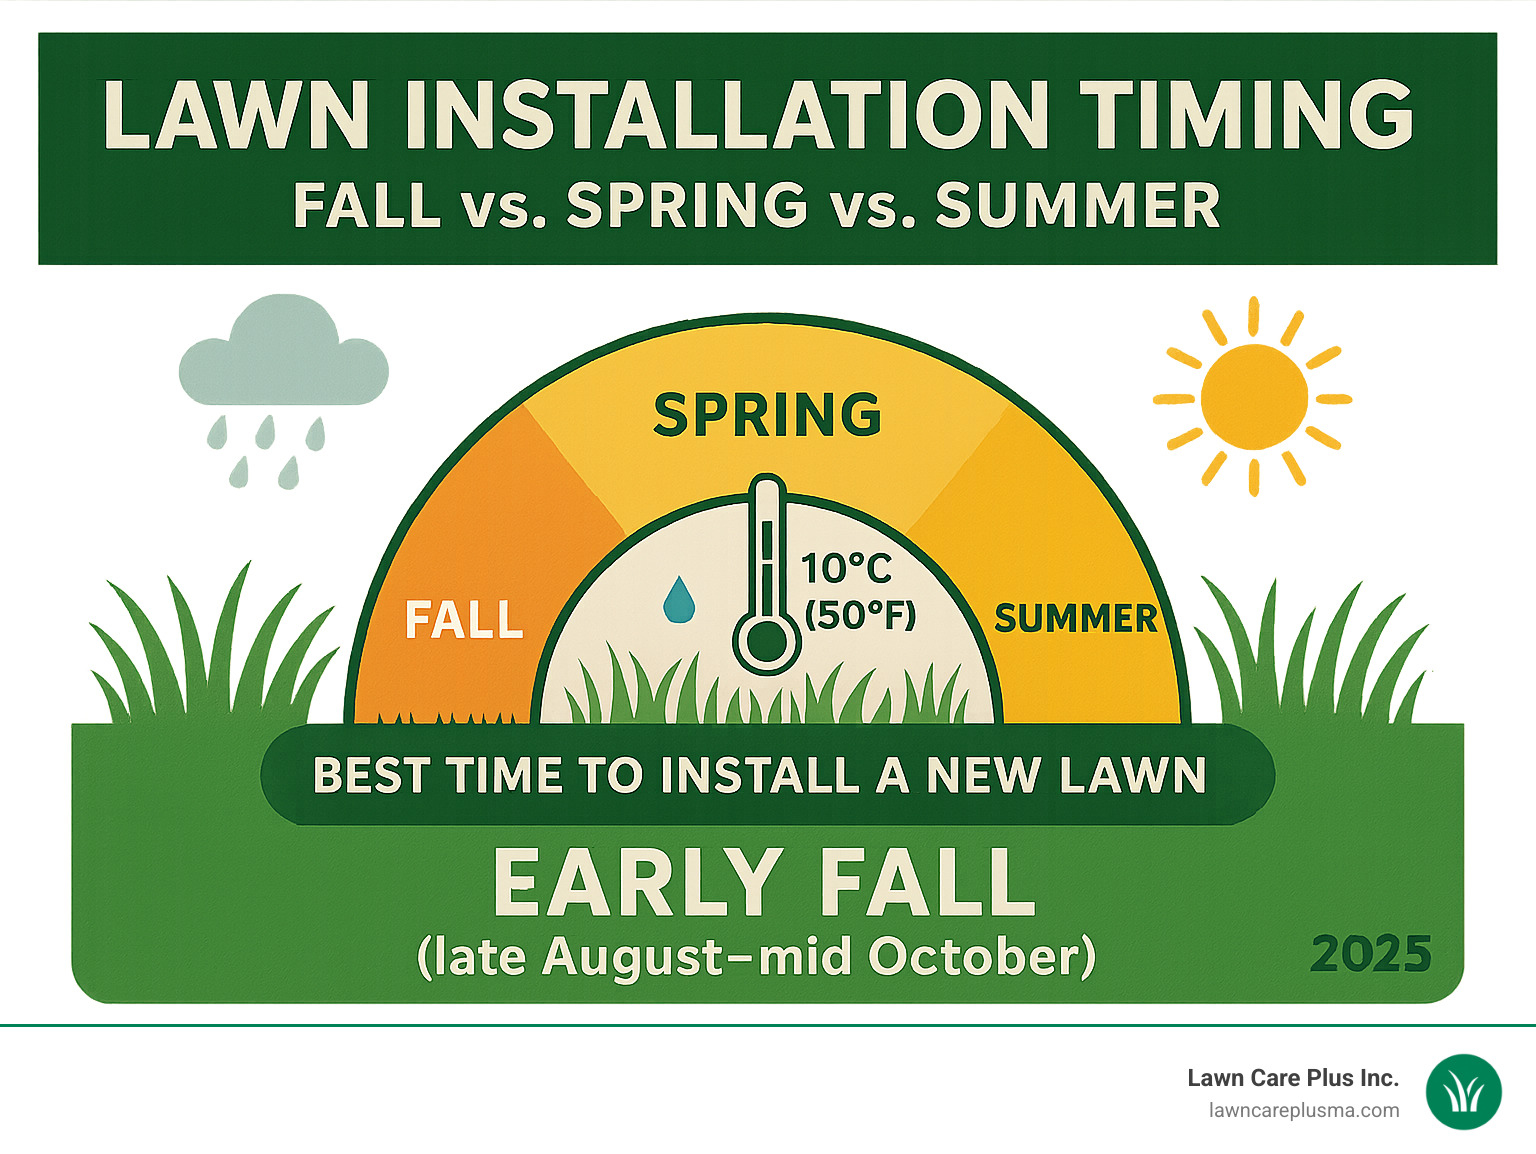
Best Time to Install a New Lawn (New England & Cool-Season Climates):
- Early Fall (late August–mid October):
- Top Choice: Warm soil, cooler air, and dependable rainfall help new grass or sod root quickly.
- Spring (late April–early June):
- Good Alternative: Still effective, but expect more weed competition and drier periods.
- Summer & Winter:
- Not Recommended: Hot, dry summer or frozen winter soil makes success much harder.
| Season | Sod Installation | Seeding New Lawn |
|---|---|---|
| Early Fall | ⭐⭐⭐⭐ Best | ⭐⭐⭐⭐ Best |
| Spring | ⭐⭐⭐ Good | ⭐⭐⭐ Good |
| Summer | ⭐ Risky | ⭐ Risky |
| Winter | 🚫 Not Advised | 🚫 Not Advised |
Local Tip:
Install sod or seed when soil temperature is above 10°C (50°F) but before the first hard frost. For best results, allow at least 6 weeks before winter cold.
“Early fall is the best time to install a new lawn—cooler temperatures and autumn rains help grass establish strong roots before winter.”
No matter if you are starting from scratch or replacing patchy turf, timing your new lawn right is the secret to a thick, green yard that thrives with less hassle and water all year long.
Basic best time to install new lawn glossary:
The Science Behind Successful Lawn Establishment
Let’s talk about what’s happening underneath your lawn when you install fresh sod or plant new grass seed. Timing isn’t just a calendar guess—it’s science! A thriving lawn depends on a few crucial factors working together: soil temperature, the right amount of moisture, and a healthy balance between root and shoot growth. If we get these right, your new lawn will root quickly and stay lush for years to come.
Cool-season grasses, like the ones we use in Massachusetts (think fescue, bluegrass, and ryegrass), are picky about their growing weather. They love cool air but warm soil. Why? Cool air slows down the leafy top growth, while warm soil tells the roots, “Go wild!” That’s why the best time to install new lawn in New England is when you have this perfect combo—usually early fall, before the cold arrives.
Don’t just take our word for it—scientific research on sod timing backs this up. When you plant during that golden window, grass roots grow faster and stronger, and you avoid the stress and patchiness that comes from planting in the summer heat or winter chill.
Why Soil Temperature Matters
If there’s one thing to remember, it’s this: soil temperature is king! For fresh sod, your goal is soil that’s steady between 10-15°C (50-59°F). In this range, new roots dig in fast and bond with your yard’s soil. For seeding, a bit warmer is better—15-26°C (59-79°F) is ideal. This cozy zone wakes up the seeds and gets them sprouting, often in just a week or so.
Want to know if you’re in the sweet spot? Grab a soil thermometer (they’re cheap and sold at most garden centers). Stick it 2-3 inches down and check the reading for a few days in a row. If the numbers are right, it’s go time! This little step can make all the difference in avoiding frustration with failed seed or sod.
Moisture & Light Balance
Water may be life, but too much or too little spells trouble for a new lawn. After installation, sod loves daily watering for the first two or three weeks. Grass seed? It likes a light mist a few times a day to keep the surface damp, but never soggy. The trick is to keep everything evenly moist—think “wrung-out sponge,” not “swimming pool.”
Sunlight is a partner in this process. Too much hot sun and your new sod could dry out before it roots. Too little light, and your grass won’t photosynthesize or grow strong roots. That’s why fall, with its milder sun and regular rainfall, is so forgiving and often the best time to install new lawn.
During the early days, water in the morning (the grass wakes up thirsty!) and again in the afternoon if it’s hot or windy. Avoid watering at night—you don’t want to invite fungus to the party. Depending on the weather, you may need to water 2 to 6 times daily while things get started.
When you tune into these natural cues—soil warmth, steady moisture, and enough light—you give your lawn the best chance to flourish. For more tips on prepping your soil or caring for your new sod, check out our guides on how to prepare ground for sod and how to care for new sod. With a little science and the right timing, your lawn will be the envy of the neighborhood!
The Best Time to Install a New Lawn: Climate & Season Breakdown
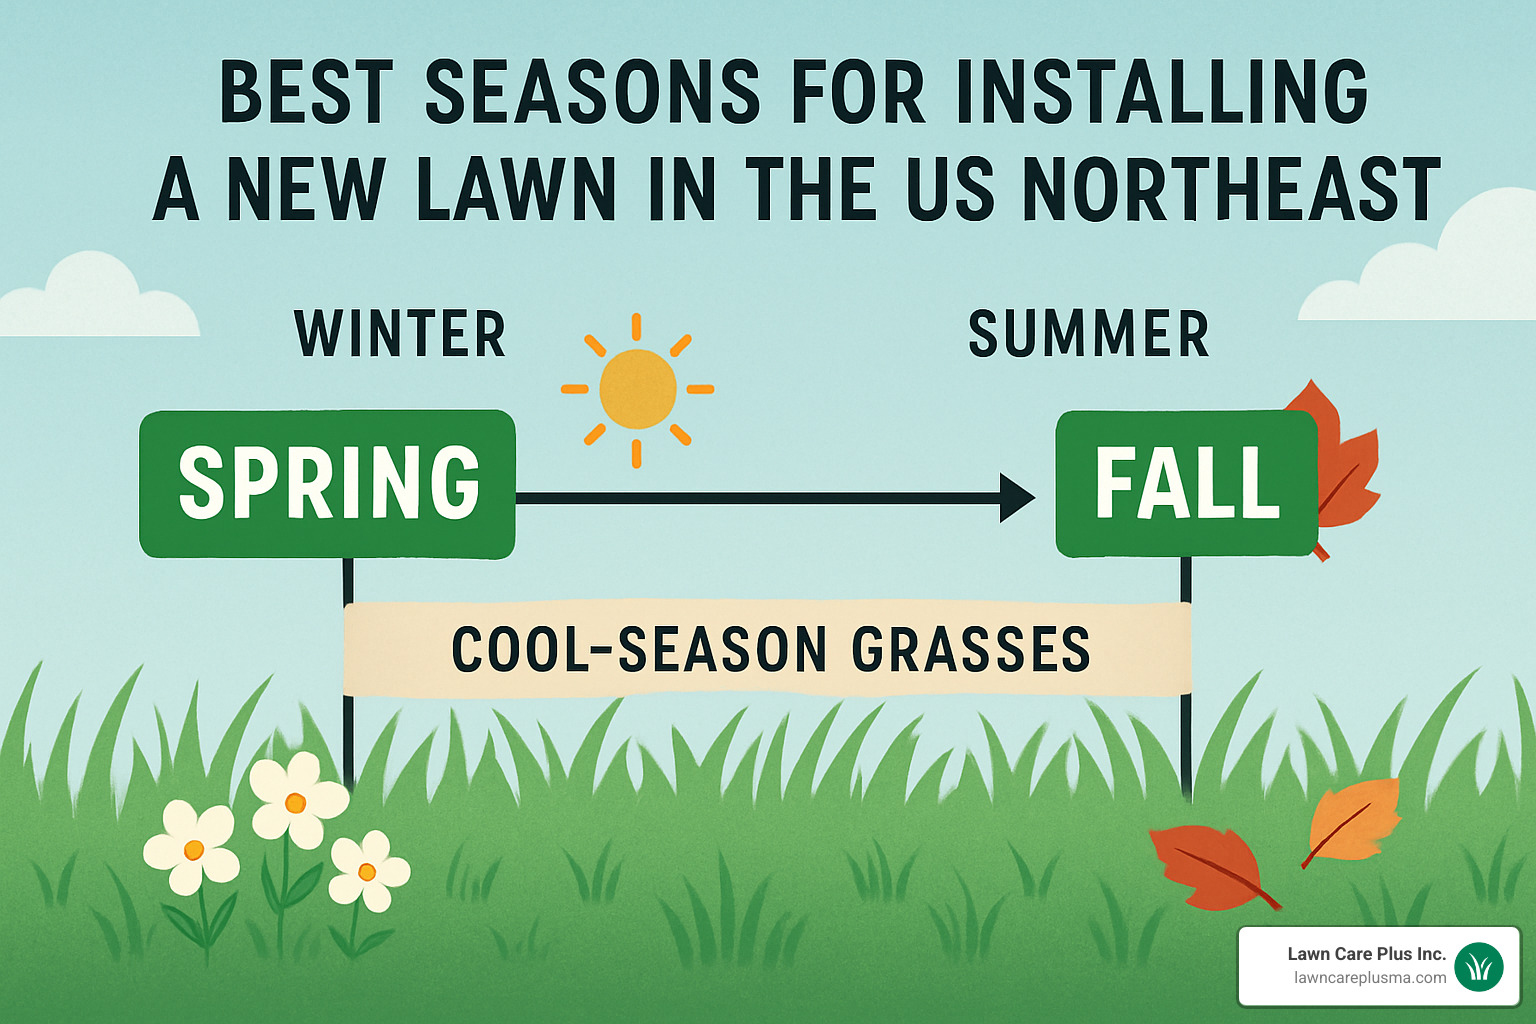
Your regional climate plays a huge role in determining when to install your new lawn. Here in Massachusetts, we’re lucky to work with cool-season grasses that actually prefer our four-season climate. These hardy varieties—like Kentucky bluegrass, perennial ryegrass, tall fescue, and fine fescue—thrive when temperatures are moderate and can handle our snowy winters like champs.
The magic happens because cool-season grasses have two peak growing seasons: spring and fall. They slow down during hot summer months and go dormant in winter, but they absolutely love those mild temperatures we get in late summer and early fall.
If you lived down south, you’d be dealing with warm-season grasses like bermuda and zoysia that have completely different timing needs. But since we’re focused on what works best in New England, let’s dive into the specifics for our climate.
Best Time to Install New Lawn in Cool-Season Areas (includes Massachusetts)
The best time to install new lawn in Massachusetts is hands-down early fall—specifically late August through mid-October. This timing isn’t just our opinion; it’s backed by how grass naturally wants to grow in our climate.
Here’s why early fall is so perfect: The soil is still warm from summer heat, which gets those roots growing fast. Meanwhile, the air temperature starts cooling down, so your new grass isn’t stressed by blazing sun. Mother Nature usually starts sending more rain our way too, which means less work for you with the sprinkler.
There’s another bonus—most weeds are winding down for the year, so your new grass doesn’t have to compete as hard for space and nutrients. Plus, you’ve got a solid 6-8 weeks for your lawn to get established before winter arrives.
Spring installations (late April through early June) are our backup plan. They can definitely work, but you’ll face more challenges. Spring weeds are just getting started, rainfall can be unpredictable, and summer heat is coming whether you’re ready or not. If you missed the fall window though, don’t worry—spring can still give you great results with proper care.
Best Time to Install New Lawn in Warm-Season Areas
Even though warm-season grasses aren’t common here in Massachusetts, understanding their timing helps explain why late spring through early summer works best for them. These grasses need soil temperatures consistently above 18°C (65°F) to get going.
The key difference is that warm-season grasses go completely dormant in winter—they turn brown and stop growing when temperatures drop below 10°C (50°F). Installing them too late doesn’t give enough time for strong root development before they shut down for winter.
Soil Temperature & Moisture Windows for Success
The best time to install new lawn really comes down to hitting those perfect soil temperature and moisture conditions. We always check soil temperature with a simple thermometer before starting any installation.
For sod installation, we look for soil temperatures consistently between 10-15°C. For seeding, we prefer slightly warmer conditions at 15-26°C. These temperatures trigger rapid root development and seed germination.
Weather timing matters too. We love to install just before a period of natural rainfall—but not during a soggy stretch when the soil becomes waterlogged. The sweet spot is when forecasts show several days without extreme heat or heavy downpours.
The golden rule? Make sure there are at least 6 weeks before the first hard frost. This gives your new lawn enough time to develop strong roots that can handle winter and come back thick and green in spring.
Step-by-Step Preparation & Installation
Getting your new lawn off to a strong start requires careful preparation—and honestly, this is where we see most DIY projects go wrong. The good news? With the right approach, you can create the perfect foundation for a lawn that’ll make your neighbors jealous.
The preparation process typically takes 2-3 days before installation, which gives your soil time to settle and ensures you’re working with optimal conditions. Think of it like preparing a canvas before painting—skip this step, and even the best time to install new lawn won’t save your project. For detailed guidance on soil preparation, check out our guide on how to prepare ground for sod.
Ground Prep Essentials
Site grading and drainage should be your first priority. Water needs somewhere to go, and pooling around your foundation isn’t it. We create a gentle slope of about 1-2% away from buildings—just enough to move water along without creating a hillside.
Debris removal might seem obvious, but you’d be surprised what we find buried in yards. Remove all rocks larger than a golf ball, old roots, construction debris, and existing vegetation. That dying patch of crabgrass might look harmless, but it can create soft spots that’ll haunt you later.
Soil testing and amendments take the guesswork out of lawn care. Most cool-season grasses prefer slightly acidic to neutral soil with a pH between 6.0-7.0. Based on your test results, you might need to add lime to raise pH or sulfur to lower it. We always incorporate 2-4 inches of quality compost to improve soil structure and give your new grass the nutrients it craves.
Tilling and final grading bring everything together. Till the soil 6-8 inches deep to break up compaction and mix in your amendments. After tilling, rake everything smooth and roll lightly to eliminate air pockets. The final grade should feel firm but not compacted—if you sink more than half an inch when walking on it, you need to do more rolling.
Sod vs. Seed Calculator & Timeline
Choosing between sod and seed often comes down to patience versus budget. Sod gives you instant gratification with a higher upfront cost, while seed saves money but requires more time and patience.
Here’s what you need to know: sod installation typically takes 1-2 days and gives you a usable lawn in 2-3 weeks. Seed installation takes just one day, but you’ll wait 8-12 weeks for a fully established lawn. Success rates favor sod at 90-95%, while seed can be more variable at 60-85% depending on conditions and care.
Calculating your sod needs is straightforward—measure your lawn area in square feet and divide by 10, since standard sod rolls cover 10 square feet each. Always add 5-10% extra for cutting around edges and obstacles. Nobody wants to run back to the garden center for two more rolls.
Calculating seed needs varies by grass type, but plan for 2-6 pounds per 1,000 square feet for new lawns. Fine fescue is on the lighter side at 2-3 pounds, while perennial ryegrass needs 4-6 pounds. The seed package will give you specific recommendations—follow them.
Watering, Mowing & Fertilizing Schedule
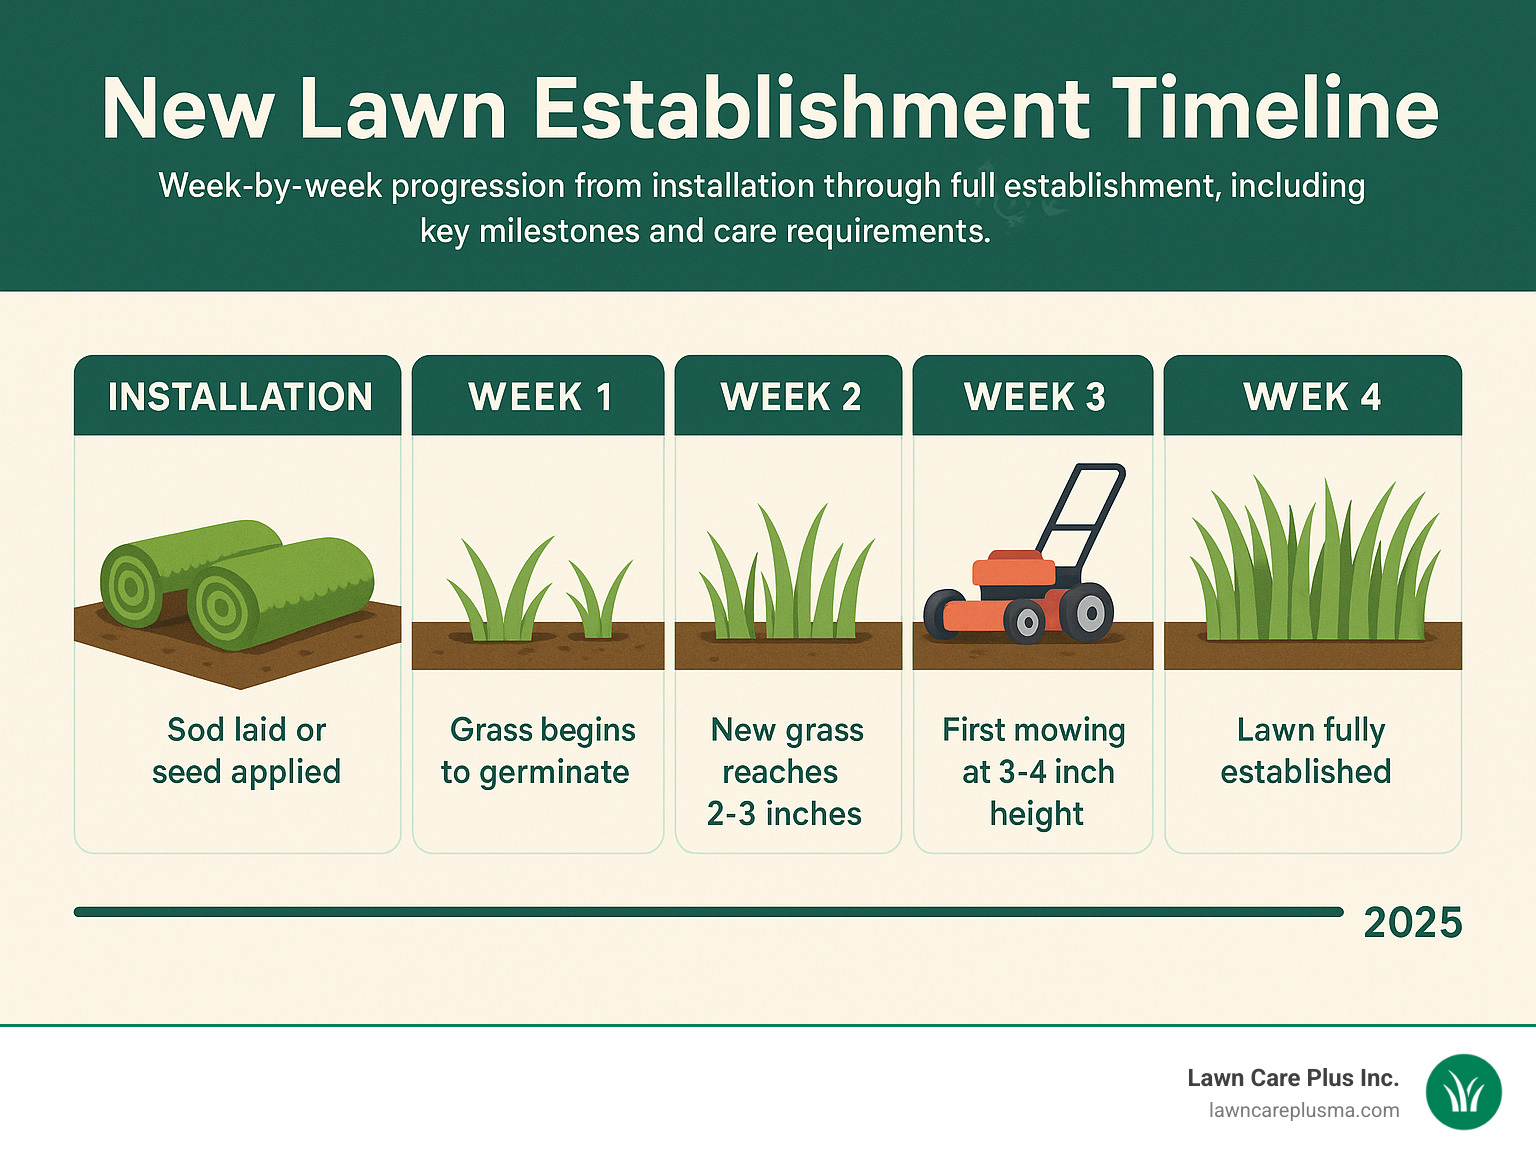
Getting your watering schedule right makes the difference between success and starting over. For the first two weeks, water daily to keep soil moist to a depth of 1/4 inch. From days 15-30, water every other day but go deeper to 1/2 inch. After 30 days, transition to deep, infrequent watering 2-3 times weekly.
Your first mowing is a milestone worth celebrating, but don’t rush it. For sod, wait until roots are established—typically 10-14 days. For seed, wait until grass reaches 3-4 inches tall. Set your mower to 3.5 inches for that first cut and never remove more than one-third of the grass blade length.
Fertilizing starts with starter fertilizer at installation, followed by a balanced fertilizer 4-6 weeks later. This gives your new grass the nutrients it needs during the critical establishment period. For specific care instructions that’ll keep your lawn looking great, see our detailed guide on how to care for new sod.
Avoiding Pitfalls & Special Situations
Even when you nail the best time to install new lawn, certain challenges can still trip you up. After years of helping homeowners in the Boston area, we’ve seen just about every curveball Mother Nature can throw at a new lawn project.
The good news? Most problems are totally preventable when you know what to watch for. Let’s walk through the trickiest situations and how to handle them like a pro.
Installing on Slopes, Clay or Sand
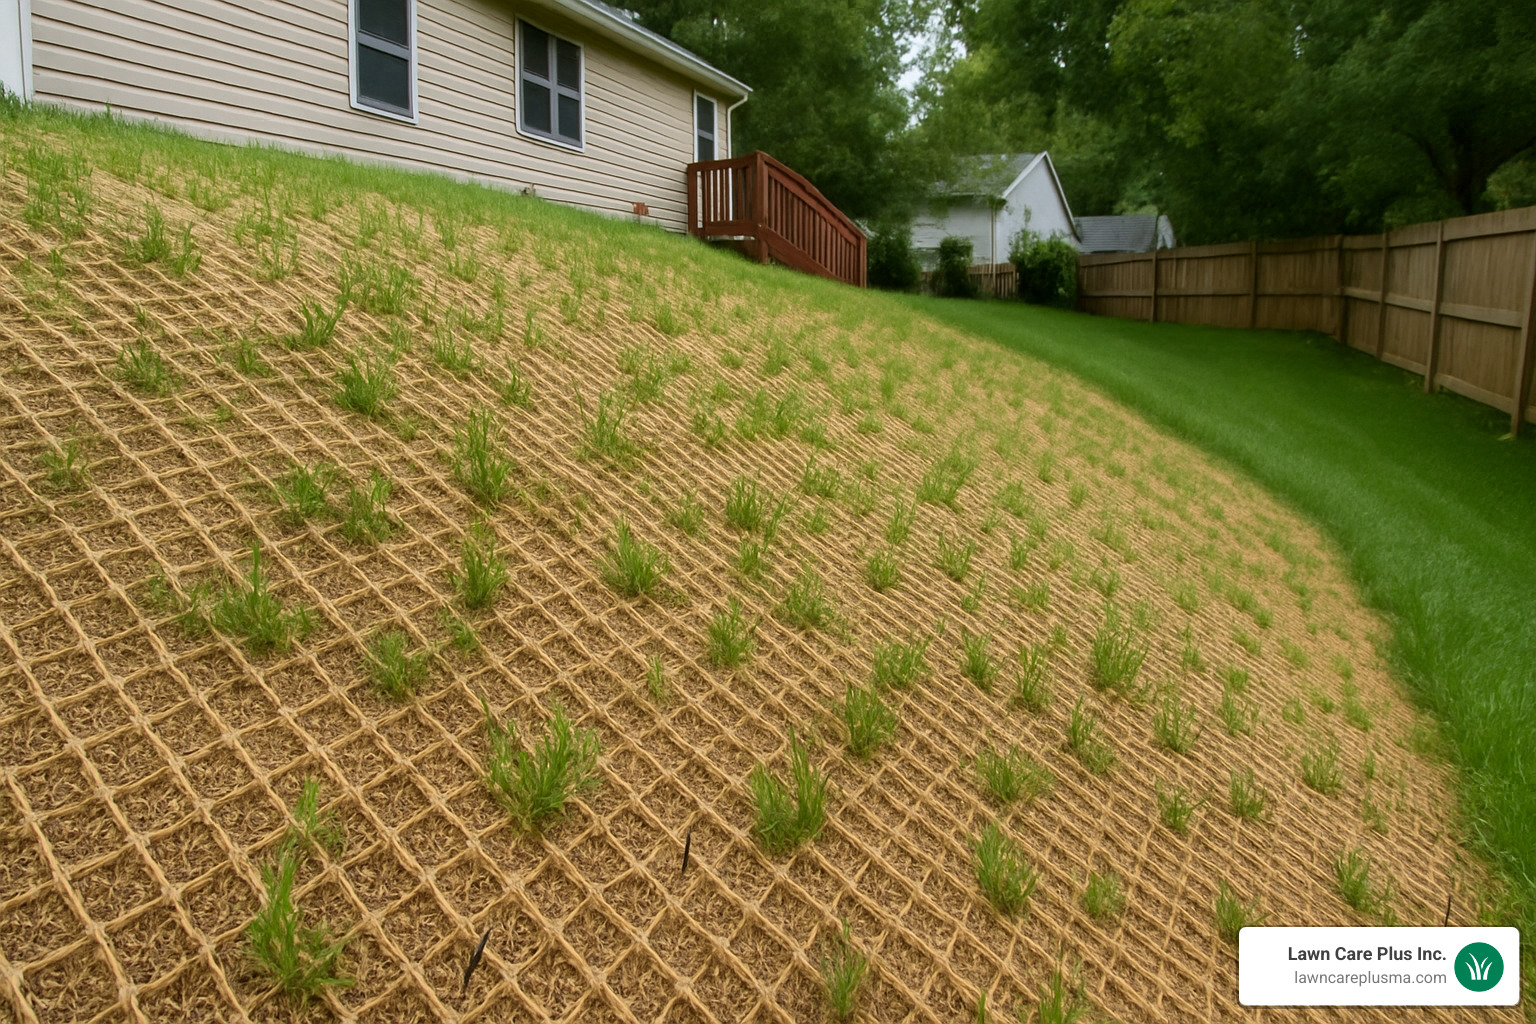
Steep slopes can turn your beautiful new lawn into a muddy mess if you’re not careful. Any slope steeper than 15% needs special attention. We always install sod pieces perpendicular to the slope—think of it like laying shingles on a roof. This creates natural barriers that help prevent erosion.
For slopes, wooden stakes or biodegradable pins are your best friends. They keep everything in place while the roots get established. If you’re seeding a slope, don’t even think about skipping the erosion blanket or straw mulch. Trust us on this one—we’ve seen too many washouts after the first heavy rain.
Clay soil is probably the most challenging situation we encounter. It holds water like a sponge, which sounds good until you realize your new grass roots are basically sitting in a swamp. The secret is mixing in coarse sand and plenty of organic matter before installation. Adding gypsum helps break up those stubborn clay particles too.
Never, and we mean never, try to install sod or seed on waterlogged clay soil. It’s like trying to grow plants in a puddle—it just won’t work.
Sandy soil presents the opposite problem. Water runs right through it, taking nutrients along for the ride. We add lots of organic matter to help sandy soil hold onto moisture and nutrients. You’ll also need to water more frequently and fertilize more often once your lawn is established.
DIY vs. Professional Help
Look, we love a good DIY project as much as anyone. There’s something satisfying about getting your hands dirty and creating something beautiful. But some lawn installations are better left to the pros.
Small lawns under 5,000 square feet? Go for it! With proper preparation and timing, most homeowners can handle these projects successfully. Larger areas, steep slopes, or tricky drainage issues? That’s when it makes sense to call in reinforcements.
We’ve rescued plenty of DIY projects that went sideways—usually because the homeowner underestimated the time commitment or ran into unexpected soil problems. There’s no shame in getting help, especially for complex grading or when you’re working with a tight timeline.
If you’re considering professional installation, check out our new lawn installations services. We handle everything from small residential patches to large commercial projects.
Common Mistakes to Dodge
The biggest mistake we see? Ignoring soil temperature in favor of what the air feels like. Just because it’s a beautiful 70°F day doesn’t mean your soil is ready for new grass. Always check soil temperature with a thermometer—it’s the only way to know for sure.
Laying sod on compacted soil is another heartbreaker. It looks great for a few weeks, then slowly dies as the roots can’t penetrate the hard-packed earth underneath. Proper soil preparation isn’t glamorous, but it’s absolutely essential.
Seeding too deep kills more lawns than you’d think. Most grass seeds need light to germinate, so they should be barely covered—just enough to keep them moist. When in doubt, go shallow.
Underwatering during establishment is probably the most common post-installation mistake. New grass needs consistent moisture, especially during those critical first few weeks. Don’t let that soil dry out, even for a day.
Mowing too early is tempting when your new grass starts looking a bit shaggy, but patience pays off. Wait until sod roots are firmly established (usually 10-14 days) or until seeded areas reach 3-4 inches tall. And when you do mow, keep it high—3.5 inches for that first cut.
According to scientific research on fall lawn feeding, proper timing and care during establishment sets the foundation for a healthy lawn that will thrive for years to come.
The bottom line? Success comes from respecting the science, preparing properly, and avoiding the common pitfalls that catch so many homeowners off guard. When you get it right, you’ll have a lawn that’s the envy of the neighborhood.
Frequently Asked Questions about New Lawn Timing & Care
How soon can I mow after laying sod or seed?
This is one of the most common questions we hear from excited homeowners who can’t wait to fire up their mowers! The answer depends on whether you’ve installed sod or seeded your new lawn.
For sod installations, patience is key—wait until the sod has firmly rooted into the soil below, which typically takes 10-14 days. Here’s a simple test: gently lift a corner of the sod. If it resists your pull and feels firmly attached, the roots have established enough to handle mowing. If it lifts easily, give it a few more days.
For seeded lawns, you’ll need to wait longer—until the grass reaches 3-4 inches tall, which usually happens 3-4 weeks after germination. New grass from seed needs more time to develop strong root systems before it can handle the stress of mowing.
When you do take that first mow, set your mower to its highest setting (3.5-4 inches) and make sure your blades are sharp. Dull blades can tear new grass, creating wounds that invite disease. Remember the golden rule: never remove more than one-third of the grass blade length in a single mowing.
What if I missed the fall window—should I wait until spring?
Don’t panic if you missed the best time to install new lawn in early fall! You still have options, though they require a bit more strategy.
If it’s late October or November but soil temperatures are still hovering above 10°C and you have at least 4 weeks before hard frost hits, you can still install sod. Success rates are lower than ideal fall timing, but it’s definitely possible with extra care and attention to watering.
For seeding, we generally recommend hitting the pause button and waiting until spring if you’ve missed the fall window. Seed installed too late in fall might germinate, but those baby grass plants won’t have enough time to develop the strong root systems needed to survive our New England winters.
Spring installation becomes your next best bet, typically from late April through early June. While it’s not as ideal as fall timing, spring installations can absolutely succeed with proper care. You’ll need to stay on top of watering more vigilantly and be ready to battle weeds that love to compete with new grass in spring.
The key is being realistic about timing and adjusting your expectations accordingly. A spring installation might need more babying, but it’s far better than rushing a late fall installation that’s doomed to fail.
How do I know my new lawn is taking root properly?
Learning to read the signs of a healthy, establishing lawn is like learning a new language—once you know what to look for, it becomes second nature.
Signs your new lawn is thriving include sod that feels firmly attached when you gently tug on it, bright green grass blades that stand upright with confidence, and consistent color across your entire lawn area. You’ll also notice new growth that requires mowing within a few weeks of installation.
Warning signs that need immediate attention include sod that still pulls up easily after 2-3 weeks, brown or yellow patches that don’t improve despite proper watering, and a musty odor that indicates fungal problems brewing beneath the surface. Patchy or uneven growth patterns and grass that remains flat instead of standing upright are also red flags.
If you spot problems, don’t wait—address them immediately. Most issues stem from watering problems, either too much or too little. Overwatering can lead to fungal diseases and root rot, while underwatering causes stress and browning. Adjust your watering schedule first, and if problems persist, consider whether your soil drainage needs improvement.
A successfully established lawn should look increasingly vibrant and uniform as weeks pass. If you’re seeing the opposite trend, it’s time to troubleshoot or call in professional help.
Conclusion & Next Steps
There’s something deeply satisfying about watching a new lawn transform from bare soil to a thick, emerald carpet. After years of helping homeowners throughout the Boston Metro-West area achieve this change, we know that success comes down to one crucial factor: timing.
The best time to install new lawn in Massachusetts is unquestionably early fall—specifically that sweet spot between late August and mid-October. This timing isn’t just our preference; it’s backed by soil science and decades of real-world results. When you install during this window, you’re giving your new grass every possible advantage.
Think of it this way: fall installation is like giving your lawn a head start in a race. The soil is still warm from summer’s heat, perfect for rapid root development. The air has cooled down, reducing stress on tender new grass. And nature provides more consistent rainfall, cutting down on your watering duties. It’s almost like the seasons are conspiring to help your lawn succeed.
Remember these key factors that separate thriving lawns from struggling ones: soil temperature between 10-15°C for sod installations and 15-26°C for seeding, thorough soil preparation that includes testing and proper amendments, and consistent watering during those critical first few weeks. Most importantly, give your lawn time to establish—patience truly pays off in the lawn game.
If you’re dreaming of a new lawn, now’s the time to start planning for the next optimal window. Fall installations require some summer preparation, so begin your soil testing and site prep about a month before your planned installation date. This preparation time might seem like a hassle, but it’s the difference between a lawn that struggles and one that thrives.
At Lawn Care Plus Inc., we’ve guided hundreds of homeowners through this process across Newton, Needham, Brookline, and throughout our service areas. We understand the unique challenges that New England weather throws at new lawns—from unexpected late-season heat waves to early frosts that catch everyone off guard.
Your new lawn journey doesn’t end at installation, though. A beautiful lawn requires ongoing care to maintain its health and appearance. That’s where our comprehensive lawn care and maintenance services come in, helping ensure your investment continues to pay dividends year after year.
Ready to take the next step toward the lawn you’ve always wanted? We’d love to discuss your specific site conditions, timing considerations, and installation options. With proper planning and professional guidance, that lush, green lawn isn’t just a dream—it’s your next reality.
