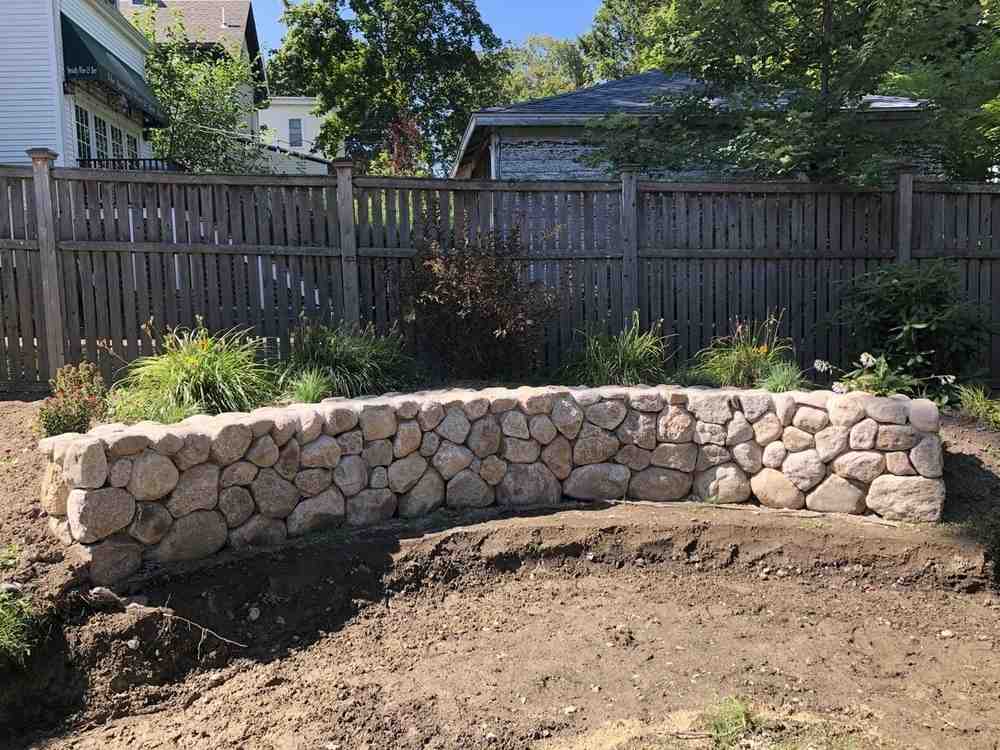
Why Building a Wall Transforms Your Outdoor Space
Building wall projects can dramatically improve your property’s functionality and curb appeal, whether you’re creating a raised garden bed, preventing soil erosion on a slope, or defining outdoor living spaces. Here’s what you need to know to get started:
Quick Guide to Building a Wall:
- Determine your wall type – Retaining walls hold back soil on slopes; freestanding landscape walls divide spaces or add visual interest
- Check local codes – Most municipalities require permits for walls over 3-4 feet high
- Prepare the foundation – Excavate a trench 4-6 inches deep and fill with compacted gravel
- Build in layers – Stack blocks or stones with staggered joints, checking level constantly
- Add drainage – Install perforated pipe and gravel backfill to prevent water buildup
- Finish and maintain – Cap the wall, backfill properly, and inspect regularly
This guide focuses on exterior landscape and retaining walls – the type you’ll build in your yard to manage slopes, create terraces, or improve your property’s hardscape. While the research above covers interior wall framing (studs, drywall, and electrical), outdoor walls require completely different techniques, materials, and structural considerations.
The difference comes down to purpose. A landscape wall faces soil pressure, water drainage, freeze-thaw cycles, and gravity working against tons of earth. Success depends on a solid foundation, proper drainage, and understanding how your specific wall type handles these forces.
I’m Tim DiAngelis, owner of Lawn Care Plus Inc., and over the past decade our team has designed and installed countless retaining walls and landscape walls throughout the Boston Metro-West area. From simple garden borders to complex multi-tier retaining systems, I’ve seen what separates a wall that lasts decades from one that fails in just a few seasons – and building wall projects the right way always starts with proper planning and preparation.
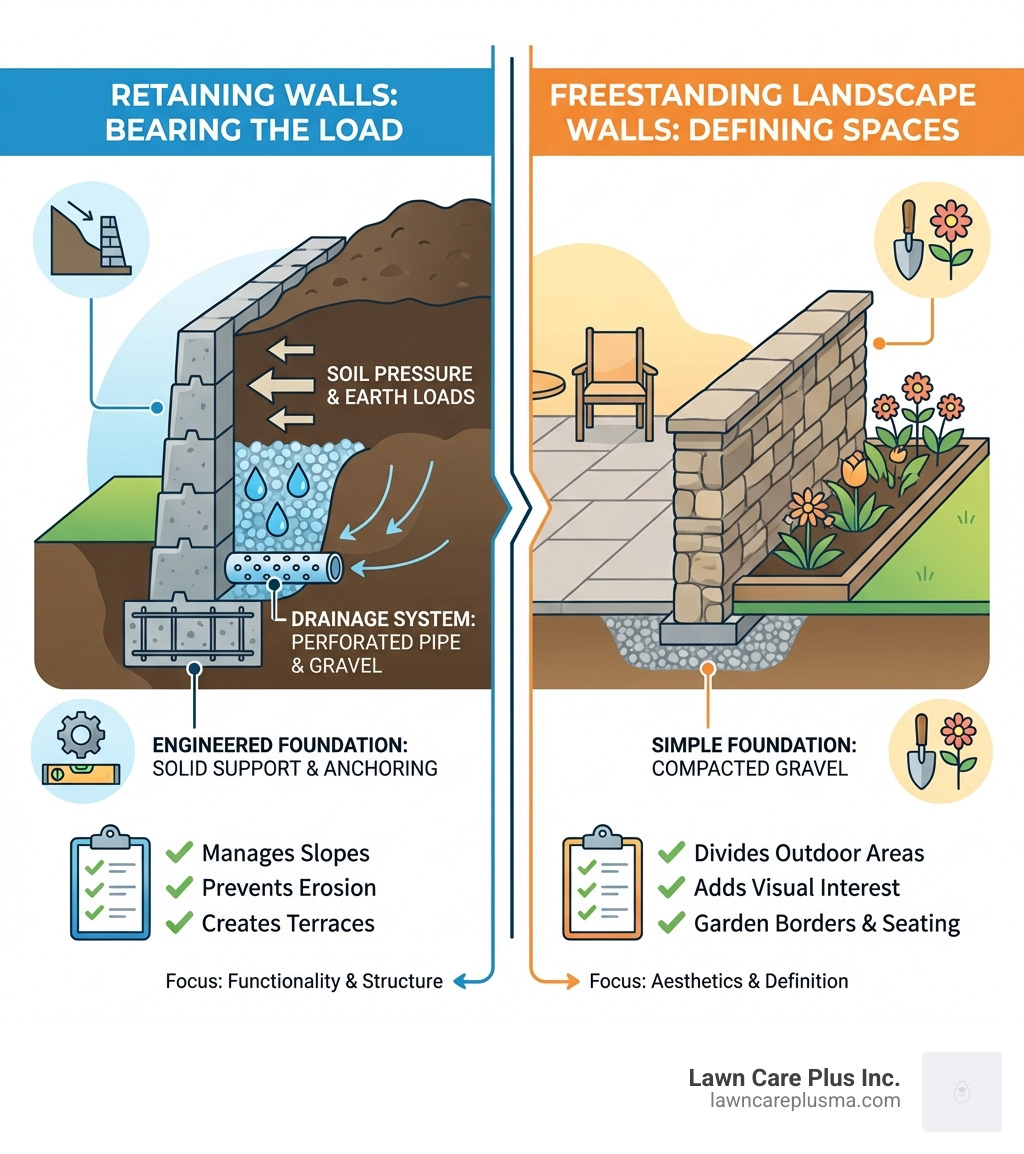
Building wall terms at a glance:
Before You Build: Planning, Permits, and Preparation
In Massachusetts, especially around Boston Metro-West communities like Newton, Needham, Canton, and Brookline, we design walls to handle New England’s realities: nor’easters, freezing winters, spring thaws, and hilly lots. A little planning here avoids a lot of headaches later.
Understanding Wall Types and Structural Needs
Not all walls work the same. Choose the right type for your goal:
- Retaining walls
- Purpose: Hold back soil and manage elevation changes
- Key forces: Lateral soil pressure, hydrostatic (water) pressure, surcharge loads (driveways, decks, slopes above)
- Structure: Engineered base, drainage, and sometimes geogrid reinforcement
- Start here: retaining-walls, retaining-wall-foundation
- Freestanding landscape walls
- Purpose: Define spaces, create seating edges, or outline beds
- Key forces: Gravity and minor impact, not soil loads
- Structure: Shallower bases and no backfill pressure
- Garden walls/planters
- Purpose: Raised beds and edging with minimal soil height
- Structure: Similar to freestanding walls but often backfilled both sides
Structural considerations for our area:
- Soil pressure increases with height and moisture. That’s why drainage is non-negotiable.
- Surcharges matter. If a driveway, patio, or slope sits above the wall, that load increases design requirements.
- Local guidance and best practice generally recommend involving a licensed engineer for walls over 3–4 feet tall or those supporting surcharges. When in doubt, ask us—we partner with local professionals every week.
Estimating Costs and Materials for Building a Wall
We’re often asked, “What will my wall cost?” While we don’t quote prices in articles, here’s how to think about it:
- DIY vs pro labor
- DIY can reduce labor costs, but specialized tools, site conditions, and potential rework can offset savings.
- Pros bring compaction equipment, laser levels, and experience with tough soils and tight sites.
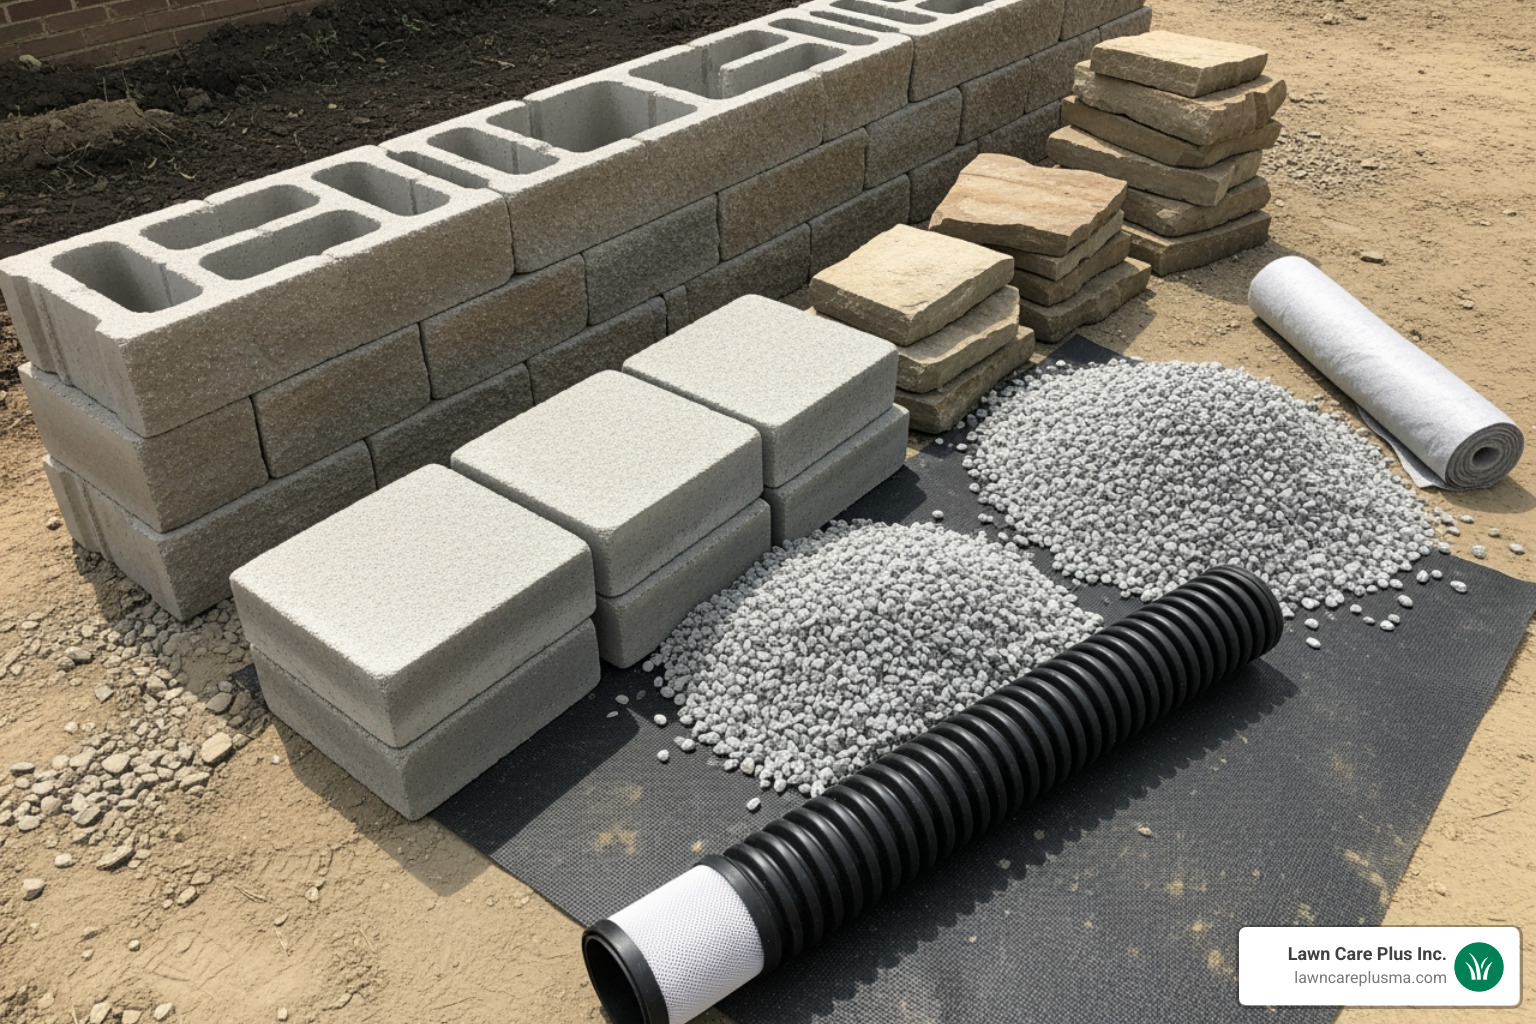
- Materials to consider
- Interlocking concrete blocks
- Natural stone
- Capstones
- Crushed stone base and backfill
- Perforated drain pipe and fittings
- Landscape fabric and/or geotextile
- Construction adhesive
- Optional geogrid (as specified by block manufacturer/engineer)
- Internet-average ranges (not our pricing)
- Small DIY garden walls can start around a few hundred dollars for materials; larger, reinforced retaining walls can reach several thousand. It’s common to see internet ranges from $500 to $5,000+ for materials depending on length, height, block/stone choice, and site prep needs. Always confirm specs and totals for your actual project.
- Ordering stone by the ton
- Plan on about 10 cubic feet of wall per ton of stone delivered, roughly 1.8 tons per cubic yard of wall built. This helps ballpark quantities when using natural stone.
For a deeper dive on budgeting, see retaining-wall-cost.
Essential Tools and Materials
A solid kit makes your project safer and faster:
- Tools
- Shovel and trenching spade
- Hand tamper or plate compactor
- 2- to 4-foot level and/or laser level
- String line, stakes, and marking paint
- Tape measure and speed square
- Wheelbarrow and buckets
- Rubber mallet and masonry hammer
- Masonry saw with diamond blade (for clean block cuts)
- Safety glasses, work gloves, hearing protection
- Materials
- Wall blocks or stone: blocks-for-retaining-wall
- Crushed stone (base and backfill)
- Perforated drain pipe with fittings
- Landscape fabric or geotextile
- Construction adhesive (for capstones)
- Optional geogrid reinforcement (per manufacturer/engineer)
Navigating Building Codes and Permits
Permits and requirements vary by town across our service area (Belmont, Boston, Brighton, Brookline, Canton, Chestnut Hill, Dedham, Hyde Park, Jamaica Plain, Mattapan, Medfield, Milton, Needham, Newton, Norwood, Randolph, Readville, Roslindale, Walpole, Watertown).
- Start with your town’s building department:
Common themes in Massachusetts:
- Retaining walls over about 4 feet (measured from bottom of footing to top of wall) or those supporting surcharges typically require engineered plans and a permit.
- Setbacks and property line rules may apply.
- Inspections may be required at footing/base stages.
- When in doubt, ask your local building department—or ask us and we’ll guide you.
The Step-by-Step Guide to Building Your Wall
Safety first: Wear eye and hearing protection, gloves, and a dust mask when cutting block or stone. Respect equipment. And hydrate—wall building is a workout.
Step 1: Site Prep and Foundation
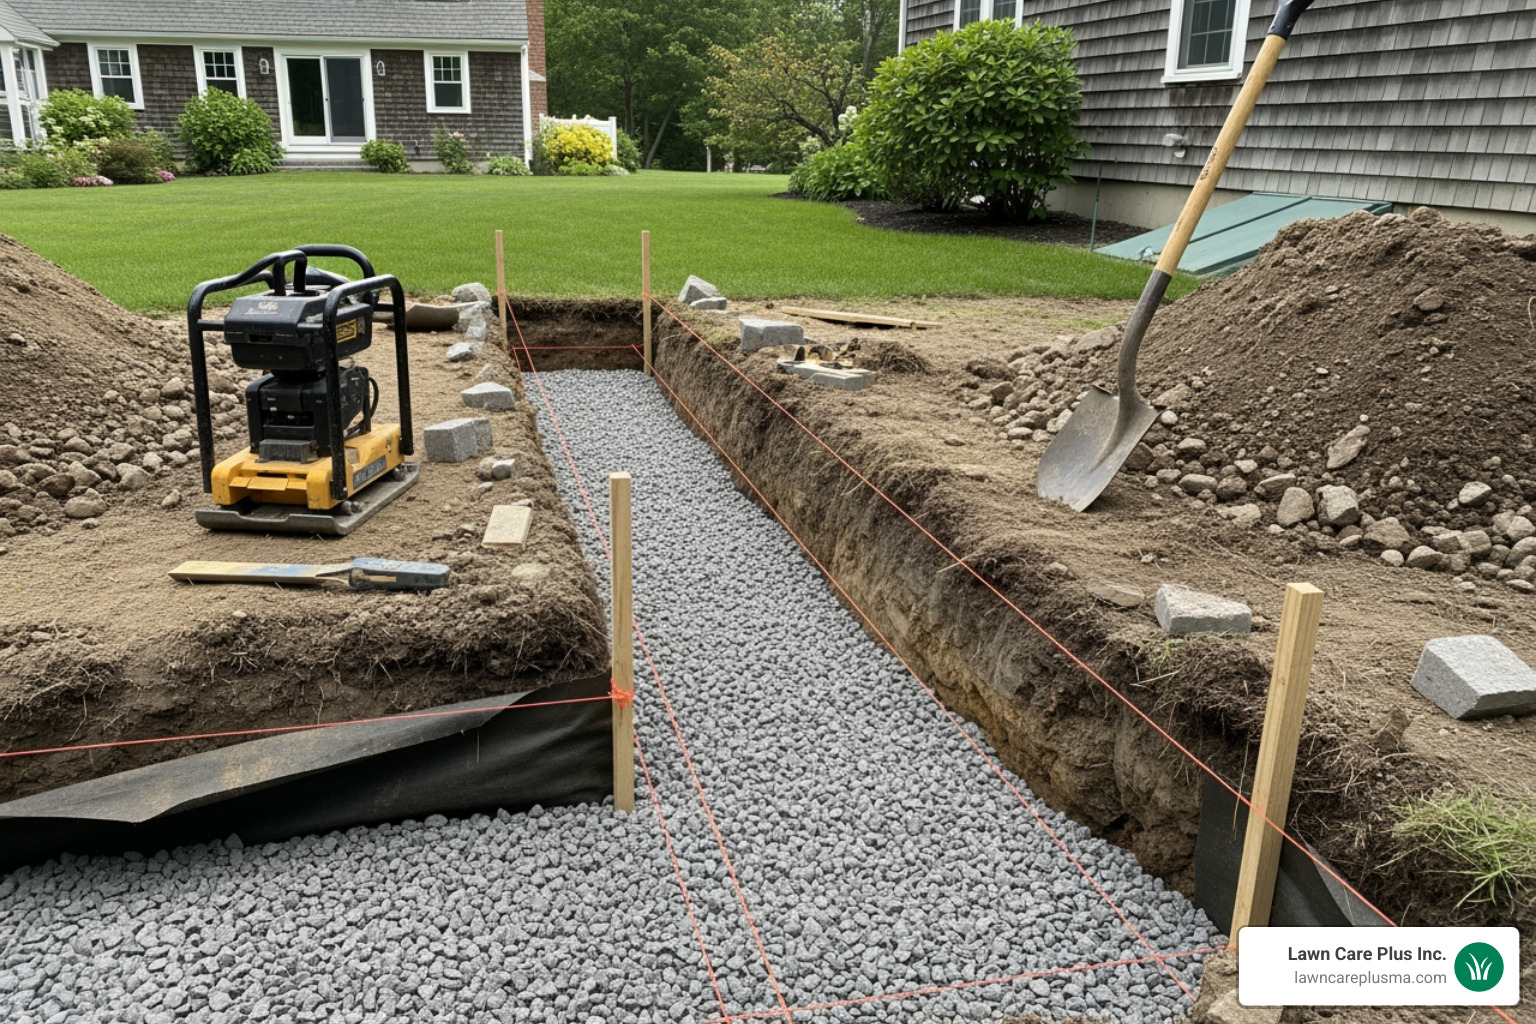
A wall is only as good as its base. In New England, proper foundations protect against frost heave and saturated soils.
- Layout
- Mark your wall line with stakes and string. Keep it straight or smooth on curves by adjusting stakes as needed.
- Identify and mark any underground utilities before you dig.
- Excavation
- Strip sod, roots, and organic matter from the wall path. Organic material decays and destabilizes bases.
- Excavate a trench wide enough for the block plus at least 6 inches of working room. Depth varies by manufacturer, but as a rule of thumb:
- Set the first course partially below grade
- Provide a compacted crushed stone base of 4–6 inches minimum
- On slopes, step your trench up incrementally to follow grade.
- Subgrade prep
- Compact the exposed subsoil with a plate compactor or hand tamper.
- Add crushed stone base material in 2–3 inch lifts, compacting each lift to refusal.
- Check and recheck level across and along the trench. Small errors here become big problems later.
Learn more: building-retaining-walls-complete-guide and retaining-wall-foundation.
Step 2: Laying the First Course
Your first course determines the rest. Take your time—future you will thank you.
- Place the first course
- Set blocks so their bottoms sit on the compacted base and the front face is at or slightly below finished grade for a clean look.
- Use your level side-to-side and front-to-back on every unit.
- Tap blocks into place with a rubber mallet; add or remove base material to dial in level.
- Lock in alignment
- Keep a tight string line at the front face to maintain straightness.
- For curves, use manufacturer-recommended gaps to create smooth arcs.
- Initial backfill
- Backfill directly behind the first course with clean, angular crushed stone.
- Lightly compact this backfill in lifts. Do not use native soil as backfill immediately behind the wall—it retains water and builds pressure.
Step 3: Building Up and Adding Drainage
Drainage is mission-critical in Massachusetts. Trapped water becomes ice, then expansive force. Design to move water away.
- Drain pipe
- Place perforated drain pipe at the base, immediately behind the first course and on top of compacted base/backfill.
- Slope the pipe to daylight where possible, or to a dry well or approved outlet. Maintain steady fall.
- Wrap the pipe in fabric if using surrounding gravel that could carry fines.
- Backfill and fabric
- Backfill each course with clean crushed stone to at least 12 inches behind the wall. This creates a drainage zone and reduces soil pressure.
- Separate native soil from the drainage zone with landscape fabric to minimize clogging.
- Stagger joints and set back
- Stack subsequent courses per the block system, staggering vertical joints (like brickwork) for strength.
- Maintain the manufacturer’s setback (batter) to lean the wall slightly into the retained soil.
- Add geogrid if specified
- For taller walls or walls with surcharges, geogrid reinforcement may be required.
- Install geogrid at the specified courses, extending it straight back into the retained soil at the prescribed length. Tension it flat, then backfill and compact.
- Always follow the block manufacturer’s and engineer’s instructions.
Dive deeper into moving water the right way: retaining-wall-drainage
Finishing Touches and Long-Term Care
Great walls look finished and shed water away from structures and patios.
Capping and Finishing Your Building Wall Project
- Capstones
- Dry-fit caps for clean joints and consistent overhang.
- Adhere caps with exterior-grade construction adhesive.
- Backfill and grading
- Transition from gravel backfill to topsoil in the final 6–12 inches, sloped away from the wall to move surface water out and over.
- Rake smooth and compact lightly.
- Tie in your landscape
- Connect beds, lawns, and paths for a cohesive look. See ideas: landscape-wall
Landscaping and Maintenance
- Planting
- Use drought-tolerant, deep-rooting plants above the wall to minimize waterlogging.
- Avoid large trees close to the wall to prevent root pressure.
- Routine inspection
- Each spring and fall, check for bulges, settlement, clogged outlets, or washed-out joints.
- Clean efflorescence with manufacturer-approved cleaners if desired.
- Keep drainage clear
- Make sure the pipe outlet remains free. A blocked outlet is like a cork in a champagne bottle—pressure builds until something pops.
Helpful inspiration: retaining-walls-and-landscaping
DIY vs. Hiring a Professional for Building a Wall
Choosing between DIY and pro installation isn’t just about budget; it’s about the site, height, and how much you enjoy weekend workouts with 60-pound blocks.
The Pros and Cons of a DIY Wall Build
- Advantages
- Save on labor and learn a new skill
- Control your schedule and design tweaks
- Satisfaction of building something that lasts
- Challenges
- Heavy lifting and precise leveling on every course
- Drainage and compaction require the right materials and equipment
- Tougher sites (slopes, poor soils, tight access) multiply difficulty
- Risk of rework if base or drainage is off
When to Call a Professional Wall Contractor
Hire pros like us when:
- The wall is over 3–4 feet high
- There’s a steep slope or poor/draining soils (clays)
- The wall supports surcharges (driveway, patio, fence, slope)
- You’re near property lines or structures (require precise planning and permits)
- You want warranty-backed workmanship, engineered designs, and predictable timelines
Explore how we can help: retaining-wall-contractor and The benefits of hiring a professional for your retaining wall installation
DIY vs. Professional at a Glance
| Factor | DIY | Professional |
|---|---|---|
| Cost | Internet averages suggest potential labor savings if you own/rent tools and avoid rework | Higher upfront due to labor, engineering, equipment; often lower lifetime cost via durability |
| Time | 2–4+ weekends for small walls; weather and learning curve add time | 1–5 days for many projects, depending on scope and access |
| Quality | Depends on skill, patience, and adherence to specs | Consistent compaction, precise grading, proper drainage, clean finishes |
| Complexity | Base, drainage, geogrid, and permits can be challenging | We handle permitting, engineering coordination, and tough site logistics |
| Risk | Rework if base/drainage is wrong; potential movement over time | Reduced risk; warranties; engineered solutions for height/load/soil |
Frequently Asked Questions about Building a Wall
What is the cheapest way to build a wall?
If you’re focused on budget:
- Do the labor yourself and keep the design simple and straight.
- Choose interlocking concrete blocks over natural stone for predictable stacking and fewer cuts.
- Source materials locally to reduce delivery fees.
- Keep height low to avoid reinforcement and engineering.
- Focus on the fundamentals—base and drainage—so you don’t pay twice.
Learn more about options: concrete-block-retaining-wall
How high can I build a retaining wall without an engineer?
General guidance in our Massachusetts service area:
- Many municipalities allow shorter walls (often under 4 feet measured from the bottom of footing to top of wall) without engineering.
- Walls supporting surcharges or built on slopes often require engineering regardless of height.
- Always check with your town’s building department (see Brookline, Belmont, Canton links above) or ask us to help steer.
What is the most important step when building a retaining wall?
The base and drainage—by far.
- A compacted crushed stone base that’s level end-to-end and side-to-side
- A perfectly set first course
- A continuous, sloped drain tied to daylight or an approved outlet
- Clean crushed stone backfill with landscape fabric separation
Master these and your wall will repay you with decades of stability. Start here: retaining-wall-foundation and retaining-wall-drainage
Conclusion
A well-planned building wall project does more than hold soil—it transforms your yard into usable, beautiful space that stands up to Massachusetts weather. When you:
- Choose the right wall type
- Build on a compacted, level base
- Add smart drainage
- Finish with thoughtful grading and landscaping
…you get a wall that looks great and lasts.
If you’re ready for professional design, engineering coordination, and a worry-free build anywhere in the Boston Metro-West area—from Newton and Needham to Milton, Dedham, and Walpole—we’d love to help.
Explore what we can build together: landscape-retaining-walls